To learn more about NEMA 17 stepper motors and how to control it using Arduino and DRV8825 stepper motor driver, visit this tutorial: https://circuitdigest.com/microcontroller-projects/control-nema-17-stepper-motor-with-arduino-using-drv8825-stepper-motor-driver
Thursday, 29 August 2019
Control NEMA 17 Stepper Motor with Arduino and DRV8825 Stepper Motor Dri...
To learn more about NEMA 17 stepper motors and how to control it using Arduino and DRV8825 stepper motor driver, visit this tutorial: https://circuitdigest.com/microcontroller-projects/control-nema-17-stepper-motor-with-arduino-using-drv8825-stepper-motor-driver

Tuesday, 27 August 2019
DIY Arduino Based Musical Fountain
In this project we make an Arduino based musical water fountain which can sprinkle water according to the music beats. A sound sensor is used to recognize the music and then a DC motor to work according to the signals received by the sound sensor.
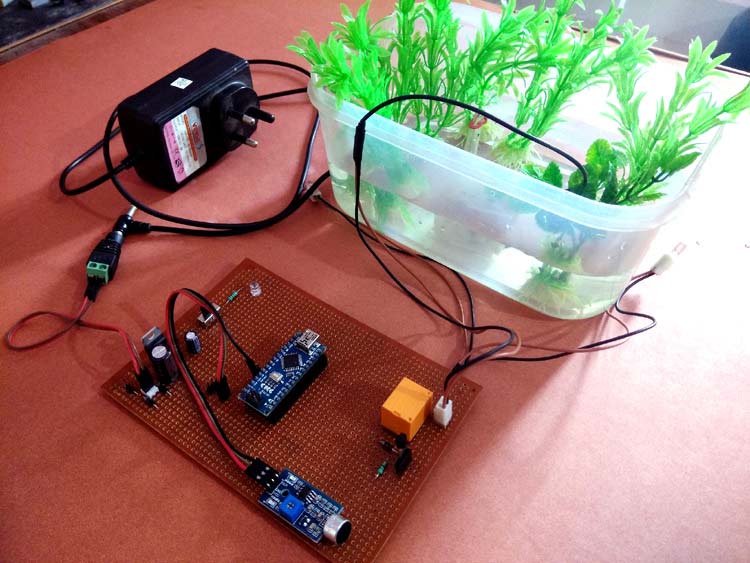
This Arduino Water Fountain takes input from any external sound source such as mobile phone and laptop and then the sound is break down to different voltage ranges, then use the output to turn on various Relay. We first used a condenser mic based sound sensor module to perform on the sound source to split the sounds into different voltage ranges. Then the voltage will be fed to op-amp to compare sound level with a particular limit. The higher voltage range will correspond to a relay switch ON which comprises a musical water fountain operating to the beats and rhythms of the song.
This Arduino Water Fountain takes input from any external sound source such as mobile phone and laptop and then the sound is break down to different voltage ranges, then use the output to turn on various Relay. We first used a condenser mic based sound sensor module to perform on the sound source to split the sounds into different voltage ranges. Then the voltage will be fed to op-amp to compare sound level with a particular limit. The higher voltage range will correspond to a relay switch ON which comprises a musical water fountain operating to the beats and rhythms of the song.
You can find the full DIY project here with required instructions along with circuits and programming.
Tuesday, 20 August 2019
DIY Raspberry Pi Based NAS Server
Raspberry Pi is the pocket sized computer having almost all the feature of a normal computer including USB port, LAN port, audio/video output, HDMI port etc. It also has inbuilt Bluetooth and Wi-Fi connectivity which makes it perfect candidate to build various online servers like Webserver, Media server, Print Server, Plex server etc. So here we will be creating another server using Raspberry Pi- File Server or NAS (Network Attached Storage), where you can plug any storage device with Raspberry Pi and access it using any computer connected on the same network.
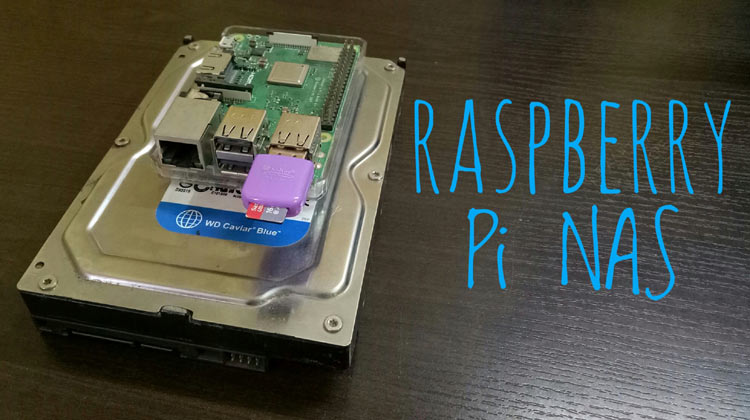
Using this Raspberry Pi NAS server you can share and access the files and folders without actually connecting the storage device to your system.
In this tutorial, we will install Samba in preinstalled Raspbian OS, so you don’t have to loose the default Raspbian OS. Samba is a re-implementation of the SMB (Server Message Block) networking protocol which integrates Linux computers with MAC and Windows based systems. There is another protocol named CIFS (Common Internet File System) which is an implementation of the SMB protocol. Nowadays, CIFs or SMB is used interchangeably, but most people use the term SMB.
Check out the full DIY tutorial here
In this tutorial, we will install Samba in preinstalled Raspbian OS, so you don’t have to loose the default Raspbian OS. Samba is a re-implementation of the SMB (Server Message Block) networking protocol which integrates Linux computers with MAC and Windows based systems. There is another protocol named CIFS (Common Internet File System) which is an implementation of the SMB protocol. Nowadays, CIFs or SMB is used interchangeably, but most people use the term SMB.
Check out the full DIY tutorial here
Thursday, 8 August 2019
DIY Raspberry Pi Gaming Console using RetroPie
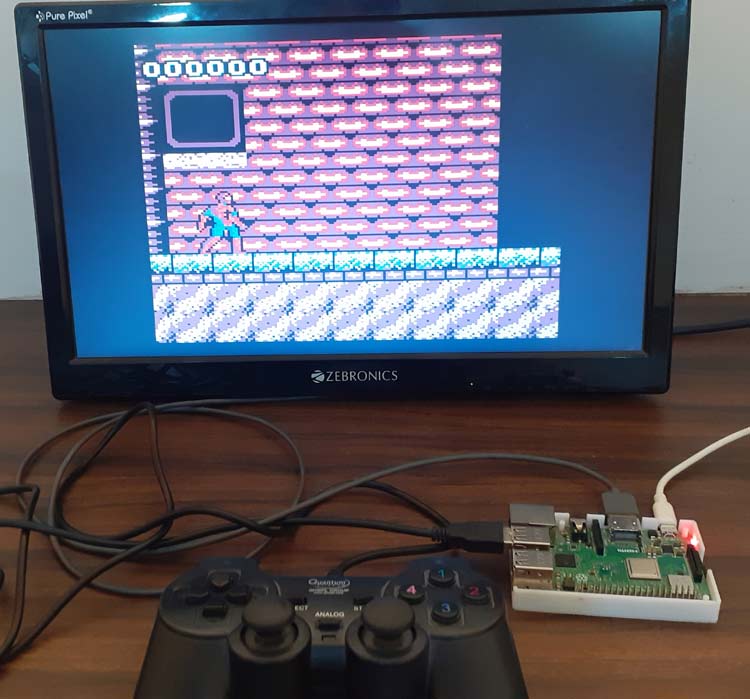
Raspberry Pi is an amazing credit-card sized computer most suited for IoT based applications and online servers like Print server, webserver, Media server. Many types of custom ROMs and custom operating systems are available for Raspberry Pi and you just need to burn the custom ROM on SD card and insert it in Raspberry Pi. Like Windows 10 and Android can be easily installed on Raspberry Pi.
Monday, 3 June 2019
DIY IoT Based Biometric Attendance Project using Arduino
In this project we use IoT to make attendance system more useful and online accessible. Most of the attendance systems generally store the information over a micro SD card and have to be connected to software via a computer to access the information.
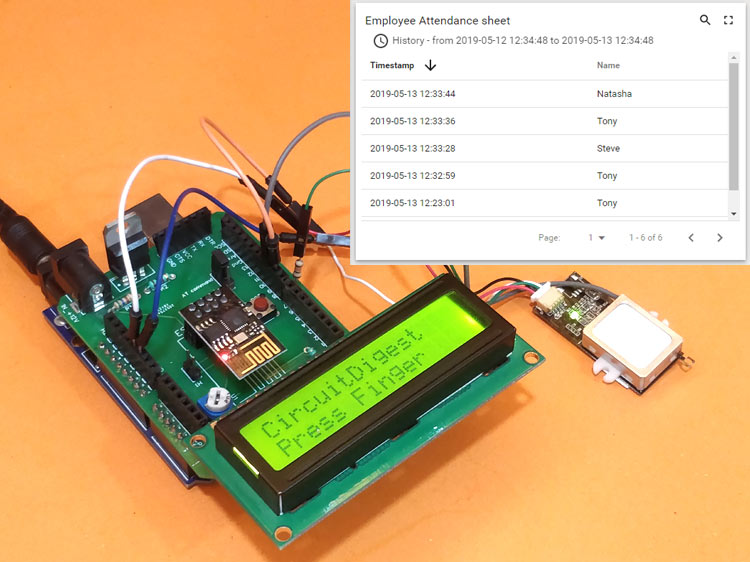
So here we use Arduino and an IoT platform called Thingsboard to build a biometric attendance system that scans for fingerprint and on successful identification of the person it will log the information to the cloud platform ThingsBoard by using the ESP8266 Wi-Fi module. This information can then be displayed in the dashboard of ThingsBoard making it available for the required authorities to view and analysis information over the internet without having any direct physical access to the hardware.
Interesting? Follow this Circuit Digest tutorial to make this biometric attendance system project.
Below is the demonstration video of the project:
So here we use Arduino and an IoT platform called Thingsboard to build a biometric attendance system that scans for fingerprint and on successful identification of the person it will log the information to the cloud platform ThingsBoard by using the ESP8266 Wi-Fi module. This information can then be displayed in the dashboard of ThingsBoard making it available for the required authorities to view and analysis information over the internet without having any direct physical access to the hardware.
Interesting? Follow this Circuit Digest tutorial to make this biometric attendance system project.
Below is the demonstration video of the project:
Tuesday, 9 April 2019
Interfacing a Camera Module with Arduino Uno
In this DIY project a OV7670 camera module is interfaced with Arduino UNO to click and store images.

The OV7670 camera module works on 3.3V, so it becomes important to avoid Arduino which gives 5V output at their Output GPIO pins. The OV7670 is a FIFO camera. But in this tutorial, the picture or frames will be grabbed without FIFO.
Below are some of the pictures captured using the above shown hardware.


Check out the complete tutorial on below link:
https://circuitdigest.com/microcontroller-projects/how-to-use-ov7670-camera-module-with-arduino
Tuesday, 5 March 2019
Digital Wall Clock using Atmega16 and DS3231 RTC
This is a DIY PCB project for a Digital wall clock, which is made using Atmega16 microcontroller and DS3231 RTC module.
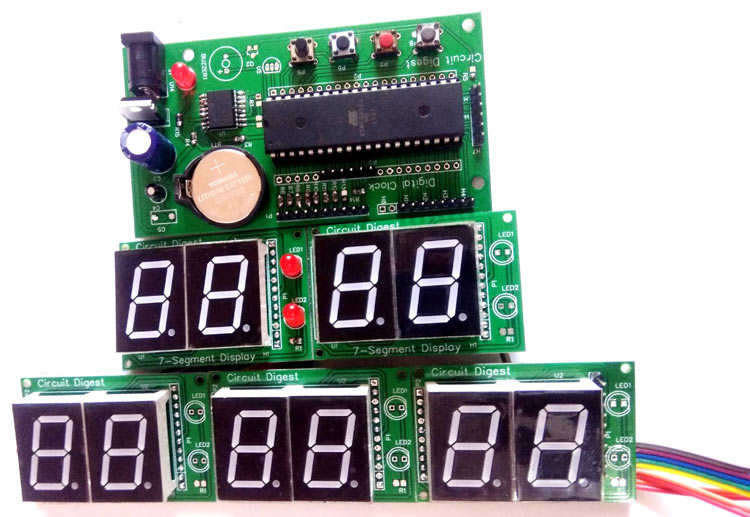
In this Digital Clock Project, ten common anode 7-segment displays of 0.8-inch are used to display time and date. Here seven segment displays are used to show hour, minute, date, month and year. Our PCB design also has options to display seconds and temperature, which can be displayed by adding more display units.
For complete project, check out the link below: https://circuitdigest.com/microcontroller-projects/digital-wall-clock-on-pcb-using-avr-microcontroller-atmega16-and-rtc
In this Digital Clock Project, ten common anode 7-segment displays of 0.8-inch are used to display time and date. Here seven segment displays are used to show hour, minute, date, month and year. Our PCB design also has options to display seconds and temperature, which can be displayed by adding more display units.
You can watch the video below for more details of this AVR project.
For complete project, check out the link below: https://circuitdigest.com/microcontroller-projects/digital-wall-clock-on-pcb-using-avr-microcontroller-atmega16-and-rtc
Subscribe to:
Posts (Atom)