Showing posts with label DIYDrone. Show all posts

Saturday, 16 May 2026

Voice Controlled Drone Using ESP32 and Python

ESP32 Voice Controlled Drone with LiteWing using Python

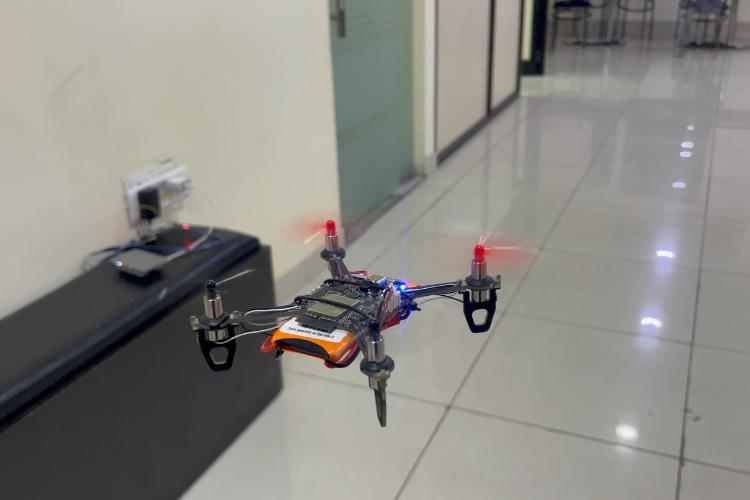
What if you could fly a drone just by talking to it? That’s exactly what this project does. Using an ESP32 based LiteWing drone, Python, and offline speech recognition, this setup allows the drone to respond to simple voice commands like “takeoff,” “forward,” and “land.”

Instead of using a traditional remote controller filled with joysticks and switches, the drone listens to spoken commands through a microphone and performs actions in real time. The result feels much more natural, interactive, and fun.

How ESP32 Voice Controlled Drone Works

Voice Controlled Drone System Architecture

The project uses two main parts:

  • LiteWing ESP32 Drone
  • Laptop or PC running the voice-control program

The microphone captures the user’s voice, and the audio is processed using the Vosk speech recognition engine. Vosk converts speech into text completely offline, meaning no internet connection is required.

Once a command is recognized, Python sends the instruction to the drone through Wi-Fi using the LiteWing library. The drone then performs the requested action instantly.

Supported commands include:

  • Takeoff
  • Land
  • Forward
  • Backward
  • Left / Right
  • Up / Down
  • Turn left / Turn right

The system can even control the drone LEDs with commands like:

  • Red
  • Blue
  • Green
  • White

Because the speech recognition works locally on the laptop, the response time remains fast and reliable.

Hardware Used

The hardware setup is surprisingly simple.

Main components:

  • LiteWing ESP32 Drone
  • Positioning Module
  • Laptop or PC
  • Microphone

The positioning module helps stabilize the drone and improves movement accuracy during flight.

Software and Libraries

The project is developed in Python and uses:

  • PyAudio for microphone input
  • Vosk for offline speech recognition
  • LiteWing Python library for drone communication

One important detail is that the laptop connects directly to the drone’s Wi-Fi access point. No cloud service or internet connectivity is needed during operation.

Why Offline Speech Recognition?

Instead of using cloud-based voice assistants, the project uses offline speech recognition for several reasons:

  • Faster response time
  • Better privacy
  • No internet dependency
  • More reliable communication

The developers also switched to an Indian English Vosk model to improve command recognition accuracy for local accents.

Applications

This project is not only fun but also a great example of human-machine interaction.

Possible applications include:

  • Educational robotics
  • Hands-free drone operation
  • Interactive AI systems
  • Research and experimentation
  • Accessibility-focused robotics projects

This Voice Controlled Drone project combines ESP32 drone technology, Python programming, and AI-based speech recognition into one exciting setup. It transforms drone flying into a much more interactive experience while remaining simple enough for students, makers, and hobbyists to explore.

If you enjoy robotics, or drone projects, this is a fantastic hands-on project to experiment with.

https://circuitdigest.com 

Robotics Projects |Arduino Projects | Raspberry Pi Projects|

Monday, 16 March 2026

LiteWing ESP32 Drone with WiFi Camera – Live Video Streaming Upgrade


Flying a small drone is already fun, but adding a camera makes the experience even better. In this project, we upgraded the LiteWing ESP32 drone with a compact WiFi camera module so it can stream live video while flying. The idea to add Wi-Fi Camera to LiteWing ESP32 Drone is simple: keep the drone light, keep the setup easy, and still enjoy real-time aerial footage.

With this upgrade, the drone can transmit live video directly to a mobile phone. It’s perfect for hobby flying, experimenting with aerial views, or simply exploring how lightweight drones can capture video without the need for expensive camera drones.

The LiteWing ESP32 drone with camera uses a dual WiFi architecture. This means the drone’s flight control and the camera streaming work on two completely separate wireless connections.

The LiteWing drone creates its own WiFi network that your phone connects to for flight control. At the same time, the WiFi camera module creates another WiFi network for video streaming.

Because the control and video signals are separated, both systems run smoothly without interfering with each other. You can control the drone and watch live video simultaneously without lag.

LiteWing Drone Working Flow Diagram


Components Required

  • LiteWing ESP32 Drone
  • Dual WiFi Camera Module
  • 1S LiPo Battery (preferably high C-rating)


The LiteWing drone acts as the flight platform, while the camera module handles video transmission independently. A lightweight LiPo battery powers both the drone and the camera during flight.

How the Drone Camera System Works

This drone setup works using two independent communication channels.

The first channel is used for flight control. The LiteWing ESP32 creates a WiFi access point that allows your phone to connect through the LiteWing control app. From the app, you can control throttle, pitch, roll, and yaw.

The second channel is used for video streaming. The WiFi camera module also creates its own WiFi access point. Your phone connects to this network using a compatible camera viewing app.

Since both networks operate separately, the drone can fly smoothly while continuously transmitting live video. Think of it like using two different radio frequencies: one for controlling the drone and the other for receiving video updates.

WiFi Camera Module Details

For this project, we used a dual WiFi camera module originally designed for toy drones. The module includes two cameras that can capture video from different angles.

The cameras operate at 3.3V, but the module includes a built-in voltage regulator that allows it to accept up to 5V input. This makes powering the camera easy because it can be connected directly to the drone’s battery.

Another advantage of this module is its lightweight design. Since it is compact and simple, it does not significantly affect the drone’s balance or flight stability.

Hardware Connections

Hardware Connection Drone

One of the best parts of this project is how simple the wiring is.

The camera module only needs two connections:

  • VCC connected to the drone’s VBUS line

  • GND connected to the drone’s ground

There is no data connection required between the camera and the flight controller. The camera operates independently and handles its own WiFi video transmission.

Both the drone and camera are powered using a 1S LiPo battery.

Connecting the Camera to Your Phone

After powering the drone, the camera module automatically creates a WiFi network.

To view the live video feed:

  1. First, open the WiFi settings on your phone and connect to the camera’s network using the default password 12345678.
  2. Next, install and open a compatible viewing app such as WebCam or IP Camera.
  3. Once connected, start the camera feed in the app. You should now see the live aerial video streaming directly from the drone.

Meanwhile, you can switch back to the LiteWing app to control the drone.

Troubleshooting Video Noise

Sometimes the video feed may show noise or jitter when the drone motors start running. This usually happens due to voltage fluctuations caused by high motor current.

The easiest fix is to use a battery with a higher C-rating. A stronger battery can deliver stable current even when the motors draw sudden power, which helps keep the camera feed stable during flight.

Conclusion

Adding Wi-Fi Camera to LiteWing ESP32 Drone is a simple but powerful upgrade. With only a few extra components, the drone can stream live video while flying.

The dual-network design keeps flight control and video transmission separate, ensuring smooth operation without lag. This makes the project ideal for hobbyists who want to experiment with aerial video without investing in a costly camera drone.

Overall, this project demonstrates how small embedded systems can be combined to create a lightweight drone capable of real-time aerial monitoring and video streaming. 

https://circuitdigest.com 

Robotics Projects |Arduino Projects | Raspberry Pi Projects|

Sunday, 1 March 2026

Configuring LiteWing ESP32 Drone with Betaflight – Complete Beginner Guide

Configuring LiteWing ESP32 Drone to Betaflight

LiteWing is an open-source ESP32-S3 based drone designed for experimentation, learning, and custom drone development. By default, LiteWing runs modified Crazyflie firmware, but it can also be configured using Betaflight, one of the most popular flight control platforms used in FPV and racing drones.

In this LiteWing ESP32 Betaflight Drone project, we configure the LiteWing drone using Betaflight firmware, transforming it into a fully tunable and performance-optimized drone. With Betaflight integration, users gain access to advanced features such as PID tuning, flight modes, receiver configuration, motor setup, and real-time flight diagnostics.

This ESP32 Betaflight setup guide walks through the complete process of flashing firmware, configuring hardware, and tuning flight performance. Once completed, your LiteWing drone becomes highly customizable and suitable for both beginners and advanced drone developers.

What You’ll Learn

  • Flashing ESP32 Betaflight firmware
  • Setting up Betaflight Configurator
  • GPIO pin configuration using CLI
  • IMU orientation correction
  • ExpressLRS receiver setup
  • Flight mode configuration
  • PID tuning for brushed motors
  • Blackbox flight data analysis

Hardware & Software Requirements

Hardware

  • LiteWing ESP32-S3 Drone
  • ExpressLRS (ELRS) Receiver
  • ELRS Transmitter (pre-bound)
  • USB Data Cable
  • LiPo Battery

Software

  • Betaflight Configurator v10.10
  • ESP32 Betaflight firmware binary
  • Chrome or Edge browser for flashing

Step 1: Flash ESP32 Betaflight Firmware

Before configuration, the LiteWing drone must be flashed with ESP32 Betaflight firmware.

Process overview:

  1. Download ESP32-S3 firmware binary.
  2. Connect LiteWing via USB.
  3. Open the ESP web flashing tool.
  4. Select COM port and connect.
  5. Upload firmware at address 0x0000.
  6. Program and wait for completion.

After flashing, the drone becomes compatible with Betaflight Configurator.

Step 2: Install Betaflight Configurator

Download Betaflight Configurator v10.10.0

Install Betaflight Configurator on your computer and enable:

Show All Serial Devices

Then connect the LiteWing drone using the detected COM port.

Step 3: Configure Hardware Pins

Default Betaflight pin mapping does not match LiteWing hardware.
Using the CLI tab, GPIO pins are reassigned to correctly control:

  • Motors
  • UART communication
  • IMU sensors
  • Battery monitoring

After entering CLI commands, save and reboot the drone.

Step 4: Correct IMU Orientation

If the 3D drone model moves incorrectly:

  • Open Configuration Tab
  • Go to Board & Sensor Alignment
  • Set Gyro Alignment → CW 270°

This ensures accurate motion tracking and stable flight response.

Step 5: Enable Battery Voltage Monitoring

Configure onboard ADC monitoring:

  • Voltage Source → Onboard ADC
  • Scale → 10
  • Divider → 1
  • Multiplier → 2

This allows real-time battery monitoring inside Betaflight.

Step 6: Configure Motor Protocol

LiteWing uses brushed DC motors, so proper configuration is required:

  • Motor Protocol → Brushed
  • PWM Frequency → 8000 Hz

Save and reboot after applying settings.

Step 7: Setup ExpressLRS Receiver

Connecting ELRS Receiver to LiteWing Drone

ExpressLRS provides ultra-low latency and long-range communication.

Connections:

  • Receiver TX → GPIO18
  • Receiver RX → GPIO17
  • 3.3V & GND → Power

Inside Betaflight:

  • Enable Serial RX
  • Receiver Mode → Serial Based
  • Protocol → CRSF

Stick movement should now appear in the Receiver tab.

Step 8: Configure Flight Modes

Flight modes define drone behavior.

Recommended setup:

Mode         Purpose
ARM         -Enables motors
ANGLE         -Self-leveling flight
ACRO         -Full manual control
BLACKBOX -Flight data logging

Assign transmitter switches and save configuration.

Step 9: PID Tuning

Default PID values are unsuitable for LiteWing due to:

  • Lightweight frame
  • Brushed motors
  • Small propellers
  • Compact structure

Apply optimized PID values and perform short test flights for stable performance.

Step 10: Blackbox Flight Data Logging

Betaflight Blackbox Flight Data Logging

Blackbox records important flight parameters such as:

  • Gyro data
  • Motor output
  • PID response
  • Receiver input

After flight:

  1. Download logs from Betaflight
  2. Analyze using Blackbox Explorer
  3. Fine-tune performance

By integrating Betaflight with the LiteWing ESP32-S3 drone, you unlock professional-level drone tuning and diagnostics on an open-source platform. This setup converts LiteWing from a basic experimental drone into a fully configurable flight system suitable for learning FPV control, tuning algorithms, and embedded flight development.

This project is an excellent introduction to ESP32-based flight controllers, open-source drone firmware, and real-world flight tuning, making LiteWing a good starting point for students, developers, and drone enthusiasts exploring advanced UAV systems.

For more info : LiteWing ESP32 Drone Betaflight: Setup & Configuration Tutorial

https://circuitdigest.com 

Robotics Projects |Arduino Projects | Raspberry Pi Projects|

Tuesday, 6 May 2025

PMW3901 Optical Flow Sensor with ESP32 – Position Hold for Drones

PMW3901 Optical Flow Sensor with ESP32

The PMW3901 is an optical flow sensor often used in drones and robotics to detect motion relative to the ground. It helps maintain a steady position, especially when GPS signals are weak or unavailable. This guide explains how the sensor works, its features, and how to use it with an ESP32. It also includes examples for visualizing motion on a web browser and an OLED display.

What is the PMW3901 Optical Flow Sensor?

The PMW3901 is a compact sensor that detects movement by tracking patterns in grayscale images. It does not provide absolute position data but measures how much and in what direction the surface underneath has shifted.

Common PMW3901 Modules

1. Pimoroni PMW3901 Pinout

Pimoroni-PMW3901-Sensor-Module-Pinout


2. Generic PMW3901 Module Pinout

PMW3901-Sensor-Pinout

Applications of the PMW3901 optical flow sensor with ESP32

  • Indoor Navigation
  • Position Holding in Drones
  • Autonomous Robots
  • Gesture Recognition Systems

The PMW3901 is a reliable optical flow sensor suitable for indoor drones and small robots. It provides real-time X/Y movement data, uses low power, and can be integrated with ESP32 using SPI. Visualization on a web interface or OLED display helps in testing and understanding motion detection.

For in-depth explanation and code : Interfacing PMW3901 Optical Flow Sensor With ESP32

https://circuitdigest.com 

Robotics Projects |Arduino Projects | Raspberry Pi Projects|

Monday, 1 April 2024

How to Build a Low-Cost Drone with ESP32?


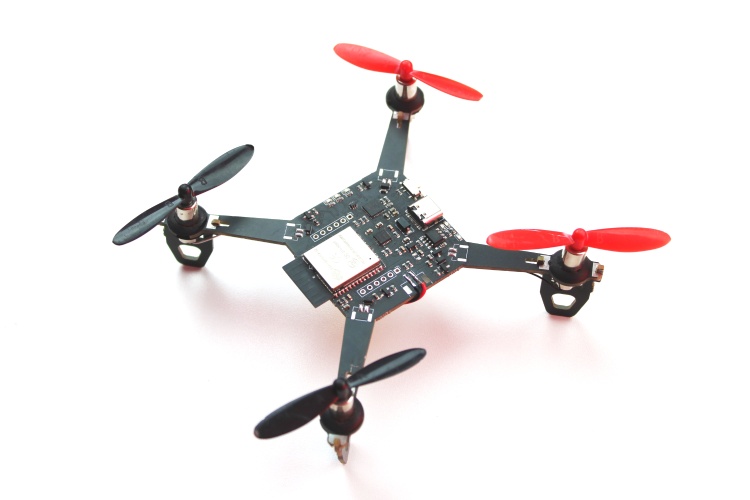
Drones have evolved from simple toys to versatile tools with countless applications across industries. Whether for aerial photography, agricultural monitoring, or military operations, drones rely on advanced technology for their functionality. In this project, we'll create a DIY Wi-Fi Controlled Drone using accessible components like ESP32 modules, MPU6050 IMU, coreless motors, and plastic propellers. This method enables hobbyists to build their own drones without requiring costly equipment.


Key Features:


  • Smartphone Control: Operate the drone wirelessly via smartphone for easy handling.

  • Stability Control: Integrated MPU6050 IMU ensures smooth flight performance.

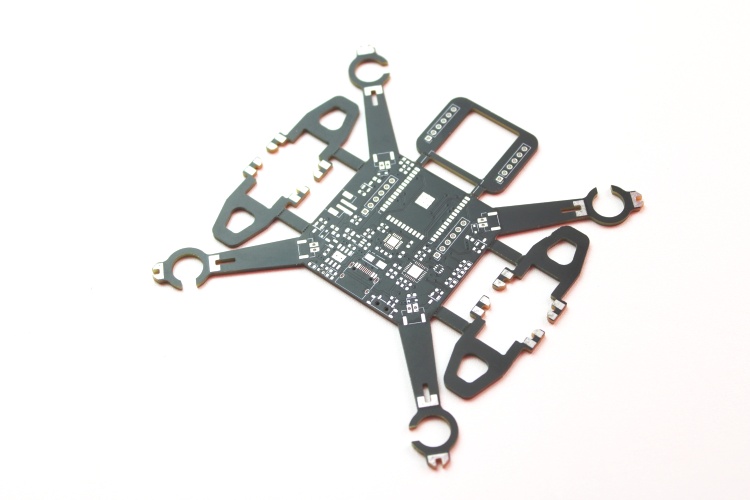
  • Compact Design: All-in-one PCB layout simplifies assembly, eliminating the need for 3D printed parts.

  • Upgradability: Easily integrate additional features for customization in the future.

  • Lightweight: Portable and maneuverable design makes it ideal for various applications.

  • Built-in Convenience: Includes features like built-in battery charging and USB interface for programming and debugging.

  • Compatibility: Works seamlessly with both Android and iOS devices.

  • Open-Source: Customize and modify the drone to suit individual preferences.


Components Needed:

For this project, gather:


  • ESP32 modules

  • MPU6050 IMU

  • Coreless motors

  • Propellers

  • PCBs

  • Other electronic components

Check the provided list for a comprehensive overview.


1) Our circuit diagram showcases connections between components, including USB port for charging and programming, voltage regulation, and motor driver circuits.


2) Compact and sturdy PCB design ensures easy assembly and incorporates mounting feet for stability.


3) The drone's firmware, based on ESP-drone firmware from Espressif, is coded using ESP-IDF version 4.4.5. It controls user commands, sensor data processing, and motor control.


4) Pre-flight checks are essential to ensure proper functionality before takeoff.


Supporting Files:

Download schematics, PCB designs, and firmware from the Circuit Digest GitHub repository.

For a detailed tutorial, watch the complete video guide here.