Showing posts with label I2C. Show all posts

Friday, 20 March 2026

Learn Interfacing Raspberry Pi Pico RTC Module Step-by-Step

Interfacing Raspberry Pi Pico RTC DS3231

If you’ve ever built a digital clock using a microcontroller, you probably noticed one big problem — it loses time when power is removed. That’s exactly where a Real-Time Clock (RTC) module comes in.

In this project, we’re building a reliable digital clock using the Raspberry Pi Pico RTC DS3231 Module, along with a 16x2 I²C LCD to display time, date, and even temperature.

But this isn’t just a simple clock. It’s a solid foundation for future projects like alarms, schedulers, or automation systems.

Why Use the DS3231 RTC?

DS3231 Pinout

Not all RTC modules are equal. Older ones like the DS1307 tend to drift over time, especially with temperature changes. The DS3231 solves this problem with a built-in temperature-compensated crystal oscillator (TCXO).

What does that mean in simple terms?
It automatically adjusts itself based on temperature, so your clock stays accurate whether it’s hot or cold.

Another great feature is the backup battery support. Even if your Pico loses power, the RTC keeps running. So when power comes back, your time is still correct — no resetting needed.

What This Project Does

This setup uses:

  • Raspberry Pi Pico as the controller
  • DS3231 RTC module for accurate timekeeping
  • 16x2 I²C LCD for display

The system shows:

  • Current time
  • Date
  • Temperature (from the RTC module itself)

Since the LCD is small, the code smartly switches between different information instead of showing everything at once.

How It Works

DS3231 RTC Module Schematic

The entire system runs on I²C communication, which is one of the simplest ways to connect multiple devices.

Both the RTC module and LCD share the same two wires:

  • SDA (data)
  • SCL (clock)

The Pico reads time and temperature from the DS3231 and updates the LCD every second.

The best part?
Once you set the time initially, the RTC handles everything on its own.

Setting the Time (Important Step)

There are two easy ways to set the time:

  • Auto method (recommended):
    The RTC takes the current time from your computer during code upload.
  • Manual method:
    You can set a custom date and time directly in the code.

Just remember - after setting the time once, disable that line. Otherwise, it will reset every time the board restarts.

Real-World Uses

This project may look simple, but it’s actually very powerful.

You can use it for:

  • Alarm systems
  • Scheduled automation (like turning lights ON/OFF)
  • Data logging with timestamps
  • Timers and reminders

Once you understand this, you can build much bigger systems.

Common Issues (Quick Tips)

If something doesn’t work, check these first:

  • RTC not working → Battery might be missing or dead
  • LCD showing weird text → Wrong I²C address (try 0x27 or 0x3F)
  • No output → Check SDA and SCL connections

Most problems come down to wiring or small configuration mistakes.

This project is more than just a clock. It teaches you how to:

  • Work with I²C communication
  • Use RTC modules properly
  • Display real-time data on LCD

And once you’ve built this, you’ve got a strong base for more advanced projects.

Simple build. Practical use. And honestly — a great project to level up your embedded skills.

Interfacing Raspberry Pi Pico RTC DS3231 : Easy Setup Guide & Code

https://circuitdigest.com 

Robotics Projects |Arduino Projects | Raspberry Pi Projects|

Wednesday, 2 July 2025

RFID-Based Attendance System with Arduino


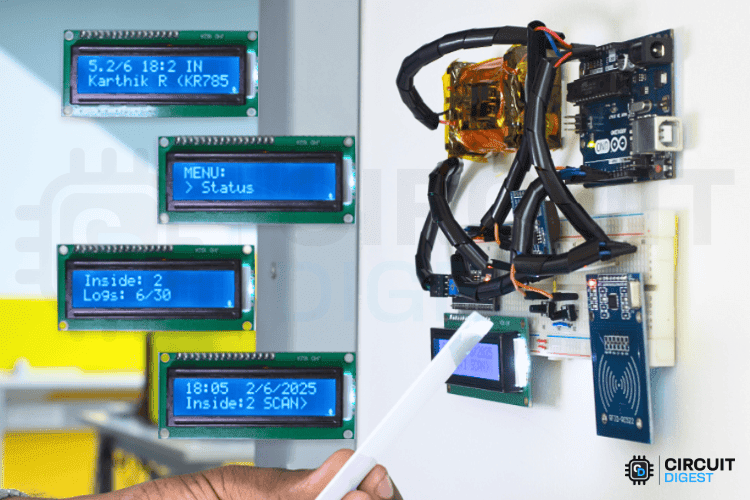
Keeping track of attendance should not feel like a daily hassle. Whether you are running a classroom, managing a small office, or organizing a community event, a simple, low-cost solution can go a long way. This RFID based attendance system using Arduino reads RFID cards to automatically log check-ins and check-outs, shows updates on an LCD, and stores attendance logs with real-time stamps using an RTC module. It's completely offline and stores data locally, so no need for an internet connection. The total cost is just around $30.

Why Choose Arduino for DIY RFID Attendance Tracker?

Arduino gives you full control over the system’s features without depending on expensive or limited commercial options. The MFRC522 RFID reader is accurate, and combining it with real-time clock and EEPROM modules means your data is both timestamped and safely stored, even during a power cut. Plus, once built, this setup is fully reusable and expandable for future upgrades like IoT integration or door control.

Key Features of RFID based attendance system

  • Automated RFID card scanning for both entry and exit
  • Real-time timestamp logging using DS1307 RTC
  • Local data storage with EEPROM, survives reboots
  • LCD display for live updates
  • Menu navigation via push buttons or serial monitor
  • Customizable card programming with personal data

Overview-Image-of-RFID-Based-Attendance-System-Using-Arduino

Components You’ll Need

  • Arduino Uno
  • MFRC522 RFID Reader
  • DS1307 RTC Module (with built-in AT24C32 EEPROM)
  • 16x2 I2C LCD Display
  • Push Buttons (x2)
  • RFID Cards/Tags
  • Breadboard, jumper wires, and 5V–12V power supply

RFID-Attendance-System-Using-Arduino
Real-World Applications

  • Classrooms – Track student attendance and prevent proxy entries
  • Offices – Log employee in/out times without manual input
  • Gyms & Clubs – Track member usage, ensure hygiene with contactless logging
  • Workshops – Monitor visitor entry or workshop sessions
  • Healthcare & Industry – Touchless logging for safety zones or shift tracking
This RFID based attendance system using Arduino is a great DIY project for anyone looking to solve a real problem while learning valuable electronics and programming skills. It’s affordable, fully offline, and scalable. Once set up, it can handle real-time check-ins, and you will know exactly how every part works.

Wednesday, 14 February 2024

Manual Techniques for Controlling Multiple Servos


The PCA9685 16-channel 12-bit PWM/Servo Driver module provides precise control over multiple PWM outputs, making it ideal for applications requiring accurate control over servos, LEDs, and various devices. This project aims to explore its functionalities, particularly focusing on how to control servo motors, to offer users a comprehensive understanding of its capabilities.

Required Components:

  • Arduino Uno R3
  • 8 * SG90 Servo Motors
  • PCA9685 16-Channel Module
  • External 5v Adapter
  • Jumper Wires

Interfacing Servo with Arduino:

Servo motors utilize PWM signals for precise control over their rotation angle. They typically feature three wires: VCC for power, GND for ground, and PWM for control signals. Connecting a servo to an Arduino involves supplying power and linking the PWM wire to a digital PWM pin. The Servo.h library enables servo control by uploading the Sweep Sketch to the Arduino IDE.

Arduino's limited number of PWM output pins poses challenges for scenarios requiring control over multiple servos. Complex techniques like multiplexing or software PWM may not offer accurate servo control. The PCA9685 module effectively addresses this limitation.

The PCA9685 module simplifies servo control by providing 16 free-running PWM outputs using only two pins, operated through I2C communication. It supports a wide range of applications, including robotics, automation, and lighting control. The module's features, such as a built-in clock and compatibility with 3.3V microcontrollers, enhance its versatility.

Programming the PCA9685 with Arduino:

Utilizing the Adafruit_PWMServoDriver library facilitates easy control of the PCA9685 module. By initializing the module and setting the PWM frequency, servo control becomes straightforward. The setPWM() function allows for precise control over servo angles, enabling smooth and synchronized motion. Prior to powering the setup, thorough checking of connections is crucial. Eight servos are connected to channels 0 to 7 of the PCA9685 module, powered by an external adapter for sufficient power. Monitoring angle and pulse data through the serial display provides insights into servo motion.

In summary, the PCA9685 16-Channel Servo Driver module offers a practical solution for precise control over multiple PWM outputs, particularly suited for applications involving servo motor control. Throughout this project, we've explored its functionalities, including interfacing methods and programming with Arduino. 


Friday, 1 June 2018

PIC Microcontroller Communication Tutorials

In the vast system of embedded applications, no microcontroller can perform all the activities by itself and so it has to communicate to other devices to share information. There are many different types of communication protocols used by microcontrollers to share these information’s, but the most used ones are USART, IIC, SPI and CAN. Each communication protocol has its own advantage and disadvantage. To learn how to work with these communication protocols in PIC microcontroller, Below are few tutorials which provide the complete guide to use these communication protocols.

1. PIC Microcontroller I2C Communication
I2C Communication with PIC Microcontroller PIC16F877

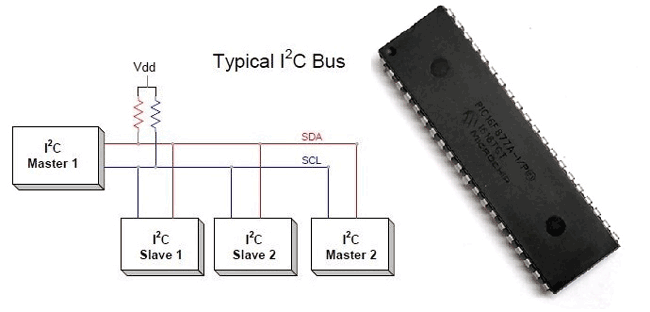
The term IIC stands for “Inter Integrated Circuits”. It is normally denoted as I2C or I squared C or even as 2-wire interface protocol (TWI) at some places but it all means the same. I2C is a synchronous communication protocol meaning, both the devices that are sharing the information must share a common clock signal. It has only two wires to share information out of which one is used for the cock signal and the other is used for sending and receiving data.
Click the link to learn more about PIC microcontroller I2C communication

2. PIC Microcontroller SPI communication
PIC16F877A PIC Microcontroller SPI Communication Tutorial

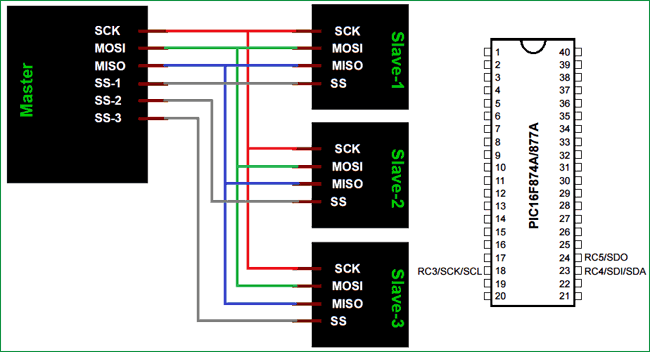
The term SPI stands for “Serial Peripheral Interface”. It is a common communication protocol that is used to send data between two microcontrollers or to read/write data from a sensor to a microcontroller. It is also used to communicate with SD cards, shift registers, Display controllers and much more. Know more about PIC SPI communication

3. PIC Microcontroller UART Communication
UART Communication using PIC Microcontroller

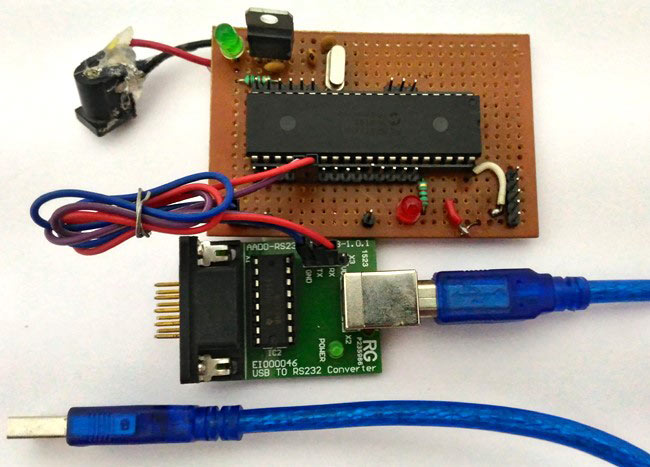
Here we have used PIC16F877A MCU, it has a module called “Addressable Universal Synchronous Asynchronous Receiver and Transmitter” shortly known as USART. USART is a two wire communication system in which the data flow serially. USART is also a full-duplex communication, means you can send and receive data at the same time which can be used to communicate with peripheral devices, such as CRT terminals and personal computers. Know more about PIC UART communication.

4. CAN Communication with PIC Microcontroller
Bring communication and connectivity in your embedded design to the next level with Microchip's Controller Area Network (CAN) bus solutions technology. Originally created for automotive applications, the CAN bus protocol is a high-speed, reliable communication protocol for applications requiring robust communications at bit rates reaching 8 Mbps. Incorporating the CAN bus protocol into your design is a low-cost, reliable way to function in a difficult electrical environment with a high degree of real-time capability. Learn more about CAN communication here.