Showing posts with label Raspberry Pi Projects. Show all posts

Thursday, 30 July 2026

Raspberry Pi Parking Space Detection System

Raspberry Pi Parking Space Detection System

Finding an empty parking space in a busy shopping mall, office complex, or public parking lot can be frustrating. Even when parking attendants are available, manually tracking occupied and vacant spaces is time-consuming and often inaccurate. An automated parking detection system can solve this problem by identifying available spaces in real time.

In this project, we'll build a Raspberry Pi Smart Parking Detection System that uses a USB camera and the CircuitDigest Cloud AI API to detect occupied and empty parking spaces. Unlike traditional computer vision projects, this solution doesn't require collecting datasets, training machine learning models, or performing complex image processing. Everything is handled through a simple cloud API, making the project ideal for beginners and rapid prototyping.

How the System Works

The Raspberry Pi continuously captures images from a USB camera using OpenCV. Images can be captured manually by pressing the Space key or automatically at regular intervals for continuous monitoring.

Each captured image is converted into JPEG format and securely sent to the CircuitDigest Cloud Parking Detection API using an HTTPS request. The cloud-based AI analyzes the parking area, determines which parking spaces are occupied and which are vacant, and returns the results to the Raspberry Pi.

The terminal then displays the number of occupied and empty parking spaces, allowing users to monitor parking availability in real time.

Hardware Required

Circuit-Diagram-of-Parking-Space-Detection-Raspberry-Pi

The project requires only a few components:

  • Raspberry Pi
  • USB Camera
  • MicroSD Card
  • Power Supply

Since all AI processing happens in the cloud, the Raspberry Pi simply captures images and communicates with the API, keeping the hardware requirements minimal.

Why Use CircuitDigest Cloud?

Parking-Space

Building a traditional parking detection system usually involves collecting hundreds of parking lot images, labeling occupied and empty spaces, training an object detection model, and optimizing it for embedded hardware.

CircuitDigest Cloud removes all these steps. Simply generate an API key, connect the USB camera, upload the provided Python code, and your parking detection system is ready within minutes. There's no need to work with TensorFlow, Edge Impulse, or custom AI models.

Key Features

  • AI-powered parking space detection
  • Detects occupied and vacant parking slots
  • No dataset collection or model training
  • Manual and automatic image capture modes
  • Python implementation using OpenCV
  • Cloud-based computer vision processing
  • Beginner-friendly setup
  • Quick deployment using Raspberry Pi

Applications

This project can be used in shopping malls, office buildings, apartment complexes, hospitals, airports, universities, and smart city infrastructure. It can also be integrated with digital parking displays or mobile applications to guide drivers toward available parking spaces.

This Raspberry Pi Smart Parking Detection System demonstrates how cloud AI can simplify computer vision projects. Instead of spending days preparing datasets and training models, you can build a fully functional parking monitoring system in a short time using just a Raspberry Pi, a USB camera, and the CircuitDigest Cloud API.

Whether you're exploring AI, computer vision, or Raspberry Pi development, this project offers an excellent introduction to intelligent parking management while leaving plenty of room for future enhancements such as automated parking guidance, cloud dashboards, and smart city integration. 

https://circuitdigest.com

Robotics Projects |Arduino Projects | Raspberry Pi Projects|

Monday, 29 June 2026

Raspberry Pi Helmet Detection System Using CircuitDigest Cloud API

Raspberry Pi Helmet Detection using CircuitDigest Cloud

Monitoring whether every two-wheeler rider is wearing a helmet can be a difficult task, especially in busy traffic. This Raspberry Pi helmet detection system makes the process much easier by automatically identifying riders with and without helmets using a USB camera and the CircuitDigest Cloud AI API.

The best part is that you don't need to train a machine learning model, collect datasets, or perform image labeling. Simply connect the camera, run the Python program, and let the cloud AI handle the detection.

How the System Works

The project uses a USB camera connected to a Raspberry Pi to continuously capture traffic images. Using OpenCV, the system displays a live camera feed and captures images either manually by pressing the keyboard's spacebar or automatically at fixed intervals.

Once an image is captured, it is converted into JPEG format and securely uploaded to the CircuitDigest Cloud Helmet Detection API. The cloud processes the image using a pre-trained AI model and identifies whether riders are wearing helmets.

The detection results, including the number of helmets detected and confidence values, are sent back to the Raspberry Pi and displayed directly in the terminal.

Hardware Required

Circuit-Diagram-of-Helmet-Detection-using-Raspberry-Pi

One of the biggest advantages of this project is its minimal hardware requirement. You'll only need:

  • Raspberry Pi
  • USB Camera
  • MicroSD Card with Raspberry Pi OS
  • Power Supply

Since all AI processing happens in the cloud, the Raspberry Pi only handles image capture and communication, keeping the project lightweight and easy to build.

Why Use CircuitDigest Cloud?

Output-Image

Traditional embedded AI projects require collecting thousands of images, labeling datasets, training models, converting them into TensorFlow Lite or ONNX format, and optimizing them for deployment. This process can take days or even weeks.

With the CircuitDigest Cloud Helmet Detection API, all of that complexity disappears. The AI model is already trained and ready to use. Your Raspberry Pi simply uploads an image and receives the detection result within seconds.

This approach also means future improvements to the AI model happen automatically on the cloud without updating your Raspberry Pi code.

Key Features

  • Real-time helmet detection using AI
  • No machine learning training required
  • Supports manual and automatic image capture
  • Simple Python implementation with OpenCV
  • Cloud-based processing for better accuracy
  • Works with standard USB webcams
  • Easy to expand for traffic monitoring applications

Real-World Applications

This project can be deployed at traffic signals, toll plazas, parking entrances, highways, educational campuses, and industrial facilities where helmet compliance needs to be monitored automatically. It can also be integrated with automatic challan systems, surveillance cameras, or traffic management dashboards for smarter road safety enforcement.

The Raspberry Pi Helmet Detection System demonstrates how cloud AI can simplify computer vision projects. Instead of spending time training machine learning models or optimizing embedded AI, developers can focus on building practical applications with minimal hardware and straightforward Python code.

https://circuitdigest.com

Robotics Projects |Arduino Projects | Raspberry Pi Projects|

Saturday, 20 June 2026

Raspberry Pi Face Detection Using CircuitDigest Cloud API

Raspberry Pi Face Detection using CircuitDigest Cloud

Face detection is one of the most popular applications of computer vision, but setting up a complete AI model often involves collecting datasets, training neural networks, and optimizing performance. For beginners and hobbyists, that can quickly become overwhelming.

This Raspberry Pi Face Detection project takes a much simpler approach. Using a Raspberry Pi, a USB camera, and the CircuitDigest Cloud Face Detection API, you can build a real-time face detection system without training a single AI model. The Raspberry Pi simply captures images and sends them to the cloud, where the face detection process happens automatically.

Why Use Cloud-Based Face Detection?

Traditional face detection projects require machine learning models running locally on the device. While powerful, they demand significant processing resources and setup time.

With CircuitDigest Cloud, all the heavy AI processing happens remotely. The Raspberry Pi only needs to capture images and upload them through an HTTPS request. The cloud API analyzes the image and returns the number of detected faces along with confidence scores. This makes the project lightweight, easy to build, and ideal for beginners.

How the System Works

Output Image

The working principle is straightforward.

A USB camera connected to the Raspberry Pi continuously captures images. OpenCV handles camera access and converts captured frames into JPEG format. The image is then securely uploaded to the CircuitDigest Cloud Face Detection API using an HTTPS request.

Once the image reaches the cloud server, the AI model performs face detection and returns the results. The Raspberry Pi displays the detected face count and confidence values directly in the terminal in real time.

The project supports multiple operating modes:

  • Manual image capture using the keyboard
  • Automatic capture at fixed intervals
  • SSH-based remote monitoring without a display

Hardware Requirements

Circuit Diagram of Face Detection using Raspberry Pi

One of the best parts of this project is its minimal hardware setup.

You only need:

  • Raspberry Pi
  • USB Webcam
  • MicroSD Card with Raspberry Pi OS

There are no additional sensors, displays, or external AI accelerators required.

Easy Raspberry Pi Setup

Before running the code, install Raspberry Pi OS using Raspberry Pi Imager and configure basic settings such as Wi-Fi and SSH access.

Once the Raspberry Pi is ready, create a CircuitDigest Cloud account, generate an API key, and copy the provided Raspberry Pi code into Thonny IDE. Connect the USB camera, run the script, and the system is ready to detect faces.

Key Features

  • No AI Training Required
  • Real-Time Detection
  • Multiple Operating Modes
  • Lightweight Implementation
  • Easy Integration

Practical Applications

This Raspberry Pi face detection system can be adapted for many real-world applications:

  • Smart attendance systems
  • Visitor logging and doorbell cameras
  • Retail customer counting
  • Home security monitoring
  • Educational computer vision projects
  • Occupancy monitoring systems

Because the face detection is handled through the cloud, developers can focus on building useful applications rather than spending time on AI model development.

This project proves that building a Raspberry Pi Face Detection System doesn't have to be complicated. By combining a Raspberry Pi, a USB camera, and the CircuitDigest Cloud Face Detection API, you can create a functional face detection setup in minutes.

For students, makers, and developers looking to explore computer vision without diving deep into machine learning, this project provides an excellent starting point. It delivers real-time face detection while keeping the hardware simple and the software setup minimal.

https://circuitdigest.com

Robotics Projects |Arduino Projects | Raspberry Pi Projects|

Monday, 20 April 2026

Raspberry Pi Pico Text-to-Speech Using AI (Wit.ai)

Raspberry Pi Pico Text to Speech using AI

Turning text into speech sounds simple - until you try doing it on a microcontroller. Devices like the Raspberry Pi Pico don’t have the processing power or memory to generate natural speech on their own. That’s where this project gets interesting. Instead of forcing the Pico to do heavy work, we let the cloud handle it.

Why This Approach Works

The Raspberry Pi Pico W is great for embedded projects, but it’s not built for audio processing. Generating realistic speech requires complex models and significant memory - something microcontrollers simply don’t have.

So instead, this project uses a cloud-based Text-to-Speech system. The Pico sends text over WiFi to an online service, and that service converts it into speech and sends back audio. The Pico just plays it. Simple, efficient, and practical.

What Powers the Speech?

WitAi Homepage

The project Raspberry Pi Pico Text to Speech using AI uses Wit.ai, a platform developed by Meta that handles speech processing through APIs. You send text via HTTPS, and it returns audio in real time.

This setup gives you:

  • Natural-sounding voice output
  • Support for multiple languages
  • No heavy processing on the Pico

And since everything runs in the cloud, updating voices or features doesn’t require changing your hardware.

Hardware Setup

Rpi Pico WitAITTS Component

The hardware is minimal and beginner-friendly:

  • Raspberry Pi Pico W
  • MAX98357A audio amplifier
  • Speaker (4Ω or 8Ω)
  • Breadboard and jumper wires

The amplifier connects using I2S pins, allowing digital audio from the Pico to be converted into sound through the speaker.

How It Actually Works

The workflow is clean and easy to follow:

  1. The Pico connects to WiFi
  2. You send text (via Serial Monitor or code)
  3. The Pico sends this text to Wit.ai
  4. Wit.ai converts it into speech
  5. Audio is streamed back to the Pico
  6. The speaker plays the sound instantly

What’s nice here is that the audio is streamed, not fully downloaded first. That means faster response and less memory usage.

Code Logic (In Simple Terms)

The program creates a TTS engine, connects to WiFi, and authenticates using a token from Wit.ai.

Then:

  • You set voice, speed, and pitch
  • Send text using a simple function
  • The system handles the rest automatically

It’s mostly plug-and-play once configured.

Where You Can Use This

This project isn’t just a demo. It can actually be used in real applications:

  • Smart home voice alerts
  • Talking IoT devices
  • Accessibility tools
  • Educational kits
  • Notification systems

Once you get the basics working, you can connect it with sensors, APIs, or automation systems.

This project shows how powerful a simple idea can be when done right. Instead of pushing hardware limits, it uses the cloud intelligently.

The result?
A lightweight system that delivers clear, natural speech using minimal components.

If you’re working with microcontrollers and want to add voice output without overcomplicating things, this is one of the cleanest ways to do it.

https://circuitdigest.com 

Robotics Projects |Arduino Projects | Raspberry Pi Projects|

Friday, 9 January 2026

Build a Raspberry Pi WiFi Router with RaspAP


Raspberry Pi Wi-Fi Router with RaspAP

Over the years, many of us end up with spare Raspberry Pi boards sitting unused in drawers. Instead of letting them collect dust, this project shows how to give them a practical second life by turning a Raspberry Pi into a fully functional WiFi router with network-wide ad blocking

Using RaspAP’s pre-built image, you can quickly convert a Raspberry Pi into a Raspberry Pi WiFi Router with RaspAP  making it wireless hotspot that shares internet access and blocks ads at the DNS level. The result is a compact router that works for laptops, phones, smart TVs, and IoT devices—without installing ad blockers on each device. Since the Pi can also run from a power bank, it doubles as a portable travel router, making it ideal for hotels, hostels, or road trips.

Why Use RaspAP Instead of OpenWrt?

OpenWrt is powerful and highly configurable, but on a Raspberry Pi it often requires extensive manual setup. RaspAP, on the other hand, is designed specifically for Raspberry Pi users who want quick results.

RaspAP provides:

  • A clean, modern web interface
  • Sensible default settings
  • A pre-built image that works out of the box

With RaspAP, you can have a working Raspberry Pi WiFi router running in under 30 minutes, making it ideal for beginners and hobbyists.

Components Required

To build this Raspberry Pi WiFi router, you’ll need:

  • Raspberry Pi (Pi 3, Pi 4, or Pi 5 recommended)
  • microSD card (8GB or larger)
  • Stable power supply
  • Ethernet cable or upstream WiFi connection
  • PC or laptop for flashing the SD card
RaspAP-Over-OpenWRT


Optional additions like a USB WiFi dongle or USB phone tethering can further expand functionality.

Understanding Raspberry Pi Network Interfaces

RaspAP uses standard Linux network interfaces, making the setup flexible:

  • eth0 – Internet input via Ethernet
  • wlan0 – Built-in WiFi used as hotspot
  • wlan1 – Optional USB WiFi adapter for repeater mode
  • usb0 – Mobile data via USB tethering

A common setup uses Ethernet as the internet source and the built-in WiFi to broadcast the hotspot.

Setting Up the Raspberry Pi WiFi Router

Flashing the RaspAP Image

Start by flashing the RaspAP pre-built image onto a microSD card using Raspberry Pi Imager. Insert the card into the Pi and power it on.

After booting, the Pi automatically creates a WiFi network. Connect to it using the default credentials.

Accessing the Web Dashboard

Once connected, open a browser and access the RaspAP web dashboard. From here, you can manage hotspot settings, view connected devices, and monitor bandwidth—just like a commercial router.

Customising WiFi Settings

Change the default WiFi name and password, select the appropriate country code, and choose a less congested WiFi channel to improve performance and reliability.

Enabling Network-Wide Ad Blocking

One of the standout features of RaspAP is its DNS-based ad blocking. Unlike browser extensions, this blocks ads before they even reach connected devices.

Once enabled:

  • Ads are blocked across phones, laptops, TVs, and consoles
  • Tracking domains are filtered automatically
  • No extra software is needed on client devices

This approach works even where browser-based blockers struggle, such as smart TVs or mobile apps.

Real-World Performance

While it won’t replace a high-end WiFi 6 router, a Raspberry Pi WiFi router performs surprisingly well for everyday use. For home labs, small networks, or travel scenarios, it offers stable speeds with the added benefit of ad blocking and monitoring.

These features make RaspAP suitable not just as a hotspot, but also as a learning platform for networking.

This Raspberry Pi WiFi Router with RaspAP  setup  is a great way to reuse old hardware and explore practical networking concepts. With RaspAP, setting up a router with ad blocking, monitoring, and VPN support becomes accessible even to beginners.

Whether you use it as a travel router, secondary home network, or learning tool, RaspAP transforms the Raspberry Pi into something far more useful than its size suggests. It’s a simple project with real-world value - and a perfect example of how much potential still lies in these tiny boards.


Wednesday, 3 September 2025

Raspberry Pi Pico GPS Tracking Project with SIM800L & Neo-6M – Step by Step Guide

Cellular GPS Tracker with Raspberry Pi Pico


The Raspberry Pi Pico makes it easy to create your own real-time GPS tracking system. With just a few parts and some basic programming, you can build a fully functional IoT GPS tracker thanks to reasonably priced GPS and GSM modules.

We'll demonstrate how to construct a Raspberry Pi Pico GPS tracker in this tutorial using:
  • Neo-6M GPS module to gather location data in real time,
  • cellular communication using the SIM800L GSM module, and
  • Data can be sent to the cloud and shown on an interactive map using the GeoLinker API.


After following this tutorial, you will have a GPS tracker that can record and send real-time location updates, even with offline buffering in case of network outages.

Components Required

Component

Description

Quantity

Raspberry Pi Pico / Pico W

Microcontroller (RP2040)

1

SIM800L Module

GSM/GPRS module for internet access

1

Neo-6M GPS Module

For GPS data Collection

1

GPS Antenna

External GPS antenna with SMA/UFL

1

GSM Antenna

External GSM antenna

1

LED

Red, Yellow, Green

3

SIM

2G Capable SIM (Airtel)

1

Jumper Wires, Breadboard

For prototyping

as needed


How Does It Work?

Pico GPS Tracker concept


  • Neo-6M GPS Module picks up latitude & longitude from GPS satellites and sends them as NMEA sentences.
  • Raspberry Pi Pico reads these values over UART and parses them.
  • SIM800L GSM Module transmits this data to the internet using HTTP POST requests.
  • GeoLinker Cloud API stores the location data and plots it on a real-time map.
  • If the GSM connection drops, data is stored offline and automatically synced once the network is back.

This way, no GPS point is lost even in areas with weak coverage.

Applications of Raspberry Pi Pico GPS Tracker

Pico GPS Tracker with Offline Data Sync

This tracker can be adapted for many real-world uses:
  • Vehicle Fleet Tracking – monitor cars or delivery vans in real-time.
  • Asset Tracking – keep an eye on shipments, parcels, or equipment.
  • Pet Locator – attach it to a collar to track pets.
  • Bike/Scooter Tracking – prevent theft and track movement.
  • Emergency Alert System – send SOS + live location on button press.
Building a Raspberry Pi Pico GPS Tracker, SIM800L, and Neo-6M GPS is not only affordable but also highly customizable. The GeoLinker library removes most of the complexity, letting you focus on logic instead of low-level AT commands.

Thursday, 22 February 2024

Popular Raspberry Pi Projects | Full Tutorial with Code and Circuit Diagram

Raspberry Pi – a small, but mighty computer that fits in the palm of your hand, complete with the ability to connect to a monitor, keyboard, and mouse. It's affordable and super easy to use, even if you're not a tech whiz. Whether you're a kid or an adult, Raspberry Pi is designed for everyone to have fun while learning about computers and technology. It's capable of doing all sorts of cool things, like teaching you how to code, helping you build your own games, creating smart home gadgets, and even making your own robots. The possibilities are endless.

The main objective of this article is to showcase the practical applications of Raspberry Pi and provide detailed tutorials through informative articles. Let’s get going…


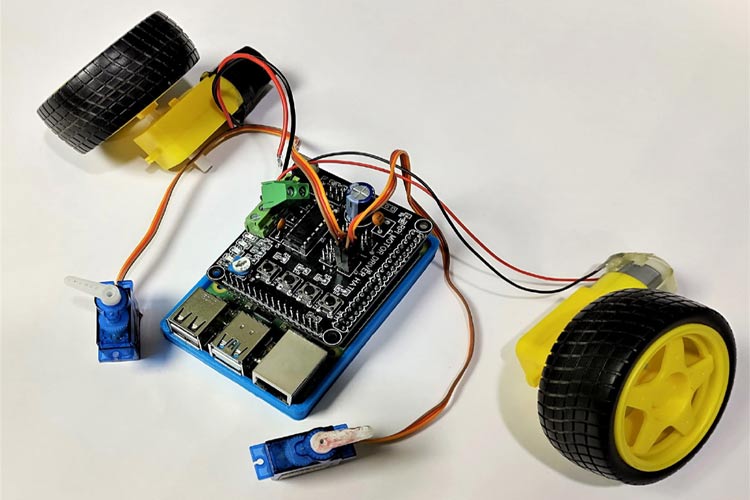
DIY Raspberry Pi Motor Driver HAT


A Raspberry Pi HAT is an add-on board for Raspberry Pi with the same dimensions as Pi. There are many Raspberry Pi HATs available in the market. In this tutorial, we are going to build a Raspberry Pi Motor Driver HAT to drive DC and Stepper motors. This HAT features an L293D motor driver IC, a 16x2 LCD Display Module, four push-buttons, and additional pins for a SIM800 Module with a 3.3V regulator, making it perfect for robotics projects and so on…


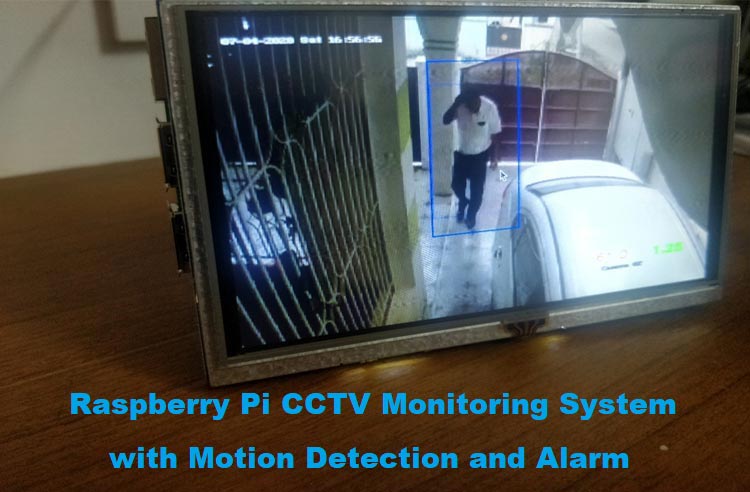
Raspberry Pi CCTV Monitoring


If you do not have a CCTV installed, you can still build a Raspberry Pi Surveillance system by connecting USB cameras directly to your Pi. Create a versatile motion detection system for CCTV surveillance using OpenCV and Raspberry Pi. Additionally, include an alarm feature – a buzzer – to alert the user with a beep upon detecting activity. Know more about the Setting up of Raspberry Pi and OpenCV for monitoring.


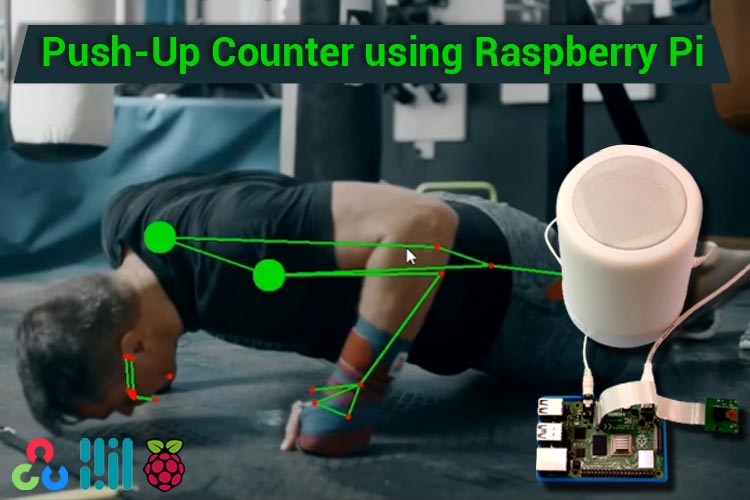
Push-Up Counter using Raspberry Pi 


Be ready to track your progress seamlessly. Simply follow our step-by-step tutorial to set up the system, and start counting your push-ups with a Raspberry Pi 4 and Pi camera module, along with OpenCV and MediaPipe installed…. Using Raspberry Pi and MediaPipe Pose estimation package, you can accurately count push-ups in real-time, making your workouts more efficient.


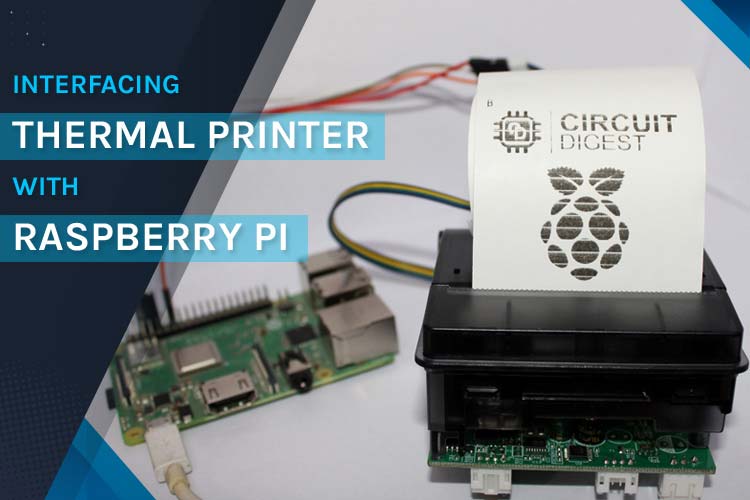
Thermal Printer with Raspberry Pi


Learn how to interface a Thermal Printer with Raspberry Pi using hardware serial communication, to print a test receipt that contains various elements like a Logo, a QR Code, or barcode along with various other text and graphical characters. This project offers a practical and versatile solution for printing receipts, tickets, and more. Check out the full tutorial for step-by-step instructions… and start printing with Raspberry Pi 


Door Lock System using Raspberry Pi


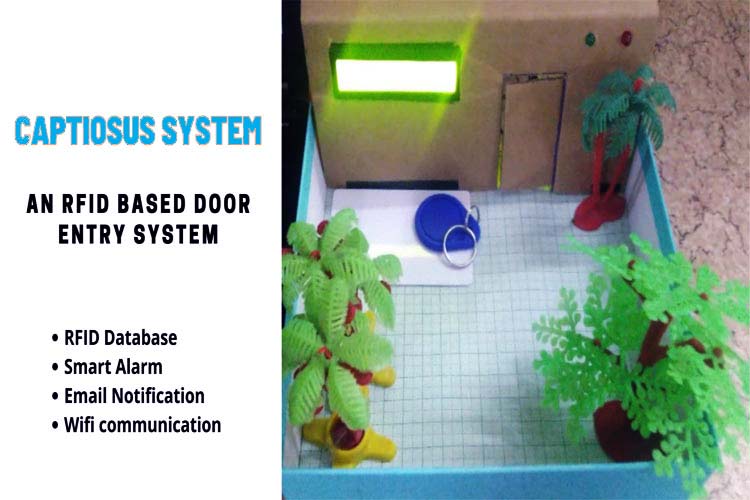
The Captiosus System: an RFID-based door lock and entry system designed to offer enhanced security and convenience for homes and other premises. This system utilizes RFID tags as keys, allowing for controlled access through an RFID scanner. Additionally, it features an alarm system to deter unauthorized entry attempts.

Complete Tutorial- https://circuitdigest.com/microcontroller-projects/rfid-based-door-lock-system


 Raspberry Pi based Autonomous UV Robot


The autonomous UV robot project offers a cost-effective solution for disinfection needs, featuring a range of components like Raspberry Pi, Arduino UNO, and UV lights. It utilizes state-of-the-art SLAM technology for safe navigation, ensuring workers are not exposed to harmful UV light. With built-in sensors and wireless connectivity, the robot provides real-time status updates via a mobile app.


Complete Tutorial- Autonomous UV Robot with SLAM


Raspberry Pi Internet Radio and Streaming Station


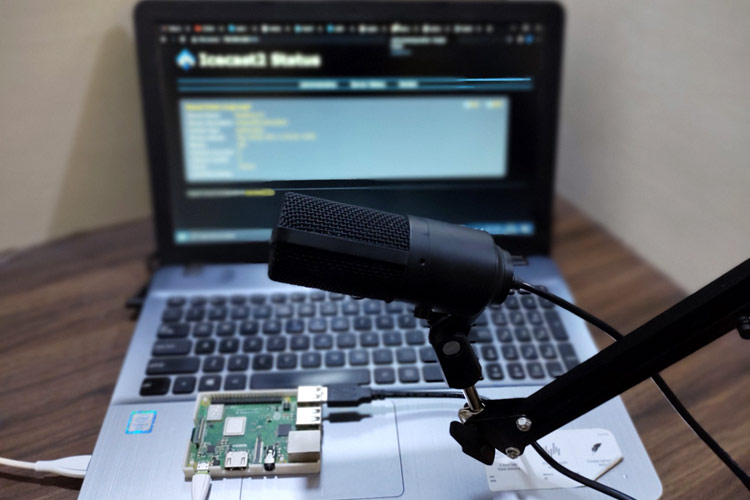
Setting up a Raspberry Pi streaming station, You'll need a Raspberry Pi, a USB microphone, and an Internet connection. After updating your Pi, you'll install and configure DarkIce and Icecast, then test the setup via web browser access.

This tutorial demonstrates setting up a Raspberry Pi streaming station using DarkIce and Icecast. 


We hope you found this tutorial helpful and enjoyable. If you have any questions or comments, please leave them in the comment section below. Additionally, you can visit our website for technical assistance and to explore our latest project.