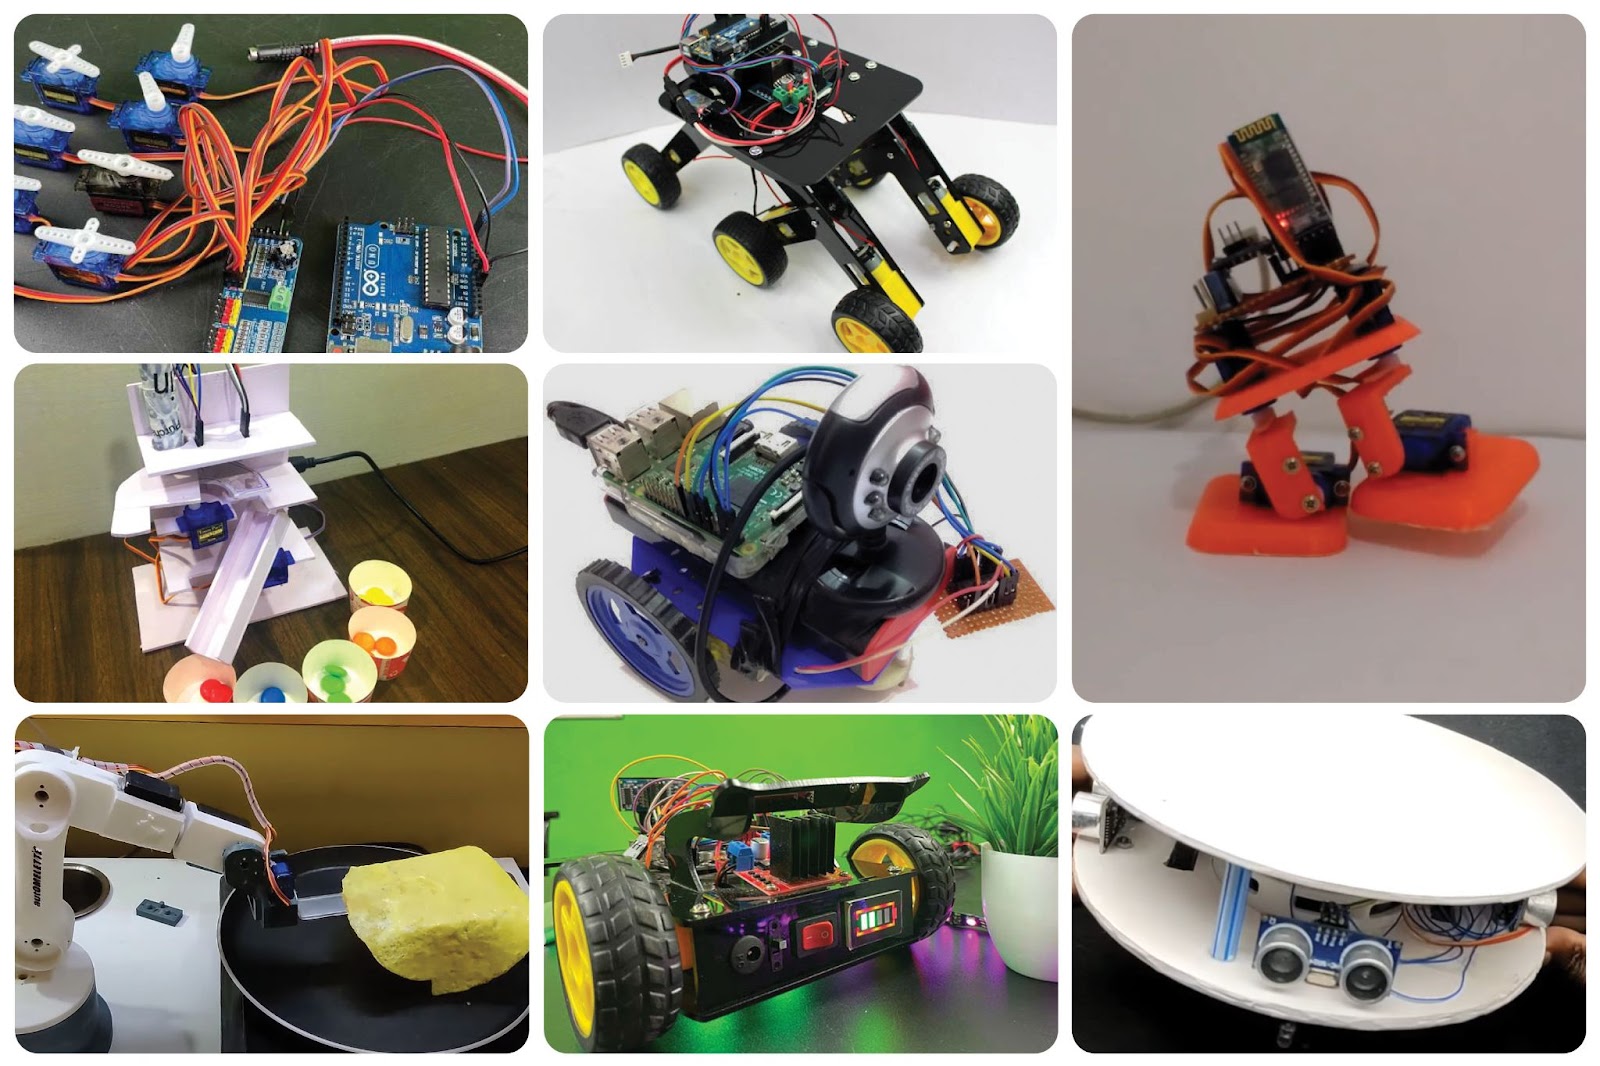
Arduino projects have gained immense popularity among both seasoned makers and beginners due to their ability to blend innovation and fun. Whether you have years of experience or are just starting out, Arduino offers a user-friendly interface that makes it easy to get started. Additionally, the vast community support surrounding Arduino ensures that you will never be alone in your journey. From online forums to tutorial videos, there are plenty of resources available to help you along the way.
One of the most exciting aspects of Arduino projects is the endless possibilities they offer. Whether you are interested in robotics, home automation systems, or interactive art installations, Arduino provides the tools and resources you need to bring your ideas to life. The flexibility of Arduino allows for customization and creativity, enabling you to tailor your projects to suit your specific needs and interests.
Captivating Arduino Projects in Robotics and its Endless Possibilities:
In this article, we will take you on a journey through captivating Arduino projects in robotics. These projects are not only designed to inspire and educate, but they also showcase the incredible potential of Arduino in the field of robotics. From simple obstacle avoidance robots to more complex autonomous drones, these projects demonstrate the power of Arduino in creating intelligent and interactive machines.
Whether you are a student looking to expand your knowledge, an engineer seeking to enhance your skills, or simply someone who enjoys tinkering with technology, Arduino projects offer a world of opportunities. With its user-friendly interface and vast community support, Arduino is the perfect platform for turning your imagination into reality. So why wait? Start exploring Arduino projects today and embark on a journey of innovation and fun.
Discovering the Versatility of Arduino in DIY Robotics:
Obstacle Avoiding Car:
The Obstacle Avoiding Car project is an exciting entry into the world of robotics. By utilizing ultrasonic sensors, this project allows beginners to learn how to build a car that can detect obstacles and maneuver around them independently. It serves as an excellent introduction to Arduino and robotics, making it the perfect choice for individuals who are interested in exploring sensor integration and autonomous navigation. With step-by-step instructions and a complete video tutorial, this project provides all the guidance needed to successfully create an obstacle avoiding car using Arduino.
Smart Vacuum Cleaning Robot:
On the other hand, the Smart Vacuum Cleaning Robot project offers a convenient solution to manual floor cleaning. Powered by Arduino, this robotic vacuum cleaner eliminates the need for human intervention by intelligently navigating through the space and cleaning efficiently. Equipped with sensors and smart algorithms, it can detect obstacles and adjust its path accordingly, ensuring a thorough cleaning experience. This project showcases the potential of Arduino in creating advanced home automation devices and provides a hands-on opportunity to learn about programming, electronics, and robotics.
Web-Controlled Raspberry Pi Surveillance Robot:Upgrade your home security with the Web-Controlled Raspberry Pi Surveillance Robot. This project is a combination of Raspberry Pi and Arduino, which allows you to monitor your home remotely through a user-friendly web interface. With this sophisticated yet accessible DIY solution, you can enhance your home surveillance and have peace of mind knowing that your home is secure no matter where you are. The Raspberry Pi Surveillance Robot offers advanced features such as live video streaming, motion detection, and even the ability to control the robot's movements from your smartphone or computer. This innovative technology provides a convenient and effective way to protect your home and loved ones.
Automelette: Automated Articulated Omelets Cooking Robot:
In the kitchen, automation is becoming increasingly popular, and the Automelette cooking robot is a perfect example of this. By utilizing the Arduino platform, this robot chef is designed to prepare omelets with precision and efficiency. With the Automelette cooking robot, you can say goodbye to the hassle of flipping omelets and worrying about overcooking or undercooking them. This innovative device takes care of all the cooking steps, from cracking the eggs to whisking them to perfection, and even flipping the omelet at just the right moment. With its articulated arm and precise controls, the Automelette ensures consistent results every time. Whether you're a professional chef or just someone who enjoys cooking at home, this automated cooking robot can revolutionize your culinary experience by saving time and effort while delivering delicious omelets on demand.
PCA9685 Multiple Servo Control:The PCA9685 Multiple Servo Control project is an excellent opportunity to elevate your robotics skills and take them to new heights. By learning how to simultaneously control multiple servos, you'll open up a world of possibilities in robotics design and implementation. This project allows you to explore complex robotic movements and master precise control mechanisms, giving you a comprehensive understanding of servo motor control. Whether you're a beginner looking to expand your knowledge or an experienced hobbyist seeking a new challenge, this project offers a deep dive into the exciting world of robotics.
Mars Rover Robot:
The Mars Rover Robot project offers an exciting opportunity to embark on a simulated Martian exploration mission. Inspired by NASA's exploration rovers, this DIY rover showcases the potential of Arduino in space exploration. By building and programming your own Mars rover, you'll gain hands-on experience in designing and operating robotic vehicles for extraterrestrial missions. This project is not only engaging but also highly educational, allowing you to learn about the challenges and complexities of exploring other planets. As you navigate the simulated Martian terrain, you'll develop important skills in robotics, programming, and problem-solving.
Arduino Color Sorter Machine:The Arduino Color Sorter Machine project showcases the immense power of industrial automation. With the integration of TCS3200 color sensor technology, this machine is able to accurately sort objects based on their color, making it a valuable tool for a variety of industrial applications. By automating the sorting process, businesses can significantly increase their efficiency and productivity. The Arduino Color Sorter Machine is a practical solution that highlights the capabilities of Arduino in streamlining processes and improving overall operational efficiency. Whether it's in manufacturing, logistics, or quality control, this project demonstrates the potential of industrial automation to revolutionize various industries.
Bluetooth Biped Bob Robot:
Another exciting project that allows users to interact with robotics in a fun and engaging way is the Bluetooth Biped Bob Robot. This friendly biped robot is designed to respond to commands from a smartphone via Bluetooth communication. With its interactive features, the Bluetooth Biped Bob Robot offers an immersive experience that combines technology and entertainment. Users can control the robot's movements, engage in simple tasks, and even play games with it. This project not only showcases the capabilities of Bluetooth technology but also emphasizes the potential of robotics in enhancing our daily lives.
Whether you're a seasoned maker or just starting out, there's something truly exciting about taking a collection of simple components and turning them into something amazing. And that's exactly what Arduino projects allow you to do. You'll learn new skills, gain a deeper understanding of electronics and programming, and have a lot of fun along the way.
So gather your components, fire up your creativity, and let's embark on this journey together. Get ready to be amazed at what you can create with Arduino. The only limit is your own imagination!


.jpg "pinout of the potentiometer")
.png "Circuit Diagram of Interfacing Arduino with Servo Motors and Potentiometer")


