Showing posts with label Ultrasonic Sensor. Show all posts

Thursday, 9 April 2026

Smart SMS Alert System Using ESP32 - Real-Time Alerts Without GSM

Send-SMS-Alert-Using-Seeed-Studio-Xiao-ESP32-S3 (1)

If you’ve ever wanted to build a simple yet useful alert system without dealing with GSM modules or SIM cards, this project is a perfect starting point. Using the Seeed Studio XIAO ESP32-S3, you can create a compact IoT system that detects movement and instantly sends SMS alerts over Wi-Fi.

This project Send SMS Alert using Seeed Studio XIAO ESP32 concept is straightforward: when an object comes close to a sensor, your phone receives a message. No complex backend, no telecom hardware- just Wi-Fi and a cloud API.

What This Project Does

At its core, this system uses an ultrasonic sensor to detect proximity. When something crosses a predefined distance (like 100 cm), the ESP32 processes this as a motion event and triggers an SMS alert.

Instead of using a GSM module, the ESP32 connects to the internet and sends a request to CircuitDigest Cloud. The cloud platform handles everything - from formatting the message to delivering it to your phone.

This makes the project much simpler, cheaper, and easier to scale.

How It Works

Workflow Diagram of Xiao ESP32 SMS Alert

When powered on, the ESP32 connects to your Wi-Fi network. Once connected, it continuously reads data from the HC-SR04 ultrasonic sensor. The sensor works by sending ultrasonic pulses and measuring how long it takes for the echo to return. This helps calculate the distance of nearby objects.

If the measured distance drops below the set threshold, the ESP32 immediately prepares an HTTP request. This request includes your API key, message template, and phone number.

The request is sent to the cloud server, which verifies the credentials and sends the SMS to your registered number. The entire process happens in seconds, giving you real-time alerts.

Why Use XIAO ESP32-S3?

Seeed Studio Xiao ESP32 S3 Pinout

The XIAO ESP32-S3 stands out because of its compact size and built-in Wi-Fi and Bluetooth. It’s perfect for small IoT projects where space and power efficiency matter.

Even though it’s tiny, it has enough GPIO pins for sensors and supports Arduino IDE, making it beginner-friendly. You get the power of ESP32 in a much smaller footprint.

Hardware Setup Made Easy

One of the best parts of this project is how simple the hardware is. You only need a few components:

  • ESP32 board
  • Ultrasonic sensor
  • Breadboard and jumper wires

The sensor connects using just four wires - power, ground, trigger, and echo. That’s it. No complicated wiring, no extra modules.

Real-World Applications

This project goes beyond just a demo. You can use it in real scenarios like:

  • Home security alerts when someone enters a room
  • Parking systems to detect vehicle movement
  • Water tank level monitoring
  • Industrial safety alerts in restricted areas
  • Farm monitoring to detect animal movement

Because it’s based on Wi-Fi and cloud APIs, you can easily expand it with different sensors like temperature, gas, or motion sensors.

What Makes It Powerful

The biggest advantage here is simplicity combined with functionality. You get instant SMS alerts without neediisg telecom hardware. The cloud handles all the heavy lifting, so your ESP32 just focuses on sensing and sending data.

It’s also flexible. You can customize messages, add more sensors, or even integrate it into larger IoT systems.

This Smart SMS Alert System is a great example of how modern IoT projects are evolving. By combining a small ESP32 board with cloud services, you can build powerful, real-world solutions with minimal hardware.

If you’re getting into IoT, this project is a solid step forward. It teaches you Wi-Fi communication, sensor integration, and cloud-based automation - all in one simple build.

https://circuitdigest.com 

Robotics Projects |Arduino Projects | Raspberry Pi Projects|

Thursday, 26 March 2026

ESP32 Send Email Notifications (Simple IoT Notification System)

Send Email from ESP32 using CircuitDigest Cloud

Ever wanted your project to notify you instantly when something important happens? Instead of constantly checking sensors or dashboards, what if your device could just send you an email?

That’s exactly what this project ESP32 Send Email Notifications  does. Using an ESP32 and a simple ultrasonic sensor, you can build a smart system that automatically sends email alerts whenever a condition is triggered. And the best part - no complex setup, no paid services. Everything runs using the CircuitDigest Cloud Email API.

What This Project Does

This setup continuously monitors distance using an ultrasonic sensor. When an object comes too close (below a set limit like 30 cm), the ESP32 sends an email alert instantly.

So instead of manually monitoring, you get notified in real time. Simple, effective, and very useful.

How It Works

The working logic is straightforward.

The ESP32 connects to your WiFi network and keeps reading distance values from the ultrasonic sensor. As long as everything is normal, nothing happens.

But the moment an object crosses the threshold:

  • ESP32 detects the event
  • It prepares a JSON request
  • Sends it securely to CircuitDigest Cloud
  • The cloud formats and delivers the email

Your inbox gets the alert within seconds.

And importantly, the ESP32 doesn’t directly send emails. It just sends data to the cloud, which handles formatting, templates, and delivery.

Components Required

Real-time-Setup-of-the-ESP32-with-Ultrasonic-Sensor

You don’t need much hardware for this project:

  • ESP32 
  • Ultrasonic sensor 
  • Breadboard and jumper wires

That’s it. No GSM module, no external email libraries, no complicated configuration.

Circuit Overview

Circuit-Diagram-of-ESP32-Setup

The wiring is simple:

  • Trigger pin - GPIO 32
  • Echo pin - GPIO 33
  • VCC and GND - Power

Once connected, the ESP32 can measure distance in real time and decide when to send alerts.

Why Use This Approach?

There are many ways to send notifications, but this method has clear advantages:

  • No SMTP setup needed
  • No third-party email libraries
  • Works over HTTPS 
  • Pre-built templates make emails look clean
  • Completely cloud-managed

This makes it beginner-friendly and scalable at the same time.

Real-World Applications

This project can be used in many practical scenarios:

  • Intrusion detection systems
  • Smart parking alerts
  • Safety monitoring
  • Industrial warning systems
  • Object detection in automation setups

Anywhere you need instant alerts without manual monitoring, this fits perfectly.

This ESP32 Send Email Notifications  is a great example of how simple IoT projects can solve real problems. With just a sensor and a microcontroller, you can build a smart notification system that works reliably in real time.

Once you understand this setup, you can easily expand it - add more sensors, send richer emails, or combine it with SMS or WhatsApp alerts.

If you’re getting started with IoT, this is definitely a project worth building.

https://circuitdigest.com 

Robotics Projects |Arduino Projects | Raspberry Pi Projects|

Thursday, 19 March 2026

Arduino Whatsapp Notification – Simple IoT Alert System

Send WhatsApp Messages from Arduino Uno R4

Sending real-time alerts from your electronics projects has become an essential part of modern IoT systems. Whether it’s monitoring distance, detecting motion, or tracking environmental data, getting instant updates on your phone makes projects far more useful.

Arduino Whatsapp Notification project is done without using a GSM module or complex APIs. Instead of dealing with SIM cards or expensive integrations, this method uses CircuitDigest Cloud WhatsApp API, allowing your Arduino to send messages over WiFi using a simple HTTPS request.

What This Project Does

The idea is simple. The Arduino reads data from a sensor, checks a condition, and sends that data to the cloud. The cloud then converts it into a proper WhatsApp message and delivers it instantly.

To demonstrate this, we use an HC-SR04 ultrasonic sensor. When an object comes closer than a defined distance (for example, 20 cm), the Arduino sends the distance value to the cloud, which then triggers a WhatsApp alert.

This setup creates a real-time proximity alert system that can be used for safety, automation, or monitoring applications.

Components Required

Whatsapp-API-Arduino-UNO-R4-Components-Used

The hardware setup is minimal and beginner-friendly:

  • Arduino UNO R4 WiFi
  • HC-SR04 Ultrasonic Sensor
  • Breadboard
  • Jumper Wires
  • USB Cable

The UNO R4 WiFi is important here because it has built-in WiFi capability, allowing direct internet communication.

How the System Works

The workflow is straightforward and happens in a loop.

First, the Arduino connects to your local WiFi network. Once connected, it continuously reads distance values from the ultrasonic sensor.

When the measured distance crosses a predefined limit, the Arduino prepares a small JSON payload. This payload includes details like your phone number, template ID, and sensor value.

The Arduino then sends this data securely to the cloud using an HTTPS POST request.

From there, CircuitDigest Cloud takes over. It verifies your API key, formats the message using a pre-approved WhatsApp template, and sends it to your registered phone number.

The key advantage here is that Arduino doesn’t directly talk to WhatsApp. The cloud handles all the complex parts like authentication, formatting, and delivery.

Circuit Connections

Whatsapp-API-Arduino-UNO-R4-Circuit-Diagram

The wiring is very simple and requires only four connections:

  • VCC → 5V
  • GND → GND
  • TRIG → Digital Pin 9
  • ECHO → Digital Pin 10

Once connected, the ultrasonic sensor can measure distances from about 2 cm up to 4 meters.

Arduino Code Overview

The code handles three main tasks: WiFi connection, sensor reading, and API communication.

First, the Arduino connects to WiFi using your network credentials. Then, it continuously triggers the ultrasonic sensor and calculates distance based on the echo time.

If the distance goes below the threshold, the code checks a cooldown timer to avoid sending too many messages. If allowed, it sends a request to the cloud API.

The payload includes dynamic values like the measured distance, which gets inserted into a WhatsApp message template automatically.

Testing the System

Once the code is uploaded, open the Serial Monitor to verify WiFi connection and sensor readings.

Place an object close to the sensor. When the distance drops below the set limit, a WhatsApp message will be sent instantly to your phone.

The message typically includes:

  • Device name
  • Event type (e.g., intrusion detected)
  • Measured distance
  • Location

The cooldown feature ensures that repeated alerts are not sent continuously.

Real-World Applications

This project can be extended into many practical use cases:

  • Intrusion detection systems
  • Smart parking alerts
  • Industrial safety monitoring
  • Home automation notifications
  • Distance-based automation triggers

Since it uses WiFi instead of GSM, it’s cost-effective and easy to scale.

Conclusion

This Arduino Whatsapp Notification project is a great example of how IoT projects can be made smarter with cloud integration. By offloading complex messaging tasks to the cloud, the Arduino only focuses on collecting and sending data.

The result is a simple, reliable, and efficient system that delivers real-time alerts directly to your phone. With just a few components and minimal setup, you can add instant WhatsApp notifications to almost any Arduino project.

https://circuitdigest.com 

Robotics Projects |Arduino Projects | Raspberry Pi Projects|

Wednesday, 23 April 2025

DIY Smart Blind Stick Using Arduino Nano

Smart Blind Stick using Arduino and Ultrasonic sensor

Navigating daily environments can be difficult for visually impaired individuals. To improve mobility and safety, this project introduces a DIY smart blind stick using Arduino Nano, an ultrasonic sensor, and a buzzer. It’s simple, budget-friendly, and serves as a practical aid for obstacle detection. The system works by detecting nearby objects and alerting the user via sound and light signals.

How the Blind Stick Works

This Arduino-based stick functions as an assistive tool by constantly checking for nearby obstacles and triggering alerts. It includes:

  • Ultrasonic Sensor (HC-SR04): Detects objects by sending ultrasonic waves and receiving the reflected signal.
  • Arduino Nano: Acts as the central controller, calculating distance and triggering alerts.
  • Buzzer and LED: Provide audio and visual warnings depending on the proximity of obstacles.
Audio Based Obstacle Detection and Alerts Using Arduino


Obstacle Detection

The ultrasonic sensor emits a sound wave when triggered by the Arduino. When the wave hits an object, it reflects back and is received by the sensor’s echo pin. The time taken for the round trip helps calculate the distance.

Distance Calculation

The Arduino uses the following formula to calculate distance:

Distance = (Time taken by the signal to Hit and bounce back / 2) / 29.1

For example, a 500µs round-trip means the object is roughly 8.59 cm away.

Alerts

If the object is within 50 cm:

  • Buzzer: Emits a beep. The closer the object, the faster the beep.
  • LED: Flashes similarly, helping those with partial vision.

Components Required

  • Arduino Nano
  • HC-SR04 Ultrasonic Sensor
  • 5V Buzzer
  • LED
  • 220Ω Resistor
  • 9V Battery
  • On/Off Switch
  • Breadboard and Wires
  • PVC Pipe for stick body

Block Diagram

The block diagram includes the Arduino Nano at the center, connected to the ultrasonic sensor (for input) and buzzer/LED (for output). A 9V battery powers the system.

Block Diagram Representation of Arduino-Based Blind Stick

Circuit Diagram

The sensor’s VCC, TRIG, ECHO, and GND are connected to Arduino pins. The buzzer and LED are connected to output pins through resistors. The entire circuit is powered by the battery via a switch.

Note: The sensor draws around 15mA, which is safe to power directly from Arduino GPIO pins.

Hardware Assembly

All components are placed on a small breadboard and fixed to a PVC pipe using zip ties. The battery is mounted with double-sided tape. The sensor is positioned at the top to detect obstacles ahead.

Hardware Connections of Obstacle Detection Stick for the Blind

Arduino Code Overview

The code reads distance and triggers alerts based on it. It uses millis() for multitasking of the buzzer and LED.

Uploading Code

  1. Open Arduino IDE.
  2. Select the board: Arduino Nano (ATmega328P).
  3. Choose the correct COM port.
  4. Paste and upload the code.

Once uploaded, your Arduino Nano starts working as the control unit for the blind stick.

Final Assembly

Fix the entire circuit onto the PVC pipe. Position the ultrasonic sensor to face forward and secure components using zip ties or tape. Ensure the switch is easily accessible for quick power control.

Assembling Blind Stick Circuit on a PVC Pipe

This project is a basic yet functional solution to help people with vision challenges navigate safely. It uses minimal components, is easy to assemble, and can be enhanced further with features like GPS or vibration alerts. You can find the full code and diagrams on the GitHub repository in the original tutorial.

Friday, 8 March 2024

How to Interface Ultrasonic Sensors with Arduino?


In this tutorial, we'll explore the process of connecting an
ultrasonic sensor to an Arduino board and displaying distance measurements on an LCD. Our goal is to provide a detailed understanding of the setup, operation, and coding involved in this project.

Components Required:


  • Arduino board (e.g., Arduino Uno)

  • HC-SR04 Ultrasonic Sensor

  • I2C LCD Display (e.g., 16x2 characters)

  • Jumper wires


Understanding the HC-SR04 Ultrasonic Sensor:


The HC-SR04 ultrasonic sensor has four pins:


  • VCC: Supply pin

  • GND: Ground pin

  • Trig: Trigger pin

  • Echo: Echo pin


Previous Projects:


We've employed the HC-SR04 with Arduino, Raspberry Pi, and PIC microcontroller in various projects, including:


Distance measurement with Arduino

Interfacing HC-SR04 with PIC microcontroller

Raspberry Pi obstacle-avoiding robot

IoT dumpster monitoring with Arduino & ESP8266


Working Principle:


The ultrasonic sensor emits high-frequency sound waves and detects their reflections. It comprises a transducer, which emits and receives ultrasonic waves, and signal processing circuitry to measure the time taken for the waves to travel and return.


Circuit Connection:


Connect the ultrasonic sensor's trig and echo pins to Arduino pins 4 and 5, respectively. This configuration enables the Arduino to trigger the sensor and measure the time taken for the echo pulse to return.


Arduino Code for Ultrasonic Sensor:


The Arduino code initializes serial communication and sets up the trigger and echo pins. It triggers the sensor, measures the duration of the echo pulse, and calculates the distance based on the speed of sound. The distance measurement is displayed on the Serial Monitor.


Adding an LCD Display:


Enhance the project by connecting an I2C LCD display to the Arduino. Use the SDA and SCL pins (A4 and A5 for Arduino Uno) for communication, along with VCC and GND. The LCD will provide real-time distance measurements alongside the serial output.


Practical Applications:


Explore various projects utilizing ultrasonic sensors, such as:


Interfacing with Raspberry Pi Pico for distance measurement

Building a smart blind stick for visually impaired individuals

Implementing an IoT-based smart dustbin management system using NodeMCU


This comprehensive guide offers detailed insights into interfacing an ultrasonic sensor with an Arduino and displaying distance measurements on an LCD. By following the steps outlined here, you can gain a better understanding of ultrasonic sensor operation and embark on exciting projects leveraging this technology.


For a complete tutorial, visit: https://youtu.be/bOZ5QdASm30


Wednesday, 6 March 2024

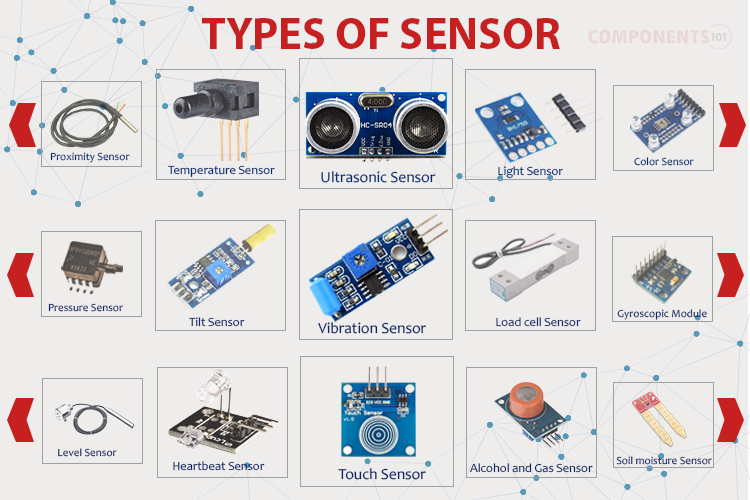
All About Sensors: Understanding Their Function and Sensing Capabilities

Sensors are vital components in our modern world, enabling us to perceive and interact with our environment in various ways. They come in different types, each with unique applications and functionalities. In this article, we'll explore the basics of sensors and its types, applications, and operational principles.


What are Sensors?


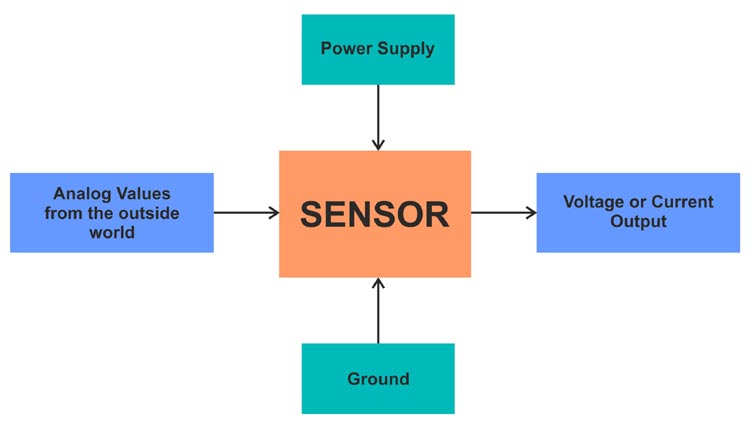
Sensors are devices designed to detect changes in their environment and provide output signals, either analog or digital. These signals serve various purposes, from displaying information to controlling processes in closed-loop systems. Essentially, sensors act as our technological senses, allowing devices to detect and respond to changes in their surroundings accurately.


Differentiating Sensors and Transducers


It's essential to distinguish between sensors and transducers. Sensors detect environmental changes and provide feedback, while transducers convert physical quantities into electrical signals or vice versa. Sensors require external power, whereas transducers can operate independently. Understanding this difference is crucial for grasping the functionality of different sensor types.


Classification of Sensors


Sensors can be classified in various ways, including active vs. passive and analog vs. digital. Active sensors, like piezoelectric sensors, don't need external power sources, while passive sensors, such as thermistors, do. Analog sensors produce continuous signals, while digital sensors generate discrete values.


Common Types of Sensors and Their Applications


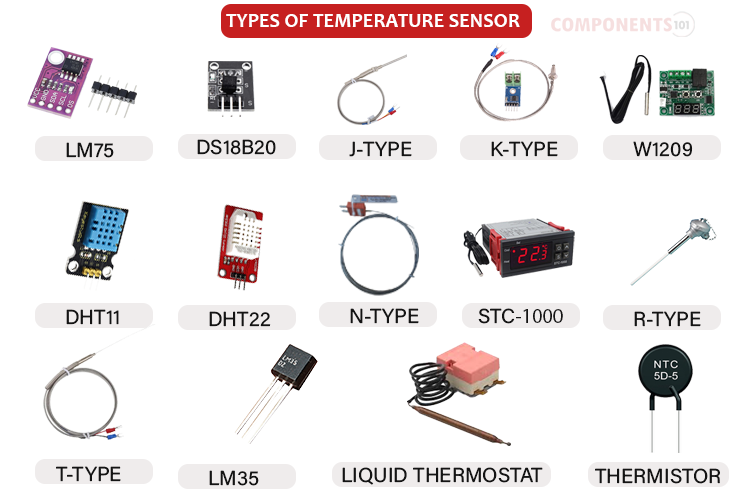
Temperature Sensor: Measures thermal energy accurately, vital in industrial, automotive, medical, and environmental monitoring.


Position Sensors: Determine object positions, essential for robotics, motion systems, and automotive applications.


Ultrasonic Sensors: Utilize ultrasonic waves for distance measurement and object detection, widely used in robotics and industrial automation.


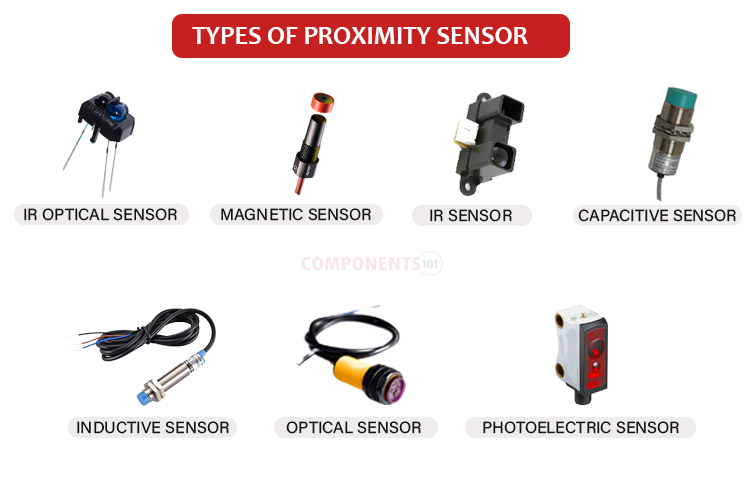
Proximity Sensor: Detects nearby objects without contact, crucial for automotive, industrial automation, and safety systems.


Hall Effect Sensors: Detect external magnetic fields, finding applications in position detection and automotive systems.


Light Sensors: Convert light energy into electrical signals, used in ambient light detection, object detection, and photography.


Gas and Chemical Sensors: Detects presence and concentration of gases, essential for safety systems, environmental monitoring, and industrial processes.


Humidity Sensors: Measure humidity levels in the air, employed in HVAC systems, weather stations, and agriculture.


Radiation Detectors: Detects various types of radiation, crucial for nuclear power plants, medical imaging, and radiation safety.


Sensors are fundamental components of modern technology, facilitating our interaction with the environment in diverse ways. Understanding their types, applications, and operational principles is essential for effectively harnessing their capabilities. Whether monitoring temperature, detecting motion, or ensuring air quality, sensors play a pivotal role in shaping our world.


Tuesday, 27 July 2021

DIY Portable Ultrasonic Digital Ruler using ATtiny85 Microcontroller


Distance measurement of an object in the path of the person, equipment, or a vehicle or moving object is used in a large number of applications such as robotic movement control, vehicle control, blind man’s walking stick, medical equipment, etc. There are many methods available for distance measurement but measurement using Ultrasonic sensor is one of the cheapest among other options. In this project, we are going to use HC-SR04 Ultrasonic Sensor with ATtiny85 microcontroller IC and OLED display module to build a digital ultrasonic ruler.


For the circuit diagram, code and gerber files, please visit the project page: DIY Digital Ruler


For more electronics project, visit: projects page


Sunday, 16 April 2017

DIY Arduino Based Radar System


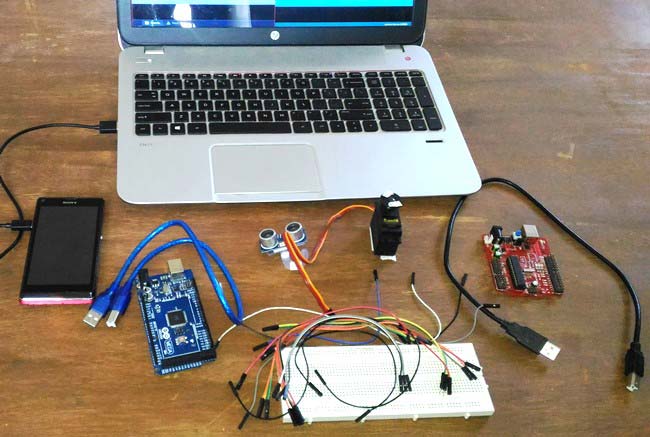
In this project we are using Arduino and ultrasonic sensor to broadcast information to a cell phone via bluetooth.  It senses objects with the help of Ultrasonic Sensor and hence can work even during night times. Ultrasonic sensor is attached with a servo motor which can be either be set to rotate automatically to scan the area or can be rotated manually using our Mobile app, so that we can focus the ultrasonic sensor in our required direction and sense the objects present over there. The information sensed by the sensor will be broadcasted to the cell phone using Bluetooth Module so it will work like a Sonar or a Radar.

If you want to make this project, you can find here the detailed DIY instructions with required circuit diagrams and source codes.

To see the project in working, check out the youtube video below: