Showing posts with label Raspberry Pi Tutorials. Show all posts

Saturday, 28 March 2026

Arduino Send Email Notifications Using DHT11 and UNO R4 WiFi

Temperature Monitoring System and Email Alerts Using Arduino

Keeping track of temperature and humidity sounds simple… until you actually need to monitor it constantly. Whether it’s your room, a server setup, or even a greenhouse, conditions can change quickly without you noticing. That’s where automation really helps.

In this project, we build a simple Arduino Send Email Notifications system that keeps you updated in real time. Using an Arduino UNO R4 WiFi and a DHT11 sensor, the system continuously monitors environmental conditions and sends an email alert whenever the temperature crosses a set limit.

What This Project Does

At its core, this is a smart monitoring system. The DHT11 sensor keeps reading temperature and humidity, while the Arduino checks if the values stay within a safe range.

The moment the temperature exceeds a predefined threshold, the system automatically sends an email notification using a cloud API. No need to manually check anything - you get notified instantly.

It’s simple, practical, and surprisingly useful in real-world scenarios.

Components Required

Hardware Setup of Arduino Based Alert System

The best part about this project is how minimal the hardware is. You only need:

  • Arduino UNO R4 WiFi
  • DHT11
  • Breadboard
  • Jumper wires

That’s it. No GSM module, no extra hardware - WiFi does all the work here.

How the Setup Works

Temperature Alert System with Email Notification Using Arduino

The wiring is straightforward. The DHT11 sensor connects to the Arduino with just three main connections:

  • VCC - 5V
  • GND - GND
  • Data - Digital Pin 2

Once powered, the Arduino connects to your WiFi network using its built-in wireless capability. This is what allows it to communicate with the cloud and send email alerts.

How the System Works

Here’s what happens behind the scenes:

  • The sensor continuously reads temperature and humidity
  • Arduino compares the temperature with a preset threshold
  • If everything is normal - no action
  • If temperature crosses the limit - alert triggered

At that moment, the Arduino creates a JSON request and sends it securely to the CircuitDigest Cloud Email API. The cloud service then formats the message and delivers it straight to your inbox.

To avoid spamming, the system includes a smart control mechanism. Once an email is sent, it won’t send another until the temperature returns to normal and crosses the threshold again.

Code Logic in Simple Terms

The program is divided into a few clear steps:

  • Connect to WiFi
  • Read sensor data
  • Check temperature condition
  • Send email if needed

It uses secure HTTPS communication, ensuring your data is safely transmitted to the cloud server before the email is generated.

Where You Can Use This

This project is more than just a demo. It has real-world applications:

  • Server room monitoring
  • Home temperature alerts
  • Cold storage systems
  • Industrial safety monitoring
  • Greenhouse automation

Basically, anywhere temperature matters - this system fits right in.

This Send Email Notifications using Arduino system is a perfect example of how a simple sensor project can become much more powerful with IoT integration. Instead of just displaying values on a screen, it actively notifies you when something goes wrong.

It’s beginner-friendly, practical, and easy to expand. You can later add features like SMS alerts, dashboards, or even multiple sensors.

If you're stepping into IoT projects, this is a great place to start - simple build, real-world value, and a solid learning experience.

https://circuitdigest.com 

Robotics Projects |Arduino Projects | Raspberry Pi Projects|

Thursday, 25 December 2025

Interfacing SD Card Module with Raspberry Pi Pico Using SPI


Adding external storage to a microcontroller project opens up many possibilities, from data logging and configuration storage to saving time - stamped sensor readings. The Raspberry Pi Pico SD card module is a simple and reliable way to achieve this using a standard microSD card and the SPI communication protocol.

In this project, we are Raspberry Pi Pico SD card module and demonstrate how to create, read, write, and delete files using an interactive Serial Monitor menu. This setup provides a clear understanding of how embedded systems handle external storage using the FAT32 file system.

Overview of the Project

The Raspberry Pi Pico communicates with the SD card module using the SPI interface. Most SD card modules include a built-in 3.3V regulator and basic level shifting, making them safe to use directly with the Pico’s 3.3V logic levels. Once connected, the Pico can access gigabytes of storage for logging sensor data, storing text files, or saving device settings.

To make the learning experience more interactive, this project uses a Serial Monitor menu that allows users to perform file operations in real time by sending simple commands.

Components Required

  • Raspberry Pi Pico
  • SD card module 
  • microSD card 
  • Breadboard and jumper wires
  • USB cable for power and programming

SD Card Module Pin Configuration for Raspberry Pi Pico

SD Card Module Pin Configuration for Raspberry Pi Pico

How It Works

The SD card module connects to the Pico’s default SPI0 pins. The Arduino SD and SPI libraries handle communication, file creation, reading, writing, and deletion. Once powered on:

  • The Pico initializes the SD card
  • A menu appears on the Serial Monitor
  • Users select actions like creating a file, writing text, reading data, or deleting files
  • All operations are executed instantly and displayed in real time

This makes it easy to understand how SPI communication and file handling work internally.

Circuit Diagram 

Circuit diagram Interfacing SD Card Module with Raspberry Pi Pico


SD Card Preparation Tips

For reliable operation:

  • Format the SD card to FAT32
  • Use a single MBR partition
  • Avoid exFAT or GPT formatting
  • Prefer standard Class 4 or Class 10 microSD cards

Improper formatting is the most common reason for SD card initialization failures.

Applications of Raspberry Pi Pico SD Card Interface

  • Sensor data logging
  • Configuration and settings storage
  • Offline data recording
  • IoT and embedded monitoring systems
  • Long-term data collection projects
for further in-depth details : Raspberry Pi Pico SD card module

Thursday, 22 February 2024

Popular Raspberry Pi Projects | Full Tutorial with Code and Circuit Diagram

Raspberry Pi – a small, but mighty computer that fits in the palm of your hand, complete with the ability to connect to a monitor, keyboard, and mouse. It's affordable and super easy to use, even if you're not a tech whiz. Whether you're a kid or an adult, Raspberry Pi is designed for everyone to have fun while learning about computers and technology. It's capable of doing all sorts of cool things, like teaching you how to code, helping you build your own games, creating smart home gadgets, and even making your own robots. The possibilities are endless.

The main objective of this article is to showcase the practical applications of Raspberry Pi and provide detailed tutorials through informative articles. Let’s get going…


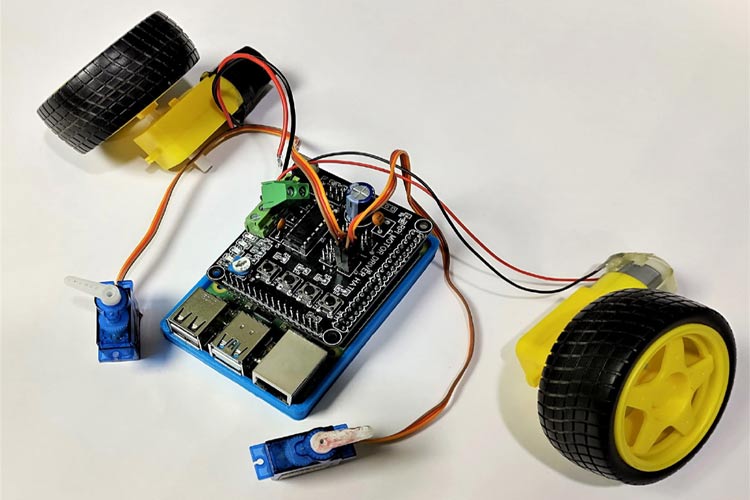
DIY Raspberry Pi Motor Driver HAT


A Raspberry Pi HAT is an add-on board for Raspberry Pi with the same dimensions as Pi. There are many Raspberry Pi HATs available in the market. In this tutorial, we are going to build a Raspberry Pi Motor Driver HAT to drive DC and Stepper motors. This HAT features an L293D motor driver IC, a 16x2 LCD Display Module, four push-buttons, and additional pins for a SIM800 Module with a 3.3V regulator, making it perfect for robotics projects and so on…


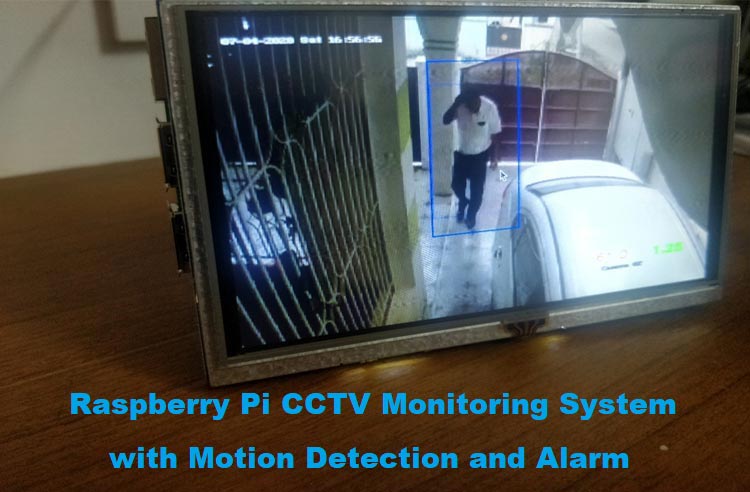
Raspberry Pi CCTV Monitoring


If you do not have a CCTV installed, you can still build a Raspberry Pi Surveillance system by connecting USB cameras directly to your Pi. Create a versatile motion detection system for CCTV surveillance using OpenCV and Raspberry Pi. Additionally, include an alarm feature – a buzzer – to alert the user with a beep upon detecting activity. Know more about the Setting up of Raspberry Pi and OpenCV for monitoring.


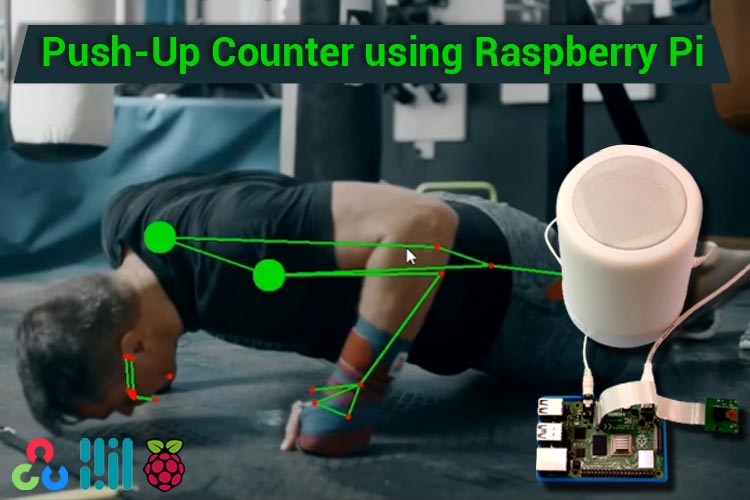
Push-Up Counter using Raspberry Pi 


Be ready to track your progress seamlessly. Simply follow our step-by-step tutorial to set up the system, and start counting your push-ups with a Raspberry Pi 4 and Pi camera module, along with OpenCV and MediaPipe installed…. Using Raspberry Pi and MediaPipe Pose estimation package, you can accurately count push-ups in real-time, making your workouts more efficient.


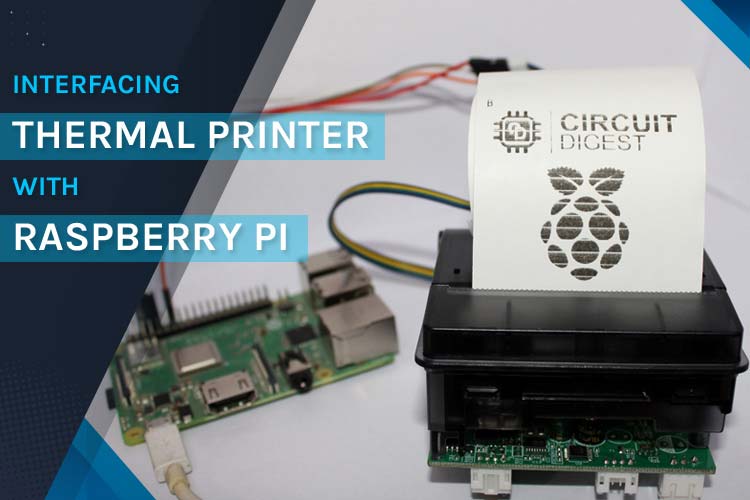
Thermal Printer with Raspberry Pi


Learn how to interface a Thermal Printer with Raspberry Pi using hardware serial communication, to print a test receipt that contains various elements like a Logo, a QR Code, or barcode along with various other text and graphical characters. This project offers a practical and versatile solution for printing receipts, tickets, and more. Check out the full tutorial for step-by-step instructions… and start printing with Raspberry Pi 


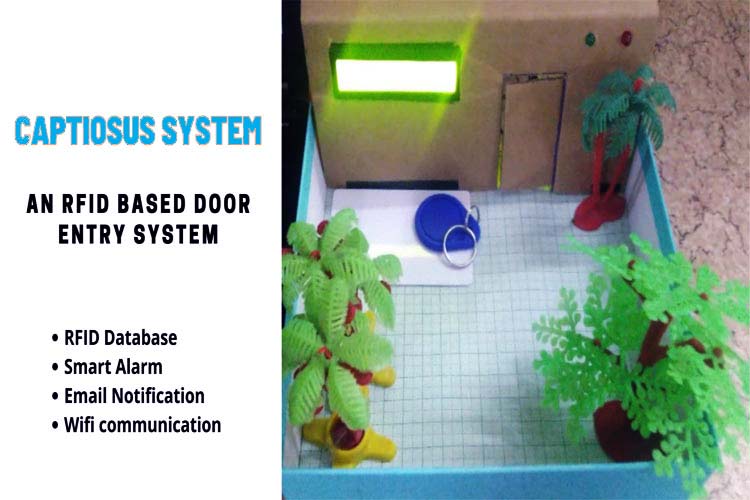
Door Lock System using Raspberry Pi


The Captiosus System: an RFID-based door lock and entry system designed to offer enhanced security and convenience for homes and other premises. This system utilizes RFID tags as keys, allowing for controlled access through an RFID scanner. Additionally, it features an alarm system to deter unauthorized entry attempts.

Complete Tutorial- https://circuitdigest.com/microcontroller-projects/rfid-based-door-lock-system


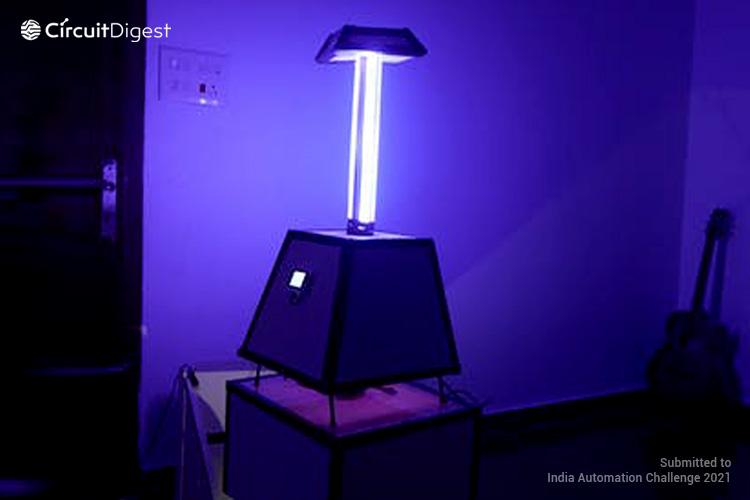
 Raspberry Pi based Autonomous UV Robot


The autonomous UV robot project offers a cost-effective solution for disinfection needs, featuring a range of components like Raspberry Pi, Arduino UNO, and UV lights. It utilizes state-of-the-art SLAM technology for safe navigation, ensuring workers are not exposed to harmful UV light. With built-in sensors and wireless connectivity, the robot provides real-time status updates via a mobile app.


Complete Tutorial- Autonomous UV Robot with SLAM


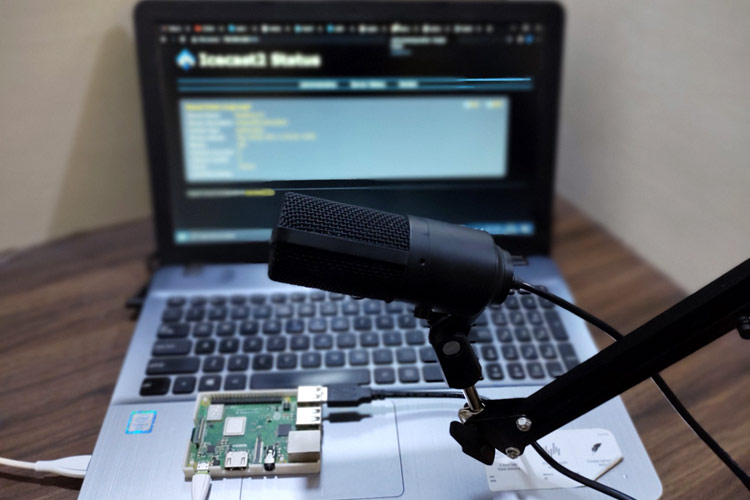
Raspberry Pi Internet Radio and Streaming Station


Setting up a Raspberry Pi streaming station, You'll need a Raspberry Pi, a USB microphone, and an Internet connection. After updating your Pi, you'll install and configure DarkIce and Icecast, then test the setup via web browser access.

This tutorial demonstrates setting up a Raspberry Pi streaming station using DarkIce and Icecast. 


We hope you found this tutorial helpful and enjoyable. If you have any questions or comments, please leave them in the comment section below. Additionally, you can visit our website for technical assistance and to explore our latest project.