Showing posts with label Sensor. Show all posts

Thursday, 22 May 2025

Weather Monitoring System Using Arduino UNO R4 WiFi

Weather Monitoring System

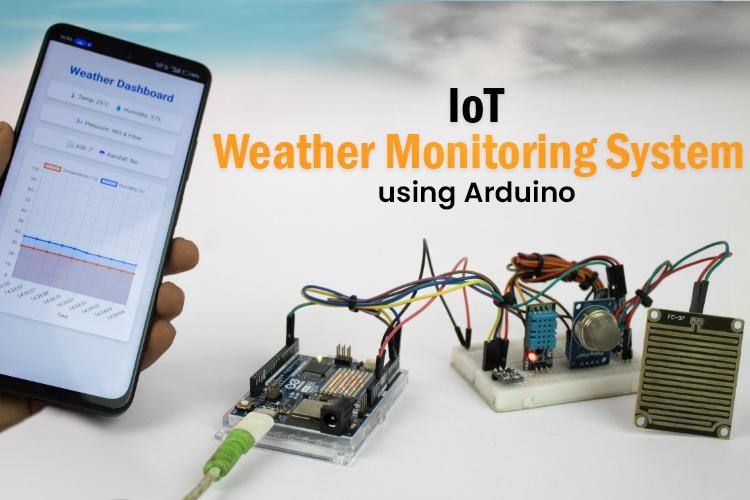
Learn how to create a simple IoT-based weather monitoring system using the Arduino UNO R4 WiFi. This project collects real-time data, such as temperature, humidity, air quality, rainfall, and atmospheric pressure, and displays the information on a local web dashboard. No cloud service or third-party platform is required, making this setup ideal for offline environments.

Features of the IoT Weather Monitoring System

  • Monitors temperature, humidity, air quality, pressure, and rainfall
  • Displays real-time readings on a local Wi-Fi dashboard
  • Operates without cloud connectivity
  • Built with Arduino UNO R4 WiFi, which includes onboard Wi-Fi
  • Easy to assemble and customize using basic electronic components

Components Required
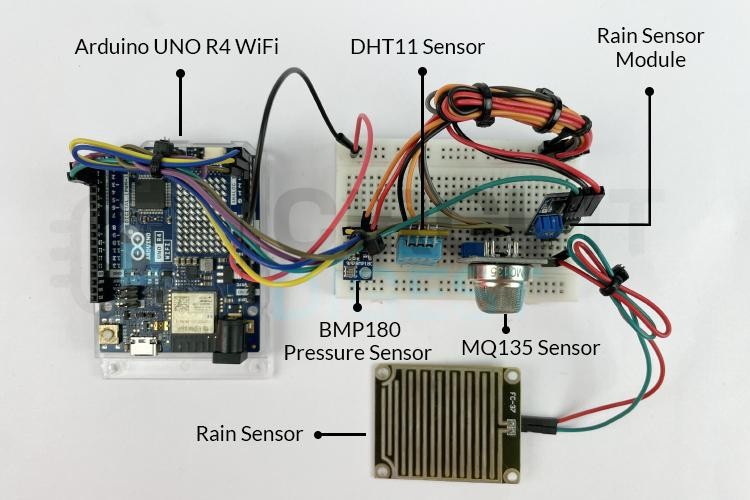
Components required to build an Arduino Weather Monitoring System


To build this system, you'll need the following:

  • Arduino UNO R4 WiFi
  • DHT11 – Temperature and Humidity Sensor
  • BMP180 – Pressure Sensor
  • MQ135 – Air Quality Sensor
  • Rain Sensor Module
  • Breadboard and Jumper Wires
  • USB Cable for Programming

Circuit Diagram and Assembly of IoT based Weather Station System

Circuit Diagram for Arduino-Based Weather Monitoring System

How It Works

Once powered on, each sensor reads environmental data. The Arduino UNO R4 WiFi processes this data and hosts a local web page that displays real-time values. Since the dashboard is served over your local network, there's no dependency on internet access or cloud platforms. Any device connected to the same Wi-Fi can access it.

Real-World Applications

This weather station can be adapted for various use cases:

  • Educational Projects – Great for learning about sensors, IoT, and data visualization
  • Smart Homes – Monitor indoor/outdoor conditions for automation
  • Gardening & Agriculture – Track weather changes for irrigation or crop planning
  • Offline Setups – Works in remote areas without relying on cloud platforms

For Arduino code and full tutorial: How to Build an IoT-Based Weather Monitoring System Using Arduino

https://circuitdigest.com 

Robotics Projects |Arduino Projects | Raspberry Pi Projects|

Tuesday, 6 May 2025

PMW3901 Optical Flow Sensor with ESP32 – Position Hold for Drones

PMW3901 Optical Flow Sensor with ESP32

The PMW3901 is an optical flow sensor often used in drones and robotics to detect motion relative to the ground. It helps maintain a steady position, especially when GPS signals are weak or unavailable. This guide explains how the sensor works, its features, and how to use it with an ESP32. It also includes examples for visualizing motion on a web browser and an OLED display.

What is the PMW3901 Optical Flow Sensor?

The PMW3901 is a compact sensor that detects movement by tracking patterns in grayscale images. It does not provide absolute position data but measures how much and in what direction the surface underneath has shifted.

Common PMW3901 Modules

1. Pimoroni PMW3901 Pinout

Pimoroni-PMW3901-Sensor-Module-Pinout


2. Generic PMW3901 Module Pinout

PMW3901-Sensor-Pinout

Applications of the PMW3901 optical flow sensor with ESP32

  • Indoor Navigation
  • Position Holding in Drones
  • Autonomous Robots
  • Gesture Recognition Systems

The PMW3901 is a reliable optical flow sensor suitable for indoor drones and small robots. It provides real-time X/Y movement data, uses low power, and can be integrated with ESP32 using SPI. Visualization on a web interface or OLED display helps in testing and understanding motion detection.

For in-depth explanation and code : Interfacing PMW3901 Optical Flow Sensor With ESP32

https://circuitdigest.com 

Robotics Projects |Arduino Projects | Raspberry Pi Projects|

Wednesday, 7 February 2024

Proximity Sensors: Types and Applications

Proximity sensors are important tools used in industries to detect the presence of objects without needing physical contact. They serve various purposes, including enhancing automation, safety, and efficiency in different applications.


These sensors come in several types:

Inductive Proximity Sensors: Detect metal objects by using electromagnetic induction. They find applications in position sensing, object detection, and automated machinery.

Capacitive Proximity Sensors: Identify a wide range of materials, including conductive and non-conductive substances, by measuring changes in electrical capacitance. They are used in level sensing, liquid detection, and object proximity sensing.

Ultrasonic Proximity Sensors: Utilize sound waves to detect objects and measure their distance by analyzing the time it takes for sound waves to bounce back. They are effective in presence detection, level sensing, and collision avoidance systems.

Photoelectric Proximity Sensors: Use light to detect the presence or absence of objects. They come in various types such as through-beam, retro-reflective, and diffuse reflective, and are widely used in conveyor systems, packaging, and object counting applications.

Magnetic Proximity Sensors: Identify the presence of objects by detecting changes in magnetic fields. They are commonly used in speed sensing, door position detection, and security systems.

Each type of sensor operates differently and has its own unique applications, contributing to the efficiency and safety of industrial processes. Check out the given link to know much more about the different types of proximity sensor.


Thursday, 1 February 2024

How to build an Arduino based Gesture Controlled Robot?


Create a captivating hand gesture-controlled robot with this complete guide using Arduino, MPU6050 Accelerometer, nRF24L01 Transmitter-Receiver Pair, and L293D motor driver module. The project splits into two parts: Transmitter (Arduino Uno, MPU6050, nRF24L01) and Receiver (Arduino Uno, nRF24L01, DC motors, L293D motor driver). Learn how the MPU6050 translates hand gestures into electrical signals, facilitated by the nRF24L01 for seamless wireless communication. 


Required components include Arduino Uno, Nano, NRF24L01, MPU6050, 2WD Acrylic Chassis kit, L298N Motor Driver Module, and a 7.4V Li-ion battery. Understand the MPU6050 sensor module's capabilities in measuring acceleration and rotation, while the NRF24L01 Transceiver Module ensures efficient wireless communication. 


Monday, 4 April 2022

How Rain Sensor Works & How to Use it with Arduino

The raindrop sensor also known as rain detector sensor is an easy-to-use device that can detect rainfall. It acts as a switch when raindrops fall on the sensor, other than that with slight tweaks in the code, it can also measure the intensity of the rainfall. This sensor also has a separate indicator led and an onboard potentiometer through which you can adjust the sensitivity of the output digital signal provided by the sensor.


Check out the full tutorial to interface rain sensor with Arduino

Sunday, 27 March 2022

Interfacing an IR Sensor and Soil Moisture Sensor with Arduino Uno

If you are a beginner and have recently started working with Arduino, you would like to learn and experiment interfacing it with few basic sensors. Or you might be planning to build a smart farming project or one which requires IR sensor? In this post we will share a few of recently published arduino tutorials which covers interfacing these sensors with arduino from a beginners point of view. So have a look to below tutorials.

1. Interfacing IR Sensor Module with Arduino


An infrared proximity sensor or IR Sensor is an electronic device that emits infrared lights to sense some aspect of the surroundings and can be employed to detect the motion of an object. As this is a passive sensor, it can only measure infrared radiation. This sensor is very common in the electronic industry and if you’ve ever tried to design an obstacle avoidance robot or any other proximity detection-based system, chances are you already know about this module, and if you don’t, then follow this arduino IR sensor interfacing article as here we will discuss everything about it.

2. How Does a Soil Moisture Sensor Work and how to use it with Arduino?


The soil moisture sensor is the first thing that springs to mind when it comes to building your smart irrigation system or automatic plant watering system. With this sensor in place and a little Arduino support, we can design a system that can water your plants when it's needed, avoiding overwatering and underwatering.

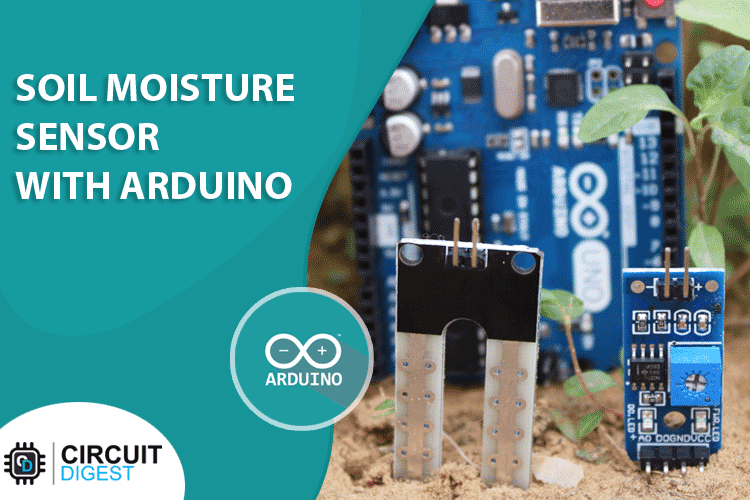
In this article, we are going to interface the soil moisture sensor with an arduino and measure the volumetric concentration of water inside the soil. This sensor is designed in a way that it can output data in both digital and analog modes. We will read this data and display the output status with an LED for digital output and we will use the serial monitor or an LED with PWM for analog output. Check out the full Arduino Soil Moisture Sensor tutorial here.

Friday, 4 June 2021

How to Interface ECG Sensor with Arduino to Diagnose Various Medical Conditions


This DIY project tutorial covers AD8232 ECG sensor working and then connecting it with Arduino Uno to run some analysis on the resulting waveform for medical diagnosis. We will also see different types of ECG sensors in the market, the lead placement for a 3 lead ECG system, and the various medical conditions that can be identified by analyzing an ECG. Apart from this, we will also understand the use of its shutdown mode and analyze the ECG signal to obtain heart rate and heart rate variability as an application. Do note that ECG and EKG are the same things so the terms can be used interchangeably.

View the full project tutorial here

Watch below video to see the project in action.