Showing posts with label API. Show all posts

Thursday, 16 July 2026

Raspberry Pi Waste Segregation System Using CircuitDigest Cloud

Separating biodegradable and non-biodegradable waste is one of those tasks we often overlook. In homes, schools, and public spaces, different types of waste usually end up in the same bin, making recycling more difficult and increasing manual effort later.

This Raspberry Pi Waste Segregation System offers a simple way to automate the process. Using a Raspberry Pi, a USB camera, and the CircuitDigest Cloud AI API, the system can identify whether a waste item is biodegradable or non-biodegradable within seconds - without training a machine learning model or creating your own dataset.

How It Works

The setup is surprisingly simple. A USB camera connected to the Raspberry Pi captures an image of the waste item. The image is then securely uploaded to the CircuitDigest Cloud, where an AI model analyzes it and classifies the waste.

Within a few seconds, the Raspberry Pi receives the result and displays whether the item is biodegradable or non-biodegradable, along with a confidence score. Images can be captured manually using the keyboard or automatically at regular intervals for continuous monitoring.

Hardware You'll Need

Circuit-Diagram-of-Waste-Segregation-using-Raspberry-Pi


You only need a few components to build the project:

  • Raspberry Pi
  • USB Camera
  • MicroSD Card
  • Power Supply

Since the AI processing runs entirely in the cloud, the Raspberry Pi only captures images and communicates with the API, making the hardware setup lightweight and beginner-friendly.

Why Use CircuitDigest Cloud?

Traditional image classification projects involve collecting hundreds of images, labeling datasets, training neural networks, and optimizing models for embedded devices. That process can take days or even weeks.

With CircuitDigest Cloud, everything is already prepared. Simply generate an API key, connect the camera, upload the provided Python code, and start classifying waste in just a few minutes. There is no need to install TensorFlow, Edge Impulse, or any other machine learning framework.

Key Features

  • AI-powered waste classification
  • No dataset collection or model training
  • Distinguishes biodegradable and non-biodegradable waste
  • Manual and automatic image capture modes
  • Simple Python implementation using OpenCV
  • Fast cloud-based processing
  • Beginner-friendly setup

Where Can It Be Used?

This project can be used in smart dustbins, schools, offices, recycling centers, public places, and educational demonstrations. It can also serve as the foundation for automated waste-sorting robots or smart recycling systems.

This Raspberry Pi Waste Segregation System shows how cloud AI can simplify computer vision projects. Instead of spending time building and training machine learning models, you can focus on creating practical solutions that solve real-world problems.

Whether you're learning AI, building an IoT project, or exploring computer vision with Raspberry Pi, this project provides an easy and effective way to build an intelligent waste classification system in just a few steps.

https://circuitdigest.com

Robotics Projects |Arduino Projects | Raspberry Pi Projects|

Thursday, 21 May 2026

Smart AI Vision with ESP32-CAM Object Detection

Object Detection With ESP32-Cam Using CircuitDigest Cloud
AI-based object detection usually sounds complicated. Most people assume you need machine learning knowledge, custom datasets, and expensive hardware to get started. But this ESP32-CAM Object Detection project proves otherwise.

Using the ESP32-CAM module and the CircuitDigest Cloud Object Detection API, you can build a real-time ESP32-CAM object detection with just a push button, WiFi connection, and a few lines of Arduino code. No model training, no Edge Impulse workflow, and no custom dataset preparation required.

How This ESP32-CAM Object Detection System Works

Detected Objects in the Image

The working principle is very simple. When the push button is pressed, the ESP32-CAM captures an image and sends it to the CircuitDigest Cloud through an HTTPS request.

The cloud API processes the image using its built-in object detection engine and returns:

  • Object names
  • Number of detected objects
  • Confidence scores

The detection result is then displayed in the Arduino Serial Monitor.

For example, the system can identify:

  • Mobile phones
  • Laptops
  • Cups
  • Cars
  • Books
  • People
  • Animals

and many other common objects.

Hardware Required

Circuit Diagram Object Detection Project

One reason this project is beginner-friendly is the minimal hardware setup. You only need:

  • ESP32-CAM module
  • Push button
  • Breadboard
  • Jumper wires

If you are using the standard ESP32-CAM without onboard USB, you’ll also need an FTDI programmer for uploading code.

Why Use Cloud-Based Detection?

CircuitDigest Home Page

Traditional AI object detection systems usually require:

  • Dataset collection
  • Image labeling
  • Model training
  • Model optimization

That process can take hours or even days.

With CircuitDigest Cloud, all of that complexity is removed. The cloud already has pre-trained object detection models, so your ESP32-CAM simply captures images and uploads them for analysis.

This makes development much faster and easier, especially for beginners.

Setting Up the Detection System

The setup process is straightforward:

  1. Create a CircuitDigest Cloud account
  2. Select object classes you want to detect
  3. Adjust the confidence threshold
  4. Generate the ESP32-CAM Arduino code
  5. Upload the code using Arduino IDE

Once powered ON, the ESP32-CAM starts working immediately.

The cloud dashboard also lets you:

  • Monitor API usage
  • View previous detection logs
  • Test detection without hardware

Real-Time Detection Results

When the button is pressed, the camera captures an image and uploads it to the cloud.

Within seconds, the Serial Monitor displays results like:

  • Laptop detected → Confidence 92%
  • Phone detected → Confidence 88%
  • Mouse detected → Confidence 84%

Good lighting and proper camera focus significantly improve accuracy.

Common Issues and Fixes

A few common issues beginners may face include:

  • Camera initialization failure
  • Power instability
  • Blurry images
  • Frequent ESP32 restarts

Most of these problems are solved by:

  • Using a stable 5V supply
  • Adjusting the camera lens focus
  • Improving lighting conditions
  • Selecting the correct board settings in Arduino IDE

This ESP32-CAM Object Detection project is an excellent introduction to AI-powered computer vision without the usual complexity of machine learning workflows.

With just an ESP32-CAM and a cloud API, you can build a compact object detection system capable of recognizing real-world objects in seconds. It’s simple, affordable, and surprisingly powerful for DIY AI projects.

https://circuitdigest.com 

Robotics Projects |Arduino Projects | Raspberry Pi Projects|

Thursday, 26 March 2026

ESP32 Send Email Notifications (Simple IoT Notification System)

Send Email from ESP32 using CircuitDigest Cloud

Ever wanted your project to notify you instantly when something important happens? Instead of constantly checking sensors or dashboards, what if your device could just send you an email?

That’s exactly what this project ESP32 Send Email Notifications  does. Using an ESP32 and a simple ultrasonic sensor, you can build a smart system that automatically sends email alerts whenever a condition is triggered. And the best part - no complex setup, no paid services. Everything runs using the CircuitDigest Cloud Email API.

What This Project Does

This setup continuously monitors distance using an ultrasonic sensor. When an object comes too close (below a set limit like 30 cm), the ESP32 sends an email alert instantly.

So instead of manually monitoring, you get notified in real time. Simple, effective, and very useful.

How It Works

The working logic is straightforward.

The ESP32 connects to your WiFi network and keeps reading distance values from the ultrasonic sensor. As long as everything is normal, nothing happens.

But the moment an object crosses the threshold:

  • ESP32 detects the event
  • It prepares a JSON request
  • Sends it securely to CircuitDigest Cloud
  • The cloud formats and delivers the email

Your inbox gets the alert within seconds.

And importantly, the ESP32 doesn’t directly send emails. It just sends data to the cloud, which handles formatting, templates, and delivery.

Components Required

Real-time-Setup-of-the-ESP32-with-Ultrasonic-Sensor

You don’t need much hardware for this project:

  • ESP32 
  • Ultrasonic sensor 
  • Breadboard and jumper wires

That’s it. No GSM module, no external email libraries, no complicated configuration.

Circuit Overview

Circuit-Diagram-of-ESP32-Setup

The wiring is simple:

  • Trigger pin - GPIO 32
  • Echo pin - GPIO 33
  • VCC and GND - Power

Once connected, the ESP32 can measure distance in real time and decide when to send alerts.

Why Use This Approach?

There are many ways to send notifications, but this method has clear advantages:

  • No SMTP setup needed
  • No third-party email libraries
  • Works over HTTPS 
  • Pre-built templates make emails look clean
  • Completely cloud-managed

This makes it beginner-friendly and scalable at the same time.

Real-World Applications

This project can be used in many practical scenarios:

  • Intrusion detection systems
  • Smart parking alerts
  • Safety monitoring
  • Industrial warning systems
  • Object detection in automation setups

Anywhere you need instant alerts without manual monitoring, this fits perfectly.

This ESP32 Send Email Notifications  is a great example of how simple IoT projects can solve real problems. With just a sensor and a microcontroller, you can build a smart notification system that works reliably in real time.

Once you understand this setup, you can easily expand it - add more sensors, send richer emails, or combine it with SMS or WhatsApp alerts.

If you’re getting started with IoT, this is definitely a project worth building.

https://circuitdigest.com 

Robotics Projects |Arduino Projects | Raspberry Pi Projects|

Monday, 16 June 2025

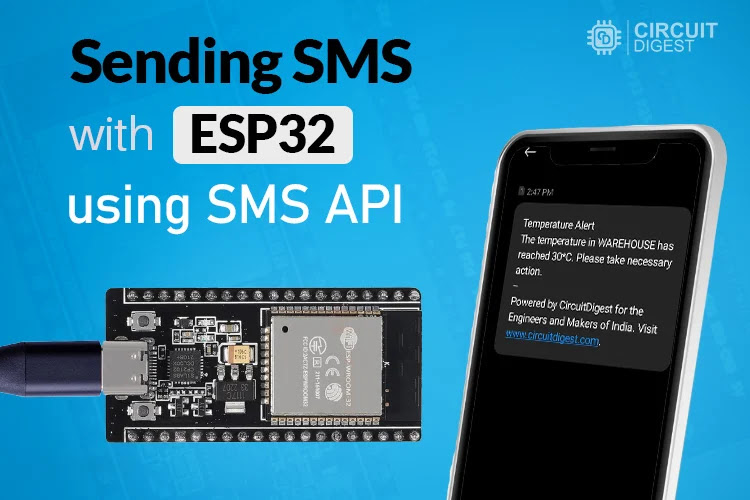
Learn How to Send SMS with ESP32 Using SMS API


Forget bulky GSM modules and SIM cards, now you can send real-time SMS alerts with ESP32 using the free SMS API from Circuit Digest Cloud. Perfect for applications like temperature monitoring, motion detection, or door-opening alerts. In this project learn how to deliver instant notifications directly to your phone without any apps, dashboards, and fees.

How It Works

  • ESP32 connects to Wi‑Fi using SSID and password.
  • It reads sensor data (e.g., temperature via DHT11).
  • If a threshold is crossed (e.g., temp ≥ 30 °C), ESP32 sends an HTTP request to the SMS API.
  • Circuit Digest Cloud validates your API key and sends an SMS to the linked phone number.
Block-Diagram-ESP32-SMS


What You Will Need

  • ESP32 Development Board
  • DHT11 Temperature Sensor (or any sensor of your choice)
  • Breadboard + Jumper Wires
  • 5V USB Power Supply

Circuit Diagram

Circuit-Diagram-of-ESP32-SMS-API

Getting Started: SMS API Key

  1. Visit Circuit Digest Cloud, sign in or register

  2. Generate your free API key (valid for 100 SMS/month)

  3. Add recipient phone number(s) via OTP

  4. Choose an SMS template (e.g., Template ID 102 for temperature alerts)

Hardware-setup-of-API-based-ESP32-SMS-Sender

Applications of SMS API with ESP32

  • Smart Home & Security: Get alerts for critical events

  • DIY Prototyping: Fast, hardware-free SMS integration

  • Educational Projects: Learn HTTP, JSON, cloud APIs ,  all through ESP32