Showing posts with label IR sensor. Show all posts

Wednesday, 21 May 2025

DIY Smart Helmet with Alcohol, Drowsiness and Theft Detection Using Arduino Uno

Road accidents are a major global concern, especially involving two-wheeler riders. Many of these accidents are due to drunk driving, drowsiness, or not wearing a helmet. The IoT Based Smart Helmet aims to reduce these risks by integrating safety features directly into the helmet. This project incorporates alcohol detection, drowsiness detection, helmet wear detection, and theft detection to ensure the rider’s safety and enforce responsible riding behavior.

Working Principle

The system is designed to prevent the bike from starting unless all safety conditions are satisfied:
  • IR sensor detects if the helmet is worn.
  • MQ-3 sensor checks for alcohol in breath.
  • If alcohol is detected, buzzer sounds and vehicle stays off.
  • Drowsiness detection monitors rider’s alertness.
  • RF transmitter sends data from helmet to vehicle.
  • Vehicle starts only if all safety conditions are met.
Parts Marking of Smart Helmet Transmitter Side

Transmitter Side

  • Arduino UNO R3 
  • 433 MHz RF Transmitter 
  • IR Sensor - wear detection and drowsiness detection
  • MQ-3 Sensor - alcohol detection
  • LED & Buzzer
  • Helmet 
  • Breadboard 
Receiver Side
  • Arduino UNO R3
  • 433 MHz RF Receiver
  • 16x2 LCD Display with I2C Module
  • 1-Channel Relay Module
  • LED & Buzzer
  • Breadboard
Sleep Detection By Smart Safety Helmet

Applications
  • Two-Wheeler Safety
  • Smart Transportation
  • Theft Prevention
  • Educational Tool
For full assembly details and code : Smart Helmet using Arduino

Monday, 24 February 2025

How to Build a Speed Sensor Using Arduino – A Step-by-Step Guide


Speed Sensor using Arduino


Introduction

Want to measure speed with an Arduino? A speed sensor helps calculate the velocity of moving objects using infrared or magnetic sensors. In this guide, we will walk you through the step-by-step process of building an Arduino-based speed sensor, including circuit connections, code, and applications.

What is a Speed Sensor?

A speed sensor is a device that detects the movement of an object and measures its velocity. It is commonly used in vehicles, industrial automation, and robotics. In this project, we use an IR sensor and Arduino to track speed.

Components Required

To build this project, you will need:
  1. Arduino Uno
  2. IR Sensor Module
  3. LCD Display (16x2)
  4. Resistors & Capacitors
  5. Breadboard & Jumper Wires

Circuit Diagram & Working


The IR sensor detects when an object passes through it. By measuring the time taken between two points, we calculate the speed using the formula:

Speed = Distance / Time

Applications of Arduino Speed Sensors

  • Automobile speed monitoring
  • Industrial conveyor belt tracking
  • Robotics & automation
  • Sports performance analysis

Building an Arduino-based speed sensor is simple and effective. With a few components and code modifications, you can customize it for different applications. Try this project and share your results.

Click here to explore the project in detail How to Build a Speed Sensor using Arduino?

Get the complete more projects with full code and schematics on our https://circuitdigest.com 

Robotics Projects |Arduino Projects | Raspberry Pi Projects|

Sunday, 27 March 2022

Interfacing an IR Sensor and Soil Moisture Sensor with Arduino Uno

If you are a beginner and have recently started working with Arduino, you would like to learn and experiment interfacing it with few basic sensors. Or you might be planning to build a smart farming project or one which requires IR sensor? In this post we will share a few of recently published arduino tutorials which covers interfacing these sensors with arduino from a beginners point of view. So have a look to below tutorials.

1. Interfacing IR Sensor Module with Arduino


An infrared proximity sensor or IR Sensor is an electronic device that emits infrared lights to sense some aspect of the surroundings and can be employed to detect the motion of an object. As this is a passive sensor, it can only measure infrared radiation. This sensor is very common in the electronic industry and if you’ve ever tried to design an obstacle avoidance robot or any other proximity detection-based system, chances are you already know about this module, and if you don’t, then follow this arduino IR sensor interfacing article as here we will discuss everything about it.

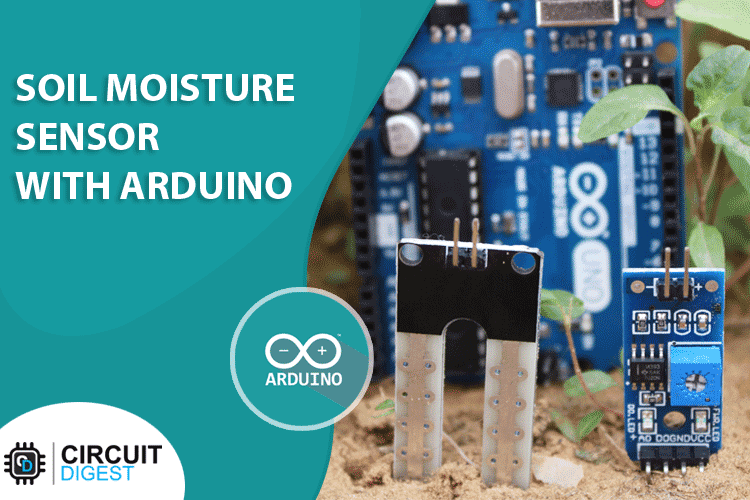
2. How Does a Soil Moisture Sensor Work and how to use it with Arduino?


The soil moisture sensor is the first thing that springs to mind when it comes to building your smart irrigation system or automatic plant watering system. With this sensor in place and a little Arduino support, we can design a system that can water your plants when it's needed, avoiding overwatering and underwatering.

In this article, we are going to interface the soil moisture sensor with an arduino and measure the volumetric concentration of water inside the soil. This sensor is designed in a way that it can output data in both digital and analog modes. We will read this data and display the output status with an LED for digital output and we will use the serial monitor or an LED with PWM for analog output. Check out the full Arduino Soil Moisture Sensor tutorial here.