Monday, 3 June 2019

DIY IoT Based Biometric Attendance Project using Arduino

In this project we use IoT to make attendance system more useful and online accessible. Most of the attendance systems generally store the information over a micro SD card and have to be connected to software via a computer to access the information.
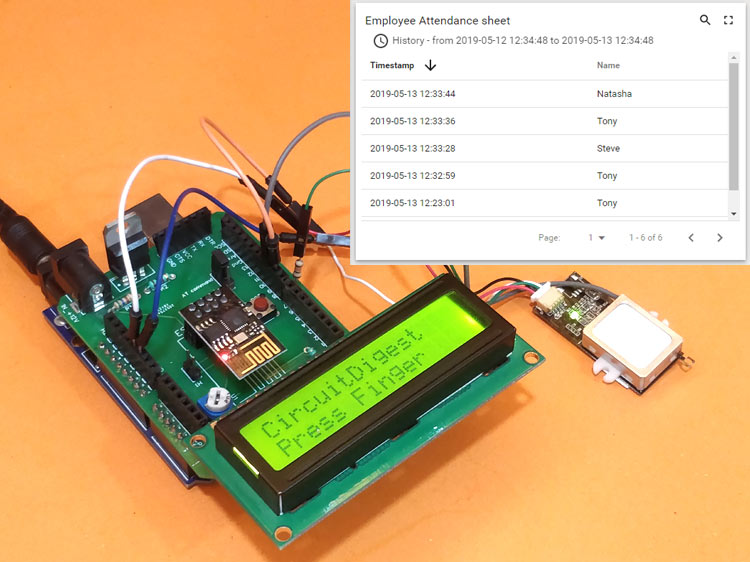
IoT based Biometric Attendance system using Arduino and Thingsboard

So here we use Arduino and an IoT platform called Thingsboard to build a biometric attendance system that scans for fingerprint and on successful identification of the person it will log the information to the cloud platform ThingsBoard by using the ESP8266 Wi-Fi module. This information can then be displayed in the dashboard of ThingsBoard making it available for the required authorities to view and analysis information over the internet without having any direct physical access to the hardware.

Interesting? Follow this Circuit Digest tutorial to make this biometric attendance system project.

Below is the demonstration video of the project:


Tuesday, 9 April 2019

Interfacing a Camera Module with Arduino Uno


In this DIY project a OV7670 camera module is interfaced with Arduino UNO to click and store images.

Arduino OV7670 Camera Module Interfacing circuit hardware


The OV7670 camera module works on 3.3V, so it becomes important to avoid Arduino which gives 5V output at their Output GPIO pins. The OV7670 is a FIFO camera. But in this tutorial, the picture or frames will be grabbed without FIFO.

Below are some of the pictures captured using the above shown hardware.
Captured Image1 using OV7670 Camera Module with Arduino UNO
Captured Image2 using OV7670 Camera Module with Arduino UNO

Check out the complete tutorial on below link:
https://circuitdigest.com/microcontroller-projects/how-to-use-ov7670-camera-module-with-arduino 

Tuesday, 5 March 2019

Digital Wall Clock using Atmega16 and DS3231 RTC

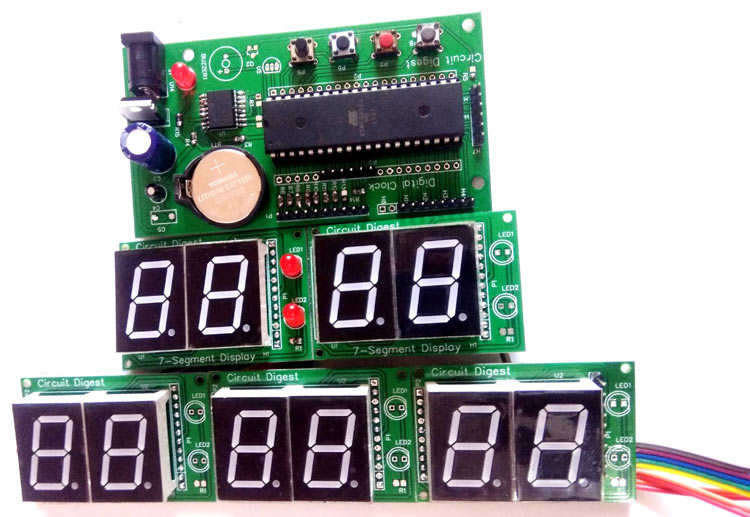
This is a DIY PCB project for a Digital wall clock, which is made using Atmega16 microcontroller and DS3231 RTC module.


In this Digital Clock Project, ten common anode 7-segment displays of 0.8-inch are used to display time and date. Here seven segment displays are used to show hour, minute, date, month and year. Our PCB design also has options to display seconds and temperature, which can be displayed by adding more display units.

You can watch the video below for more details of this AVR project.

Monday, 11 February 2019

Using Google Firebase with ESP8266 NodeMCU

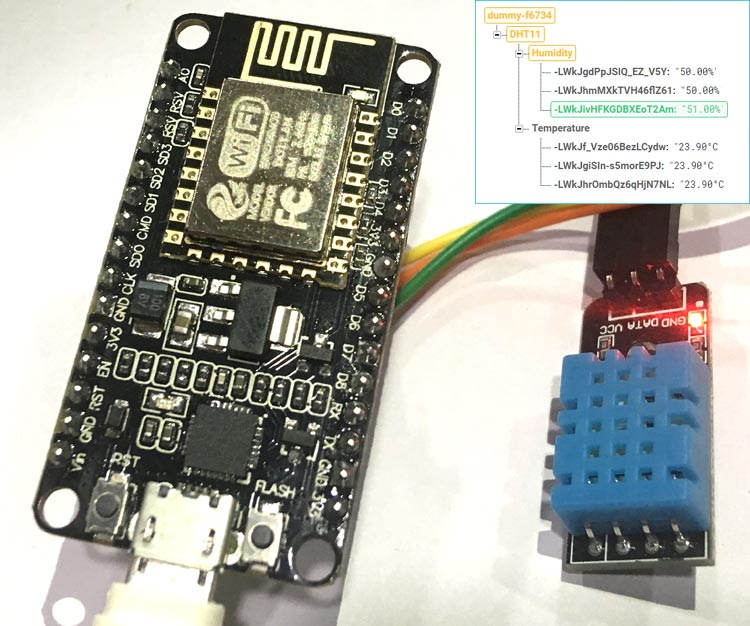
In this DIY project will be building a project where we’ll use a temperature & humidity sensor DHT11 and a NodeMCU ESP8266 Module to log the temperature and humidity in real time on Google’s Firebase database server.


The complete project is divided into two sections. First we start with assembling the hardware components and uploading firmware into it. And second, we will use Firebase to setup with NodeMCU to exchange real time data.

Find the complete project tutorial on circuit digest: https://circuitdigest.com/microcontroller-projects/sending-temperature-and-humidity-data-to-firebase-database-using-esp8266

Monday, 4 February 2019

Interfacing ESP8266 with ARM7-LPC2148 and Creating a Webserver to control an LED


ESP8266 Wi-Fi transceiver provides a way to connect a microcontroller to the network. It is widely used in IoT projects as it is cheap, tiny and easy to use. This WiFi module can be used with any microcontroller to connect it with internet. In some of the following tutorials, it is used with Arduino and Raspberry pi, to create webserver such as Raspberry webserver and Arduino webserver.

ESP8266 Interfacing with ARM7-LPC2148- Creating a Webserver to control an LED

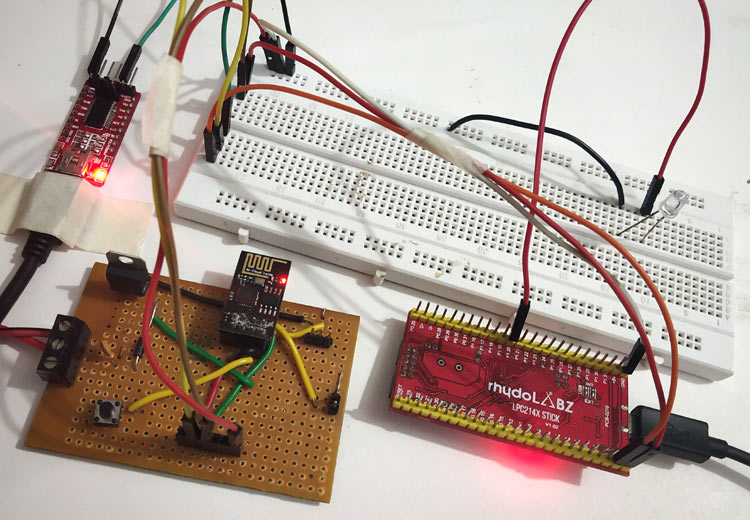
To interface an ESP8266 Module with the ARM7-LPC2148 microcontroller and create a webserver to control the LED connected to LPC2148. The workflow will go like this:

  • Send AT commands from LPC2148 to ESP8266 to configure ESP8266 in AP mode
  • Connect the laptop or computer Wi-Fi with the ESP8266 Access point
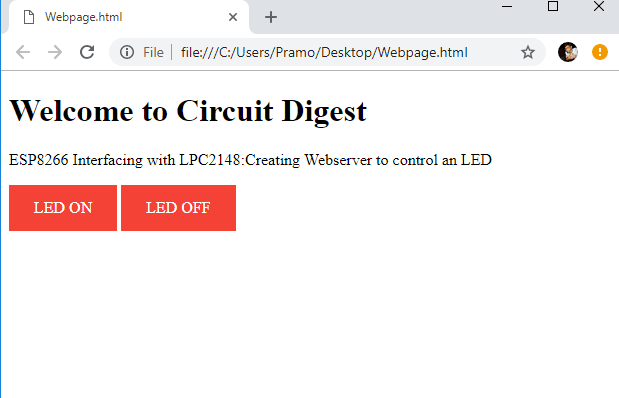
  • Create a HTML webpage in PC with Access point IP address of the ESP8266 webserver
  • Create a program for LPC2148 to control the LED according to the value received from ESP8266


If you are completely new to ESP8266 Wi-Fi module visit the below links to get familiar with ESP8266 Wi-Fi module.


You can check the complete tutorial to interface ESP8266 module with LPC2148:  https://circuitdigest.com/microcontroller-projects/iot-based-ARM7-LPC2148-webserver-to-control-an-led 

Wednesday, 23 January 2019

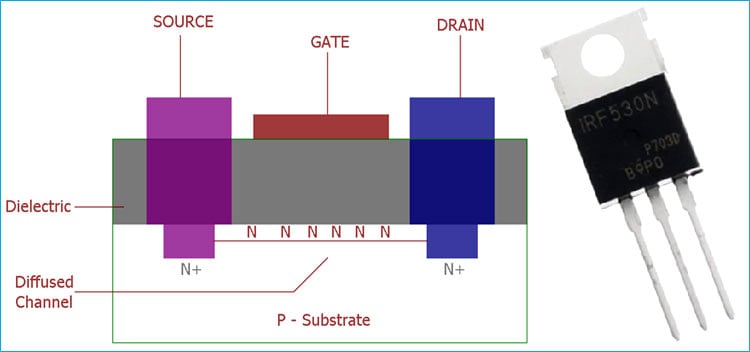
What is MOSFET and Where are they Used?

MOSFET is basically a transistor which uses field effect. MOSFET stands for Metal Oxide Field Effect Transistor, which has a gate. The gate voltage determines the conductivity of the device. Depending on this gate voltage we can change the conductivity and thus we can use it as a switch or as an amplifier like we use Transistor as a switch or as an amplifier.

MOSFET Amplifier

MOSFET provides very high input impedance and it is very easy to bias. So, for a linear small amplifier, MOSFET is an excellent choice. The linear amplification occurs when we bias the MOSFET in the saturation region which is a centrally fixed Q point.

Check out the following article to learn more about MOSFETs

Monday, 10 December 2018

Interfacing OLED Display with Android Phone

connecting OLED display with Android Phone using bluetooth

Most of us would be familiar with the 16×2 Dot matrix LCD display that is used in many projects to display some information to the user. But these LCD displays have a lot of limitation in what they can do. In this tutorial, we will use OLED to display some basic information from the Android smartphone like Time, date, network strength and battery status. This project provides a basic idea and framework to build an Arduino based SmartWatch and can be further extended to display incoming calls, messages and many more on OLED display.

Here you can find the basic circuit diagram to interface the OLED with Android phone using a bluetooth module:

Circuit Diagram for Interfacing OLED display with Android Phone to build a Smart Watch

To check out the complete project with codes and required libraries for arduino, visit the link below: