Friday, 4 June 2021

How to Interface ECG Sensor with Arduino to Diagnose Various Medical Conditions


This DIY project tutorial covers AD8232 ECG sensor working and then connecting it with Arduino Uno to run some analysis on the resulting waveform for medical diagnosis. We will also see different types of ECG sensors in the market, the lead placement for a 3 lead ECG system, and the various medical conditions that can be identified by analyzing an ECG. Apart from this, we will also understand the use of its shutdown mode and analyze the ECG signal to obtain heart rate and heart rate variability as an application. Do note that ECG and EKG are the same things so the terms can be used interchangeably.

View the full project tutorial here

Watch below video to see the project in action.


Monday, 24 May 2021

DIY Raspberry Pi UPS HAT – An Uninterrupted Power Supply to Keep your Pi Safe during Power Failure


Raspberry Pi is a small or mini-computer that can be used in different types of small to large embedded, IoT, Industrial IoT applications. As this is a computer that could run different operating systems, a shutdown of this minicomputer is an important thing to ensure that everything is saved, the operating system properly ended all required tasks, and it is safe to turn the device off. Uncertain failure of power could damage the Pi as well as the operating system could also break down. Previously we have built many Raspberry Pi Projects and most of them needed to work 24x7 so, this project can act like a Raspberry pi UPS hat and can be used to keep our raspberry pi on during power failure.

View the full project tutorial:

DIY Raspberry Pi UPS

Monday, 23 November 2020

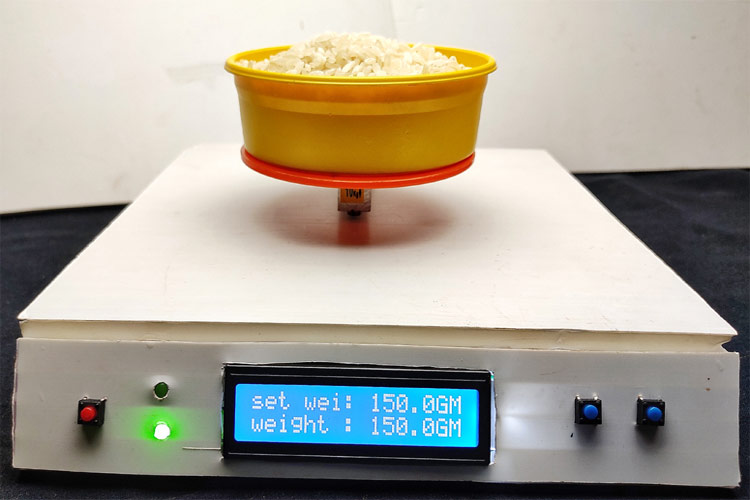
DIY Portable Arduino Weighing Machine using Load Cell


This weighing machine is perfect for local stores, where they pack items in bulk quantity. Like commercial products, our weight scale will have a zero button that zeroes out the scale. Also, It has an option to set weight for measurement, when the measuring weight reaches the set weight, a buzzer beeps fast and stops when the set weight equals the measuring weight. This way, the user can pack it just by hearing the sound and would not have to look at the display. As this is a very simple project, we will be building this very easily using components like Arduino and strain gauge load cell. 


Watch the below video for the complete working of this Arduino Weighing Machine.


Get the circuit diagram, code and required instructions to build the project in this tutorial.


Thursday, 12 November 2020

Using Arduino Millis() Function for Multi-tasking

This tutorial covers performing Multitasking with Arduino millis function. Generally a delay() function is used in Arduino for a periodic task like LED Blinking but this delay() function halt the program for some definitive time and don’t allow other operations to perform. So this article explains how we can avoid use of delay() function and replace it with millis() to perform more than one tasks simultaneously and make the Arduino a Multitasking controller. Before going into detail let’s start with understating Multitasking.

To learn how to make the circuit and write code for performing multitasking in the this detailed Arduino Millis tutorial

Below you can watch the demonstration video:

Thursday, 5 November 2020

How to Build a Compact and Low Power Solid-State Relay to Control AC Home Appliances using ESP8266

The best alternative for an electromechanical relay is a solid-state relay. A solid-state relay is a type of semiconductor-based relay that can be used as a substitute for an electromechanical relay to control electrical loads.


In this project, we will make a Solid-State Relay using a single component and we will control an AC load in 230VAC operation. The specification used here is limited, we have chosen 2A of Load to be operated using this Solid-State-Relay. The aim is to build a compact PCB for a solid state relay that could be directly interfaced and controlled with the 3.3V GPIO pins of Nodemcu or ESP8266. To accomplish that we have fabricated our PCB boards from PCBWay and we will assemble and test the same in this project.
View the full project tutorial

Watch the video below:

Wednesday, 19 August 2020

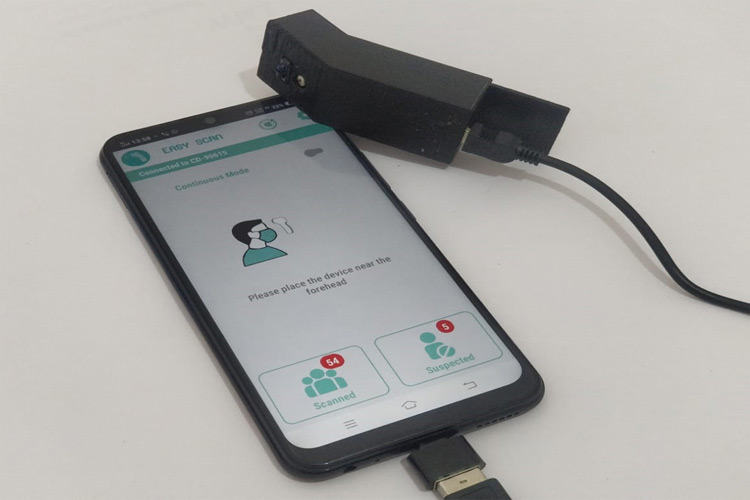
Contactless Smart Infrared Thermometer using Arduino and Android App


In this article we explain designing a Low cost, Easy to build Contactless Thermometer that can measure body temperature, log them into an excel along with the picture of the individuals so that the record can be easily shared with concerned authorities. 

We can create a simple Android application that can communicate with our thermometer and perform other activities like data logging and image capture. This way we can not only make it work faster but can also increase its potential application by instantaneously sharing log results with pictures on WhatsApp, Gmail, or any other preferred platform. This is why we created our Android application called “Easy Scan” which is open-sourced and the APK is also free to download, more on this later. So the only material required for this project are as below:

You can check out the link below for the complete DIY project for this handheld thermometer.

Watch the video below to understand more how this thermometer works:


For similar interesting projects, please see the links below:

Thursday, 4 June 2020

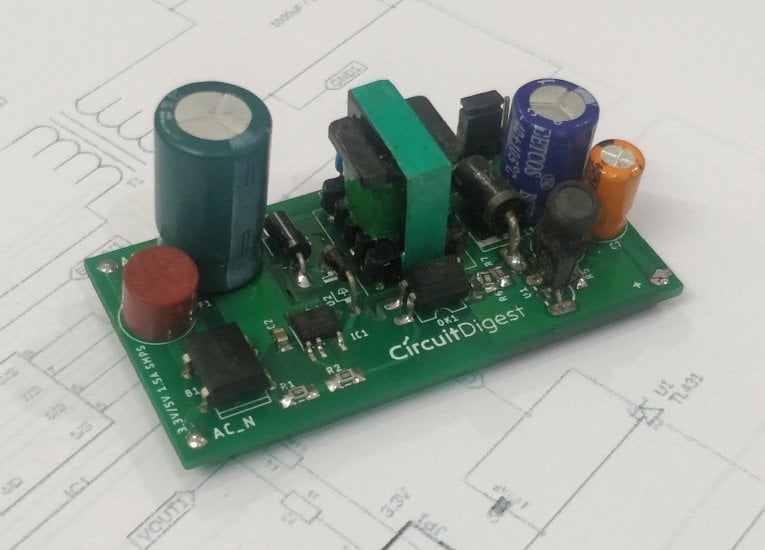
Design your own Compact 5V/3.3V SMPS Circuit for Embedded and IoT Projects


Here we will build a SMPS that can be used for general purposes and has a simple module shape to be used in space-related situations. Nowadays, the Internet of Things uses various wifi-based processors like NodeMCU, ESP32, and ESP12E, etc. which operate on 5V or 3.3V. These modules are highly compact and hence to power these boards, it makes sense to use smaller SMPS circuits that can go on the same board, instead of using a separate SMPS circuit. Hence in this article, we will learn how to build a SMPS circuit that can either output 5V or 3.3V (hardware configurable using jumper), the circuit design and PCB layout is also provided, so you can simply port this into your existing design. Here our PCB boards are manufactured by PCBGoGo, a china based low cost high quality PCB prototype and PCB assembly service company.