Arduino would have been the first board for many hobbyists (including me) and engineers out there when they started with electronics. However, as we start building more and dig deep we would soon realise that Arduino is not industry ready and its 8-bit CPU with a ridiculously slow clock, it does not give you enough juice for your projects. Hopefully though, we have the new STM32F103C8T6 STM32 Development Boards (Blue Pill) in the market now which can easily outperform Arduino with its 32-bit CPU and ARM Cortex M3 architecture. Another honey pot here is that we can use the same old Arduino IDE to program our STM32 Boards. So in this tutorial, let us get started with the STM32 to know a bit of basics about this board and blink the on-board LED using the Arduino IDE.
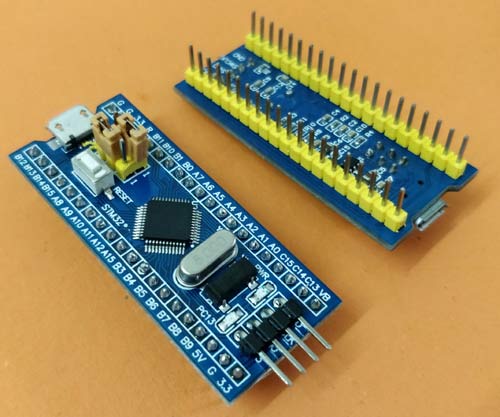
The STM32 board a.k.a Blue Pill is a Development board for the ARM Cortex M3 Microcontroller. It looks very much similar to the Arduino Nano but it packs in quite a punch. The Development board is shown below.

Working with STM32 development board is quite easy. You can check below the series of tutorials which covers basics as well as higher level tutorials in order of increasing difficulty.
- Getting Started with STM32 using Arduino IDE: Blinking LED
- Interfacing 16x2 LCD with STM32F103C8T6
- Programming STM32F103C8 Board using USB Port
- How to use ADC in STM32F103C8 - Measuring Analog Voltage
- Pulse width Modulation (PWM) in STM32F103C8: Controlling Speed of DC Fan
- Interfacing Bluetooth HC-05 with STM32F103C8 Blue Pill: Controlling LED
- Interfacing Stepper Motor with STM32F103C8
You can explore more STM32 tutorials and projects here: https://circuitdigest.com/stm32-projects-and-tutorials