Showing posts with label circuits. Show all posts

Monday, 5 February 2024

Ohm's Law: Formulas, Examples, and Calculator

Ohm's Law, named after the scientist Georg Simon Ohm, defines the relationship between Voltage (V), Current (I), and Resistance (R) in circuits. It states that electric current (I) is directly proportional to voltage (V) and inversely proportional to resistance (R).


Key Points:

  • Formulas: V = IR, I = V/R, R = V/I
  • These formulas enable calculations for voltage, current, resistance, and power (P).
  • Illustration: Two circuits with 12V source and different resistances show Ohm's Law in action.
  • Calculation Example: For a 110Ω circuit, I ≈ 0.11A; for a 220Ω circuit, I ≈ 0.5A.

Click the link to use the Ohm's Law Calculator - Ohm's Law Calculator (circuitdigest.com)


Wednesday, 5 July 2017

Top 10 Electronics Projects from June 17

Below are the top 10 electronics projects from Circuit Digest.

This is a simple arduino based project where an Arduino shield is designed on PCB which uses an  Accelerometer ADXL335 to detect the vibrations. When the accelerometer detects the vibrations it sends signal to Arduino Uno which in turn start the alarm.

You can watch the demonstration video below:


2. Sending Text Messages using ESP8266

ESP8266 is a popular microcontroller cum WiFi transceiver popularly used to connect Arduino and other microcontrollers with internet. In this DIY project, ESP is used with just few components and IFTTT online service to send text messages to any mobile phone.

Here you can see the demo video:


3. ESP8266 based Home Automation

This is another interesting application using ESP8266 to control home appliances using just voice commands. For this, they have used an android app to give pre-set voice commands. To build this project, check out the full project in the link given above.

The working of this project is demonstrated in the youtube video attached below:


4. Circuit Breaker Schematic

Circuit breaker is an important requirement to protect your electrical devices from high/low voltages. It doesn't use any microcontroller and merely use an op-amp IC and voltage regulator. You can build your own circuit breaker by using the details shared in this project.

Working is shown in the video:


5. Simple Digital Voltmeter Circuit

Buying a digital voltmeter or a multimeter is not a big deal but making one yourself is surely a good learning experience. Here you can find a voltmeter using ICL7107 which is quite popular for measuring voltage. They have built the entire circuit on PCB so you can just use the PCB layout and simply or a PCB or make one yourself.

Check the demonstration video below:


6. Real Time Face Detecting Robot:
This is an interesting arduino project where they have developed an algorithm which detects the human face from any image. Along with arduino, processing is used and also a 3D printed robotic arm to hold the phone. You can download the STL files for the 3D printed part, and also the required code for processing and arduino, so it would be quite easy to build this interesting project.


7. SSD1306 OLED with Arduino
OLED displays are very useful and they also look beautiful in comparison with other displays such as 16x2 LCD. This is nice detailed tutorial which covers details on interfacing the OLED with arduino uno with an example of displaying a batman picture on the OLED.

See the video:


8. Arduino Audio Player

Arduino is a very powerful tool to build a lot of things. Here they built an Audio player which reads the song files from a SD card and play them on the speaker attached to it. To improve the voice quality there is an audio amplifier IC also used with the circuit.


9. Sending Data to Web Server using Arduino

Popular SIM900A GSM module is used here with arduino to send data to SparkFun's server. GPRS feature of GSM module is used here. See the working of this project in below video:


10. Playing Melody using Arduino Tone Function

In this tutorial they simply explained to use Arduinos tone function to create various melodies on a speaker connected with Arduino uno board. You can download the code and play various tones such as Titanic, Super Mario, etc.

Watch the video below to see the project working:


Thursday, 22 October 2015

Latest Electronics Projects and Circuits

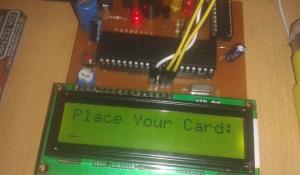
  • RFID Based Attendance System Project using 8051 Microcontroller
    In this RFID based Attendance System project, we will explain you how can we count attendance automatically by using RFID cards. RFID Tecnology (Radio Frequency Identification and Detection) is commonly used in schools, colleges, office and stations for various purposes to automatically keep a track of people.  Here we will count the attendance of an authorised person by using RFID.
  • Fire Alarm System using AVR Microcontroller
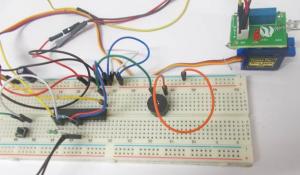
    In this project, we are going to make a Fire Alert System using ATMEGA8 microcontroller and fire sensor. Fire sensor can be of any type, however we are using IR (Infrared) based Fire Sensor. Although IR based Fire Sensors have some disadvantages mostly of inaccuracy, it is the cheapest and easiest way to detect fire.
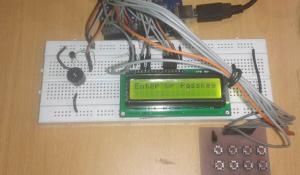
  • Digital Code Lock using Arduino
    Security is a major concern in our day to day life, and digital locks have became an important part of these security systems. One such digital code lock is imitated in this project using arduino board and a matrix keypad. 
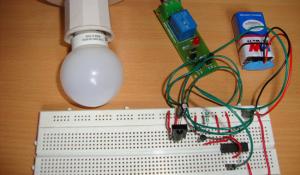
  • Remote Controlled Light Switch
    IR LED emits infrared light, and used in TV remotes. This Infrared is received by the receiver TSOP17XX (TSOP 1738used in TV). TSOP17XX receives the modulated Infrared waves and changes its output. TSOP is available in many frequency ranges like TSOP1730, TSOP1738, TSOP1740 etc. Last two digits represent the frequency (in Khz) of modulated IR rays, on which TSOP responds. Like for example TSOP1738 reacts when it receives the IR radiation modulated at 38Khz. TSOP output is active low, means it becomes LOW when IR is detected.
  • Color Detector using Arduino
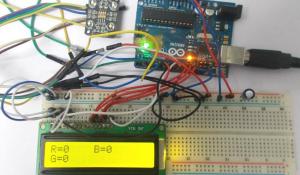
    In this project we are going to interface TCS320 color sensor with Arduino UNO. TCS320 is a color sensor which can detect any number of colors with right programming. TCS230 contains RGB (Red Green Blue) arrays. As shown in figure on microscopic level one can see the square boxes inside the eye on sensor. These square boxes are arrays of RGB matrix. Each of these boxes contain Three sensors, One is for sensing RED light intensity, One is for sensing GREEN light intensity and the last in for sensing BLUE light intensity.
  • Arduino Alarm Clock
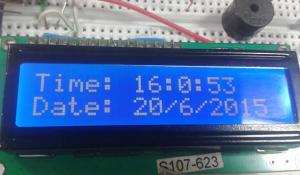
    This Arduino based Real time clock is a digital clock to display real time using a RTC IC DS1307which works on I2C protocol. Real time clock means it runs even after power failure. When power is reconnected, it displays the real time inrespective to the time and duration it was in off state. In this project we have used a 16x2 LCD module to display the time in - (hour, minute, seconds, date, month and year) format.
  • Light Intensity Measurement using LDR and ATmega8 Microcontroller
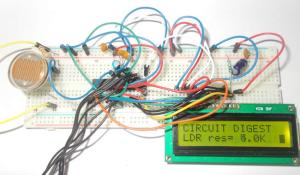
    In this project we are going to interface LDR with ATMEGA8 microcontroller, and with this we can measure LIGHT INTENSITY in the area. In ATMEGA8, we are going to use 10bit ADC (Analog to Digital Conversion) feature to measure the light intensity.
  • Digital Ammeter using AVR Microcontroller
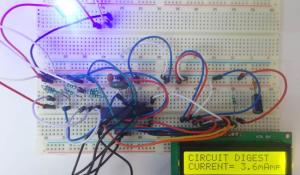
    In this project we are going to make a low range ammeter using ATMEGA8 microcontroller. In ATMEGA8, we are going use 10bit ADC (Analog to Digital Conversion) feature to do this. Although we have few other ways to get the current parameter from a circuit, we are going to use resistive drop method, because it’s the easiest and simplest way to get current parameter.
  • UART Communication Between Two ATmega8 Microcontrollers
    In this tutorial we are going to establish a serial communication between two ATMEGA8 microcontrollers. The communication established here is UART (Universal Asynchronous Receiver Transmitter) type. By this serial communication data can be shared between two microcontrollers, which is required in various embedded systems.
  • Line Follower Robot using 8051 Microcontroller
    Line follower Robot is a machine which follows a line, it may be a black line or a white line. Basically two types of line follower robots are: one is black line follower which follows black line and second one is white line follower which follows white line. Line follower actually senses the line and run over it. In our previous projects, we have made a black line follower robot using arduino but this time we are going to make white line follower using 8051 microcontroller. In this tutorial, we will also cover how to make a printed circuit board for line follower robot at home in low price. 
Check more interesting projects and circuits here: Electronics Projects