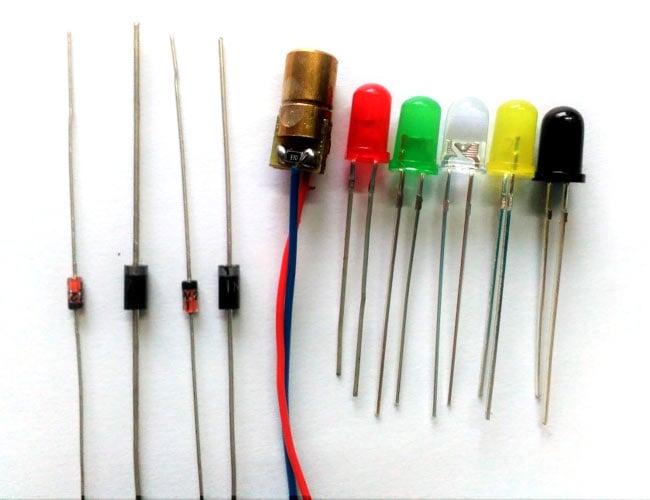
In general all the electronic devices need DC power supply but it is impossible to generate DC power so, we need an alternative to get some DC power thus the usage of diodes comes into the picture to convert AC power to DC power. A diode is a tiny electronic component used in almost all the electronic circuits to enable the flow of current in only one direction. We can say that the usage of semiconductor materials to build the electronic components was started with diodes. Before the invention of diode there were with vacuum tubes, where the applications of both these devices are similar but the size occupied by the vacuum tube will be much greater than the diodes. The construction of vacuum tubes is a bit complex and they are difficult to maintain when compared with the semiconductor diodes. Few applications of diodes are rectification, amplification, electronic switch, conversion of electrical energy into light energy and light energy into electrical energy.
These electrical and electronics engineering calculators are one of the most commonly used calculators by electronics students and circuit designers. These calculators solve common equations and formulas which takes quite a time so these calculators come handy by solving these calculations quickly.
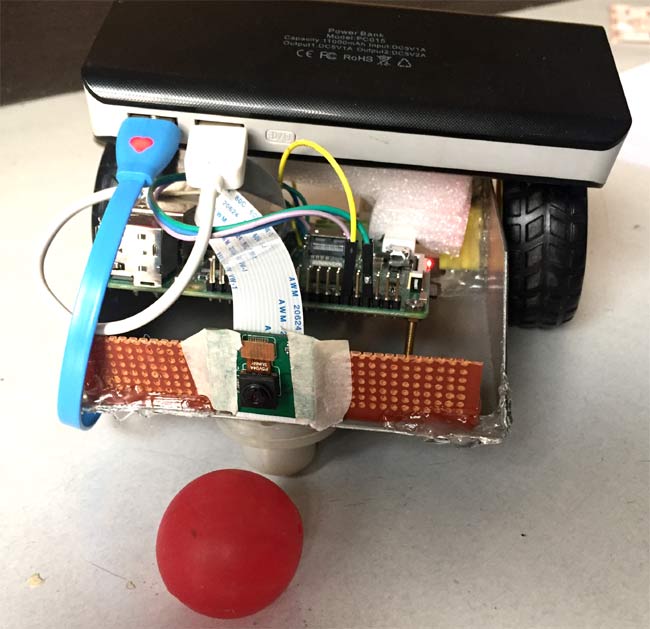
Image recognition is one of the popular way in which the robots are thought to understand objects by looking at the real world through a camera just like we do. In this project we are going to use popular development board Raspberry Pi to build a Robot that could track ball and follow it just like the football playing robots do.
Below is the picture of the robot built here:
OpenCV is popular and open source tool for Image processing but in this DIY project we are using the Processing IDE to keep the project simple and easy to build.
Go to the link below to find the complete DIY project with required circuit connections and codes: Ball Tracking Robot
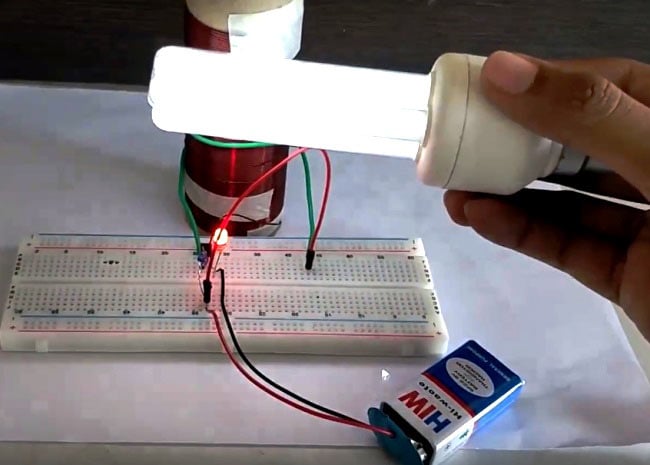
A Tesla Coil is a simple coil that creates a high voltage electric field in the air when a small input power is provided, this electric filed is strong enough to glow small light bulbs. This principle was invented by the Nicolas Tesla, who also holds the credit for inventing Induction Motors, AC current, neon bulbs, Remote controls etc..
So how to make a Tesla Coil?
To make a mini Tesla coil at home in easy way you need following materials:
Magnetic wire a.k.a Enamelled copper wire
22K Resistor
2N2222 Transistor
LED
Ordinary breadboard wire
Any non conductive cylindrical object
9V Battery (or 5V Supply)
Breadboard
Follow the below link to complete DIY tutorial on CircuitDigest.com which will guide you to make this mini Tesla coil.
Flip flops or latches can also be understood as Bistable Multivibrator as two stable states. Generally, these latch circuits can be either active-high or active-low and they can be triggered by HIGH or LOW signals respectively.
This simple circuit uses a LDR sensor to detector the presence of light and turns on or off the street lights accordingly. A demonstration of the project is done on the breadboard as shown below
This circuit mainly uses an LDR and Relay along with few other commonly used electronics components such as BC547 transistor, resistors, 1N4007 diode etc.
You can find the circuit diagram and necessary details to DIY this circuit on the following link: Street light controller circuit
Demonstration video for the project is shown below:
With a simple knowledge of Arduino and Voltage Divider Circuit, we can turn the Arduino into Digital Voltmeter and can measure the input voltage using Arduino and a 16x2 LCD display.
The circuit diagram which is used to build this arduino based voltmeter is given below. You can connect the arduino and other components as per the diagram.
Once all the components are connected you can write the code for Arduino. Here is the link given from where you can download the arduino code for voltmeter.
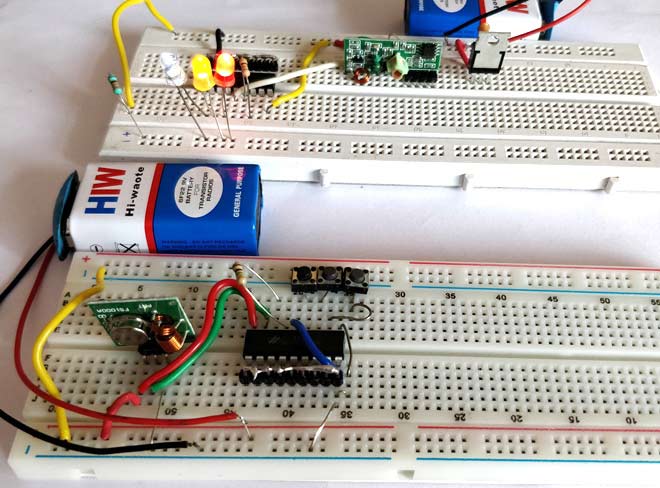
Making our projects Wireless always makes it to look cool and also extends the range in which it can be controlled. Starting from using a normal IR LED for short distance wireless control till an ESP8266 for worldwide HTTP control there are lots of ways to control something wirelessly. In this project we will learn how we can build wireless projects using a 433 MHz RF module. These modules are cheap for its functions and are easily available.
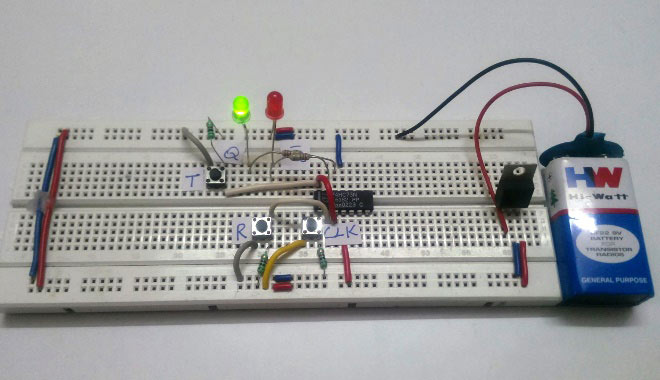
Here we will learn the basics of RF module and how to use it as a standalone RF Transmitter and Receiver. Here we have explained the RF Transmitter and Receiver Circuit by controlling the LEDs wirelessly using RF.
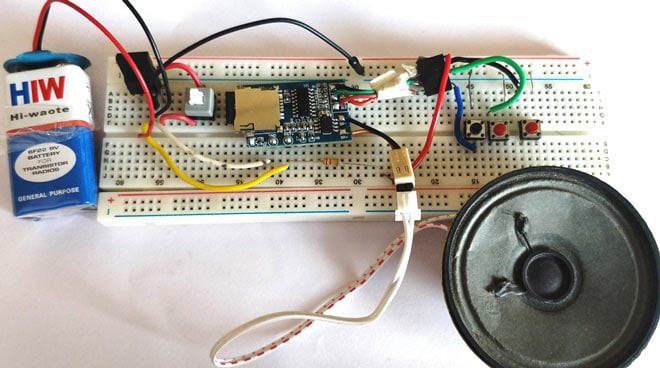
In this tutorial we will learn how to build a simple yet powerful MP3 player that could play any MP3 song, the volume and track can also be adjusted with the help of push buttons. With some extra effort you can build your own pocket MP3 Music player and take it with you on the go.
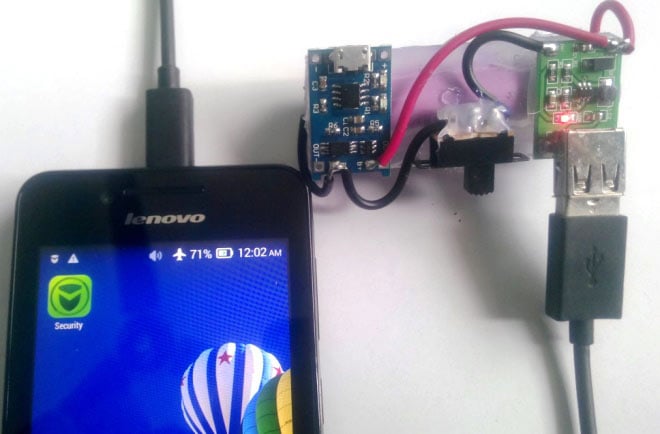
You can make your own power bank with the help of a li-ion battery, TP4056 Module and a boost converter. This portable power bank can charger your cell phone with USB cable. Here is the demonstration pic:
You can see the components in demo pic and charging the phone by using it.
Check out the link for the complete DIY instructions to build this power bank, along with a circuit diagram and connections: DIY Power Bank
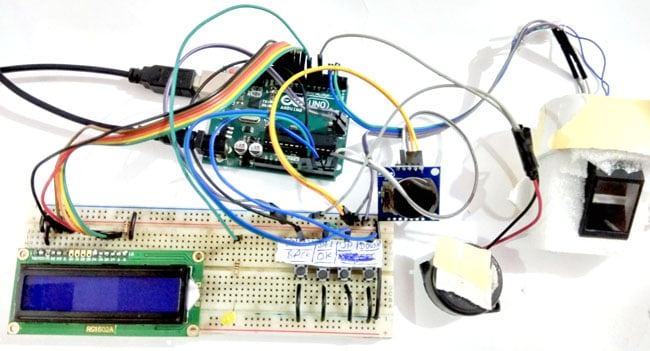
There are many kinds of attendance systems are popular such RFID based attendance systems. With latest technologies there are many kind of sensors which can effectively identify a person based on their biometric featues, such as fingerprints or retina. In this project we have built a fingerprint sensor based attendance system which will make the attendance based on the matching of fingerprints.
As shown in the above breadboard setup it uses a fingerprint sensor, LCD, buzzer, input buttons which are useful to give input and display output. To get the circuit connections for this project and complete arduino code, visit the link below which will redirect to the project page on circuitdigest.com
Here are 3 simple electronic circuits by using basic electronic components. 1. Simple Preamp Circuit
"Sometimes we use a Preamp Circuit in circuits for pre-amplification of weak signal when the audio source sound level is too low. Pre-amlification of low level signals is necessary before feeding them into a power source, for clear and noiseless sound." So here we will build this Simple Preamplifier Circuit using NPN transistor BC547.
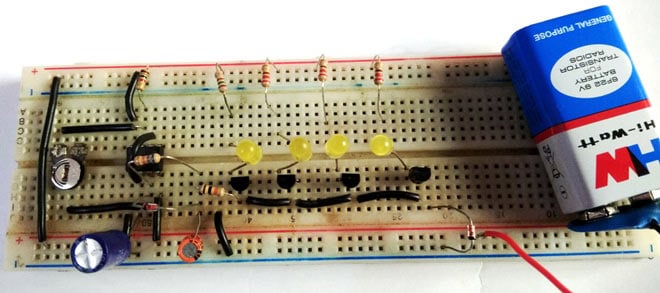
2. Bike Turning Signal
This fancy Car/Bike Turning Indicator Circuit uses a 555 Timer IC along with four yellow color LEDs glowing one by one in a particular pattern and we can control the speed or frequency of this LED indicator by simply turning a Potentiometer. This works in the similar pattern in which bike or car's turning signal works. Here you can find all the required details to build this circuit.
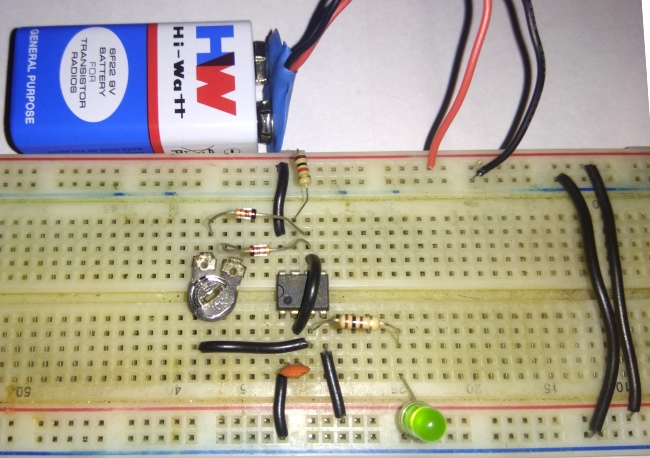
3. PWM Generator Circuit
PWM is very important concept in electronics engineering. To understand this concept and make a simple circuit with this, we used a 555 timer IC along with a potentiometer, a capacitor and few registers which generates PWM signal. You can learn about PWM concept with building this basic circuit.
This is a simple arduino based project where an Arduino shield is designed on PCB which uses an Accelerometer ADXL335 to detect the vibrations. When the accelerometer detects the vibrations it sends signal to Arduino Uno which in turn start the alarm.
ESP8266 is a popular microcontroller cum WiFi transceiver popularly used to connect Arduino and other microcontrollers with internet. In this DIY project, ESP is used with just few components and IFTTT online service to send text messages to any mobile phone.
This is another interesting application using ESP8266 to control home appliances using just voice commands. For this, they have used an android app to give pre-set voice commands. To build this project, check out the full project in the link given above.
The working of this project is demonstrated in the youtube video attached below:
Circuit breaker is an important requirement to protect your electrical devices from high/low voltages. It doesn't use any microcontroller and merely use an op-amp IC and voltage regulator. You can build your own circuit breaker by using the details shared in this project.
Buying a digital voltmeter or a multimeter is not a big deal but making one yourself is surely a good learning experience. Here you can find a voltmeter using ICL7107 which is quite popular for measuring voltage. They have built the entire circuit on PCB so you can just use the PCB layout and simply or a PCB or make one yourself.
Check the demonstration video below:
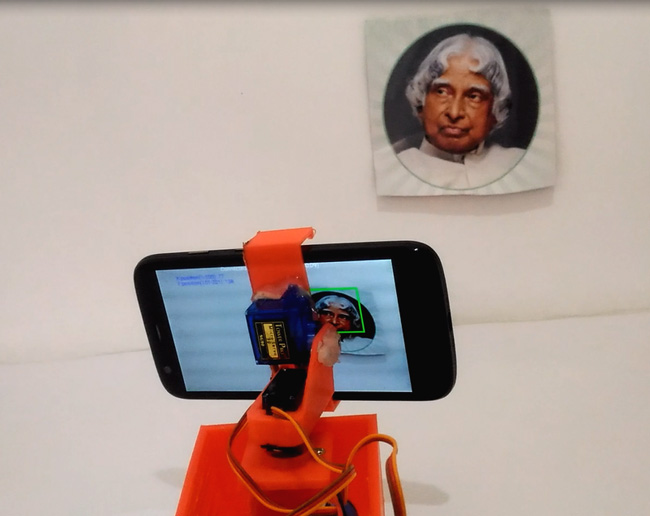
6. Real Time Face Detecting Robot:
This is an interesting arduino project where they have developed an algorithm which detects the human face from any image. Along with arduino, processing is used and also a 3D printed robotic arm to hold the phone. You can download the STL files for the 3D printed part, and also the required code for processing and arduino, so it would be quite easy to build this interesting project.
7. SSD1306 OLED with Arduino
OLED displays are very useful and they also look beautiful in comparison with other displays such as 16x2 LCD. This is nice detailed tutorial which covers details on interfacing the OLED with arduino uno with an example of displaying a batman picture on the OLED.
Arduino is a very powerful tool to build a lot of things. Here they built an Audio player which reads the song files from a SD card and play them on the speaker attached to it. To improve the voice quality there is an audio amplifier IC also used with the circuit.
Popular SIM900A GSM module is used here with arduino to send data to SparkFun's server. GPRS feature of GSM module is used here. See the working of this project in below video:
In this tutorial they simply explained to use Arduinos tone function to create various melodies on a speaker connected with Arduino uno board. You can download the code and play various tones such as Titanic, Super Mario, etc.
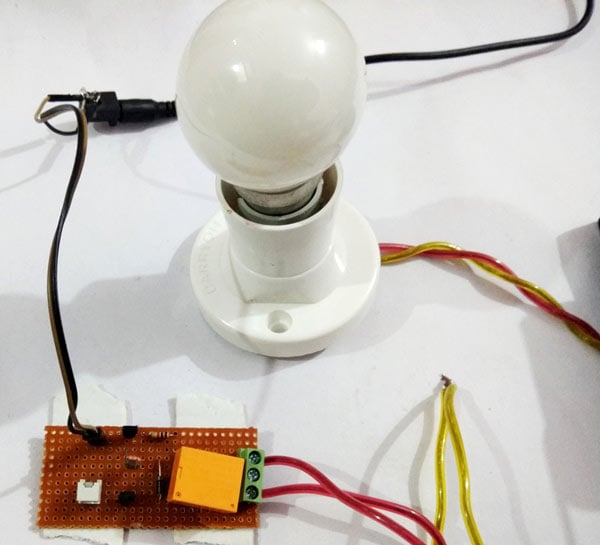
Home Automation has always been inspiring projects for most of us. Toggling an AC load from the comfort of our chairs or bed of any room without reaching for the switch in another room sounds cool doesn’t it!!, Thanks to the ESP8266 modules this idea can be easily implemented with subtle knowledge on electronics.
So in this IoT based project, this junction box's switches are connected with a ESP8266 based circuit board and enabled with internet. So you can toggle the switches with your cell phone or a computer with an internet connection from anywhere in the world.
In this project we are going to build a robot using arduino and android which detects and tracks the face. We have attached a camera phone so the mobile camera will move along with your face with the help of servos. The advantage of using the Android Mobile Phone here is that you do not need to invest on a camera module and the whole image detection work can be done in the phone itself, you do not need your Arduino connected to your computer for this to work. We can use a Bluetooth Module interfacing with Arduino to communicate with Mobile wirelessly.
You can build this robot by yourself following the instructions and detailed tutorial with circuit diagram, codes and files given here.
Watch the Youtube video below which shows how this face tracking robot works:
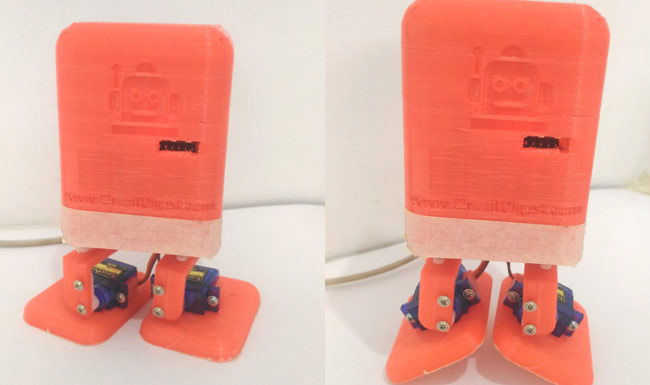
Want to make a small cute tiny robot that can just walk and dance? If you have a 3D printer and an arduino, you can simply make this robot with this detailed DIY instructions on CircuitDigest.com
It takes command from an Android application to perform some pre-defined actions. You can also use the program (given at the end of the tutorial) to easily manipulate the actions of your very own robot by controlling the position of the servo motors using the Serial monitor. Having a 3d printer will make this project more interesting and look cool. But, if you do not have one you can use any of the online services or just use some cardboard to build the same.
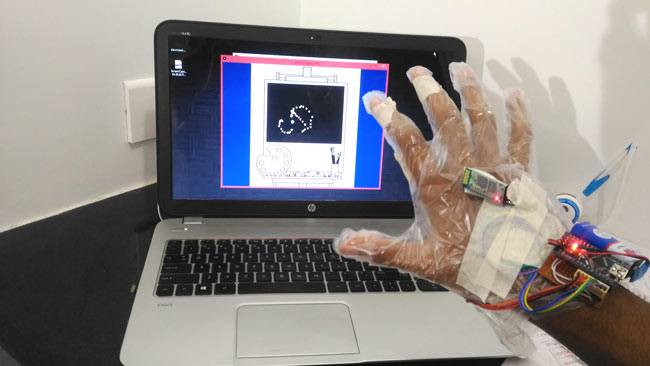
This is an interesting arduino based project in which we are going to learn how to implement virtual reality using Arduino and Processing. For most of us, the movie Iron man by Jon Favreau has always been an inspiration to build new things that will make our life easy and more fun. I have personally admired the Techs that are shown in the movie and have always wanted to build something similar to that. So, in this project I have tried to mimic the Virtual reality stuffs that happen in the movie, like we can simply wave our hand in front of the computer and move the pointer to the desired location and perform some tasks.
This DIY project explains how you can draw something on your computer without touching your keypad or mouse, merely waving your hands. Your computer will draw the pattern you make in the air by your hand movements.
You can watch the video below to see this virtual reality project working:
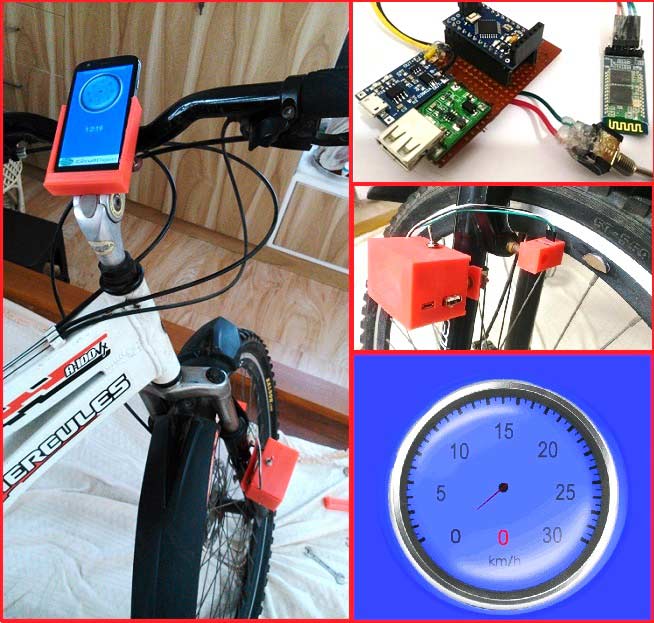
In this project we make a Cool Speedometer for bikes or any automotives by using Arduino which broadcast the speed using Bluetooth to an Android application that we created using Processing. The complete project is powered by an 18650 Lithium cell and hence highly portable along with your vehicle. To spice it up a bit more I have added the option of charging your mobile phone as it displays your speed. Yes, you can also use this as a power bank for your mobiles on the go as the 18650 has high charge density and can easily be charged and discharged.
You can watch the project working on youtube.
For detailed DIY project with circuit diagram, code and instructions, please visit circuitdigest.com
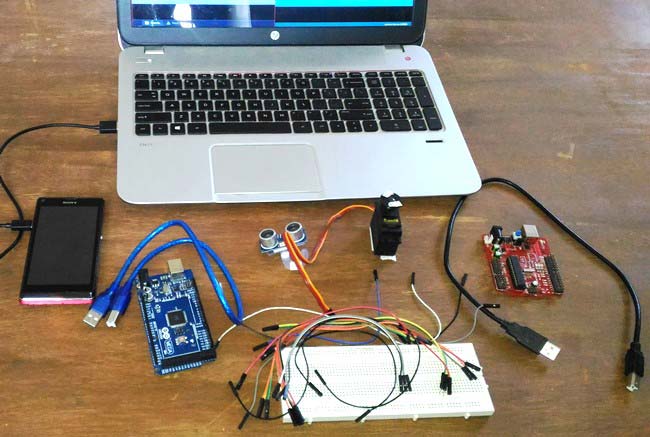
In this project we are using Arduino and ultrasonic sensor to broadcast information to a cell phone via bluetooth. It senses objects with the help of Ultrasonic Sensor and hence can work even during night times. Ultrasonic sensor is attached with a servo motor which can be either be set to rotate automatically to scan the area or can be rotated manually using our Mobile app, so that we can focus the ultrasonic sensor in our required direction and sense the objects present over there. The information sensed by the sensor will be broadcasted to the cell phone using Bluetooth Module so it will work like a Sonar or a Radar.
If you want to make this project, you can find here the detailed DIY instructions with required circuit diagrams and source codes.
To see the project in working, check out the youtube video below:
In this DIY project we have built a weighing machine by interfacing Load Cell and HX711 Weight Sensor with Arduino. We have seen weight machines at many shops, where machine displays the weight just by placing any item on the weighing platform. So here we are building the same Weighing machine by using Arduino and Load cells, having capacity of measuring upto 40kg. This limit can be further increased by using the Load cell of higher capacity.
Watch the demonstration video below to see the project working:
You can DIY this project by using the source codes and instructions given on circuitdigest.com
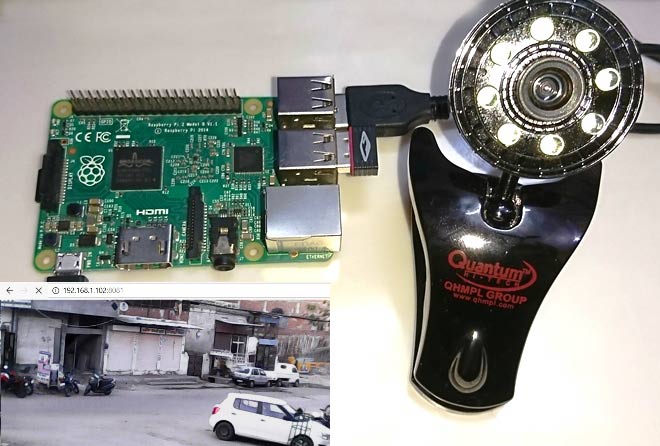
This DIY talks about building a simple security system using Raspberry Pi and webcam which captures motion in the area. This is a great and very cheaper security tool, which have many configurable options and can be built in few minutes. Here we are using only Raspberry Pi and a USB web camera to build this Motion Capture camera. We have Raspbian Jessie OS installed on our Raspberry Pi board.
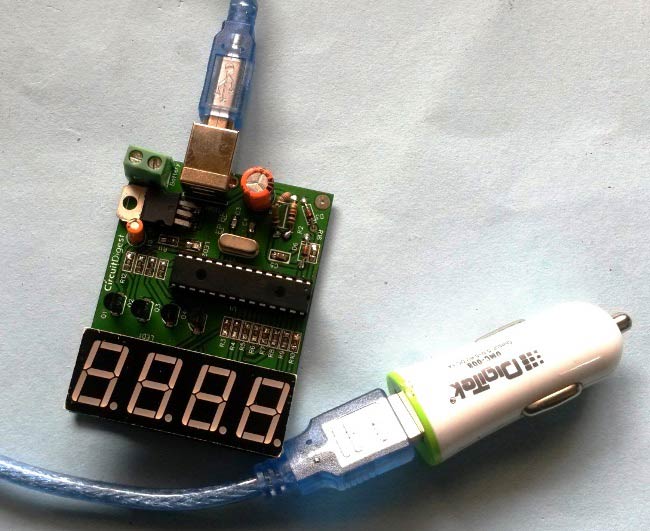
In this project we are going to make a PIC based Car Battery Monitoring system on PCB. Here, we have designed a PCB using EASYEDA online PCB simulator and designer. This Car Battery Monitoring Circuitis used to monitor the power of Car Battery by just plugging it into the power outlet on the dashboard of a car. The PCB also has the option to use it as Voltage Measurement tool or Voltmeter without using USB car charger. We have attached a terminal block here to measure the voltage of other power sources, just by connecting two wires in it from the power source.
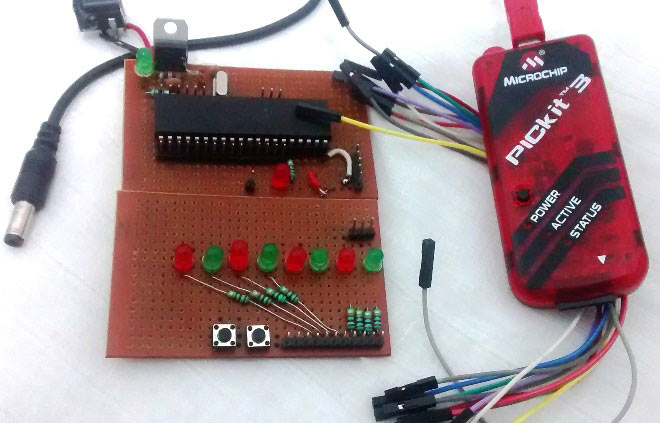
In this PIC microcontroller tutorial series, this tutorial will help you to learn and use Timers in PIC16F877A. In our previous tutorials, we had started with Introduction to PIC and MPLABX IDE, then we wrote our first PIC program to blink the LED using PIC and then made a LED Blinking Sequence by using delay function in PIC Microcontroller. Now let us use the same LED Blinking sequence which we have used in previous tutorial hardware and with this we will Learn How to use Timers in our PIC MCU. We have just added one more button in LED board for this tutorial. Go through the tutorial to learn more.
To learn more about the basic concepts of PIC microcontrollers, and get some interesting DIY projects, keep visiting www.circuitdigest.com