Showing posts with label Sensors. Show all posts

Monday, 16 June 2025

Learn How to Send SMS with ESP32 Using SMS API


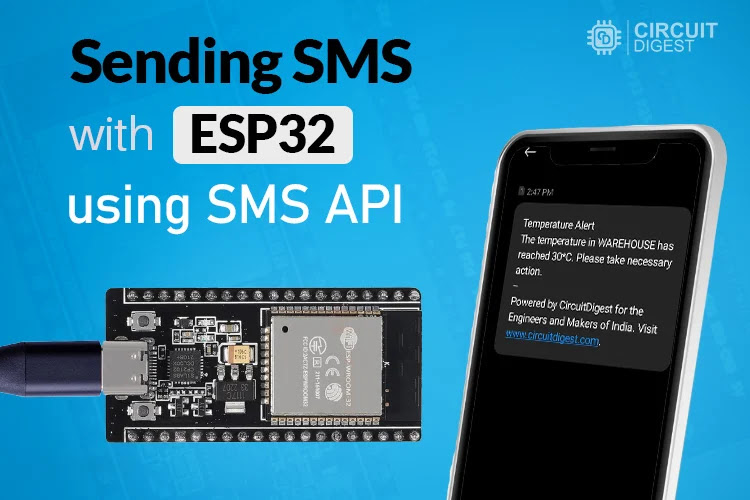
Forget bulky GSM modules and SIM cards, now you can send real-time SMS alerts with ESP32 using the free SMS API from Circuit Digest Cloud. Perfect for applications like temperature monitoring, motion detection, or door-opening alerts. In this project learn how to deliver instant notifications directly to your phone without any apps, dashboards, and fees.

How It Works

  • ESP32 connects to Wi‑Fi using SSID and password.
  • It reads sensor data (e.g., temperature via DHT11).
  • If a threshold is crossed (e.g., temp ≥ 30 °C), ESP32 sends an HTTP request to the SMS API.
  • Circuit Digest Cloud validates your API key and sends an SMS to the linked phone number.
Block-Diagram-ESP32-SMS


What You Will Need

  • ESP32 Development Board
  • DHT11 Temperature Sensor (or any sensor of your choice)
  • Breadboard + Jumper Wires
  • 5V USB Power Supply

Circuit Diagram

Circuit-Diagram-of-ESP32-SMS-API

Getting Started: SMS API Key

  1. Visit Circuit Digest Cloud, sign in or register

  2. Generate your free API key (valid for 100 SMS/month)

  3. Add recipient phone number(s) via OTP

  4. Choose an SMS template (e.g., Template ID 102 for temperature alerts)

Hardware-setup-of-API-based-ESP32-SMS-Sender

Applications of SMS API with ESP32

  • Smart Home & Security: Get alerts for critical events

  • DIY Prototyping: Fast, hardware-free SMS integration

  • Educational Projects: Learn HTTP, JSON, cloud APIs ,  all through ESP32


Wednesday, 23 April 2025

DIY Smart Blind Stick Using Arduino Nano

Smart Blind Stick using Arduino and Ultrasonic sensor

Navigating daily environments can be difficult for visually impaired individuals. To improve mobility and safety, this project introduces a DIY smart blind stick using Arduino Nano, an ultrasonic sensor, and a buzzer. It’s simple, budget-friendly, and serves as a practical aid for obstacle detection. The system works by detecting nearby objects and alerting the user via sound and light signals.

How the Blind Stick Works

This Arduino-based stick functions as an assistive tool by constantly checking for nearby obstacles and triggering alerts. It includes:

  • Ultrasonic Sensor (HC-SR04): Detects objects by sending ultrasonic waves and receiving the reflected signal.
  • Arduino Nano: Acts as the central controller, calculating distance and triggering alerts.
  • Buzzer and LED: Provide audio and visual warnings depending on the proximity of obstacles.
Audio Based Obstacle Detection and Alerts Using Arduino


Obstacle Detection

The ultrasonic sensor emits a sound wave when triggered by the Arduino. When the wave hits an object, it reflects back and is received by the sensor’s echo pin. The time taken for the round trip helps calculate the distance.

Distance Calculation

The Arduino uses the following formula to calculate distance:

Distance = (Time taken by the signal to Hit and bounce back / 2) / 29.1

For example, a 500µs round-trip means the object is roughly 8.59 cm away.

Alerts

If the object is within 50 cm:

  • Buzzer: Emits a beep. The closer the object, the faster the beep.
  • LED: Flashes similarly, helping those with partial vision.

Components Required

  • Arduino Nano
  • HC-SR04 Ultrasonic Sensor
  • 5V Buzzer
  • LED
  • 220Ω Resistor
  • 9V Battery
  • On/Off Switch
  • Breadboard and Wires
  • PVC Pipe for stick body

Block Diagram

The block diagram includes the Arduino Nano at the center, connected to the ultrasonic sensor (for input) and buzzer/LED (for output). A 9V battery powers the system.

Block Diagram Representation of Arduino-Based Blind Stick

Circuit Diagram

The sensor’s VCC, TRIG, ECHO, and GND are connected to Arduino pins. The buzzer and LED are connected to output pins through resistors. The entire circuit is powered by the battery via a switch.

Note: The sensor draws around 15mA, which is safe to power directly from Arduino GPIO pins.

Hardware Assembly

All components are placed on a small breadboard and fixed to a PVC pipe using zip ties. The battery is mounted with double-sided tape. The sensor is positioned at the top to detect obstacles ahead.

Hardware Connections of Obstacle Detection Stick for the Blind

Arduino Code Overview

The code reads distance and triggers alerts based on it. It uses millis() for multitasking of the buzzer and LED.

Uploading Code

  1. Open Arduino IDE.
  2. Select the board: Arduino Nano (ATmega328P).
  3. Choose the correct COM port.
  4. Paste and upload the code.

Once uploaded, your Arduino Nano starts working as the control unit for the blind stick.

Final Assembly

Fix the entire circuit onto the PVC pipe. Position the ultrasonic sensor to face forward and secure components using zip ties or tape. Ensure the switch is easily accessible for quick power control.

Assembling Blind Stick Circuit on a PVC Pipe

This project is a basic yet functional solution to help people with vision challenges navigate safely. It uses minimal components, is easy to assemble, and can be enhanced further with features like GPS or vibration alerts. You can find the full code and diagrams on the GitHub repository in the original tutorial.

Tuesday, 23 April 2024

The ADS1015: Enhancing Precision with I2C ADC Technology


The ADS1015 is a 12-bit ADC with I2C compatibility, featuring a low-drift voltage reference, oscillator for clock signal, programmable gain amplifier (PGA), and digital comparator for signal comparison. Equivalents and alternatives to the ADS1015 include the ADS1013, ADS1014, AD7791, HX711, MCP3008, ADS1115, ADC0804, MCP3301, and ADC0831.


Troubleshooting Tips for ADS1015:


Stability Issues and Noise: Ensure stable power supply within specified voltage range. Use a 0.1 µF capacitor between supply voltage pin and ground to filter out noise.

I2C Communication Problems: Double-check hardware connections. Ensure SDA and SCL pins are correctly connected to the microcontroller's I2C pins. Use I2C scanner program to detect device and address.

No Signal from ADS1015: Verify correct power supply voltage and current requirements. Check all connections including I2C lines, reference voltage inputs, and analog input signals. Use pull-up resistors on I2C lines if needed.


Design Tips for ADS1015:


Minimizing Noise with LTC2400: Use good decoupling by adding 0.1 µF capacitors close to the device. Place capacitors as close as possible to reduce noise.

Using ADS1015 without Microcontroller: ADS1015 requires a microcontroller due to its I2C communication interface.

PCB Layout Considerations:

  • Separate analog and digital signals to prevent noise interference.

  • Provide good ground return paths to minimize impedance and EMI.

  • Use bypass capacitors on supplies to reduce high-frequency noise. Avoid vias between bypass capacitors and the device.

  • Reduce resistance and inductance in routing to minimize error voltage and EMI pickup.

  • Match differential inputs and use high-quality differential capacitors for accurate measurements.


Designing with ADS1015 requires careful consideration of layout and component placement to achieve optimal performance and minimize noise and interference. For more technical details, refer to the ADS1015 datasheet.


Wednesday, 6 March 2024

All About Sensors: Understanding Their Function and Sensing Capabilities

Sensors are vital components in our modern world, enabling us to perceive and interact with our environment in various ways. They come in different types, each with unique applications and functionalities. In this article, we'll explore the basics of sensors and its types, applications, and operational principles.
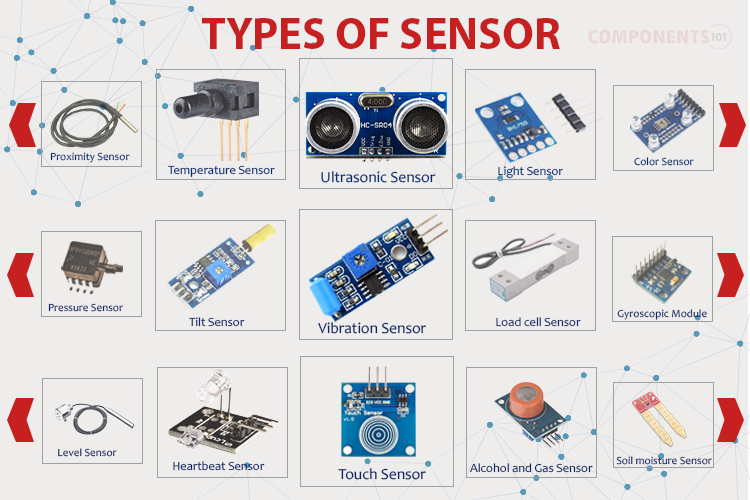

What are Sensors?


Sensors are devices designed to detect changes in their environment and provide output signals, either analog or digital. These signals serve various purposes, from displaying information to controlling processes in closed-loop systems. Essentially, sensors act as our technological senses, allowing devices to detect and respond to changes in their surroundings accurately.


Differentiating Sensors and Transducers


It's essential to distinguish between sensors and transducers. Sensors detect environmental changes and provide feedback, while transducers convert physical quantities into electrical signals or vice versa. Sensors require external power, whereas transducers can operate independently. Understanding this difference is crucial for grasping the functionality of different sensor types.
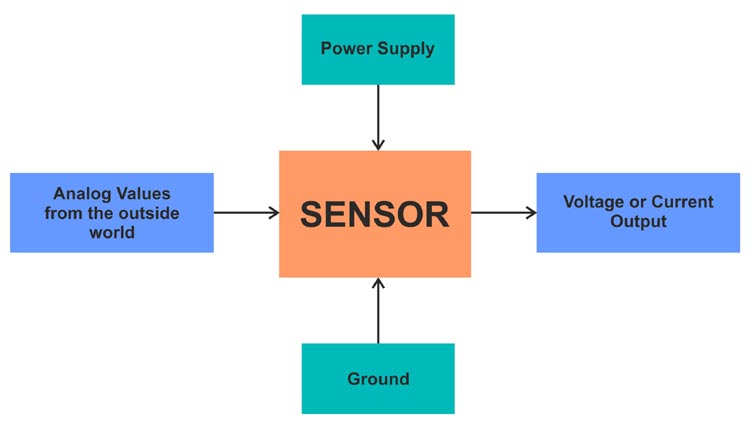

Classification of Sensors


Sensors can be classified in various ways, including active vs. passive and analog vs. digital. Active sensors, like piezoelectric sensors, don't need external power sources, while passive sensors, such as thermistors, do. Analog sensors produce continuous signals, while digital sensors generate discrete values.


Common Types of Sensors and Their Applications


Temperature Sensor: Measures thermal energy accurately, vital in industrial, automotive, medical, and environmental monitoring.
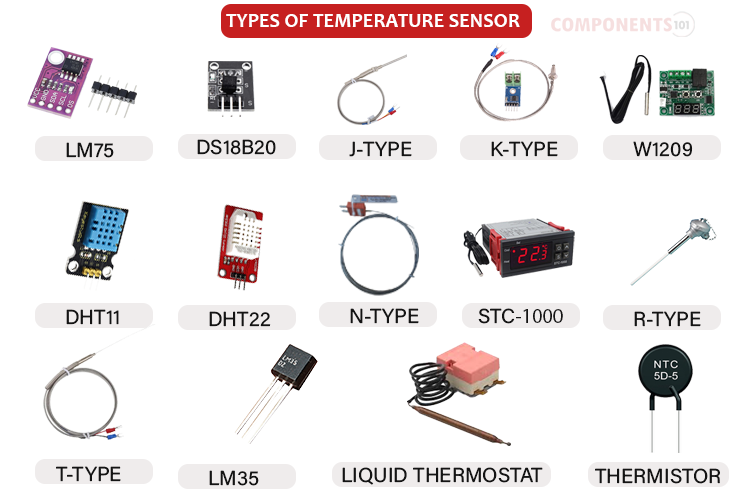

Position Sensors: Determine object positions, essential for robotics, motion systems, and automotive applications.


Ultrasonic Sensors: Utilize ultrasonic waves for distance measurement and object detection, widely used in robotics and industrial automation.


Proximity Sensor: Detects nearby objects without contact, crucial for automotive, industrial automation, and safety systems.
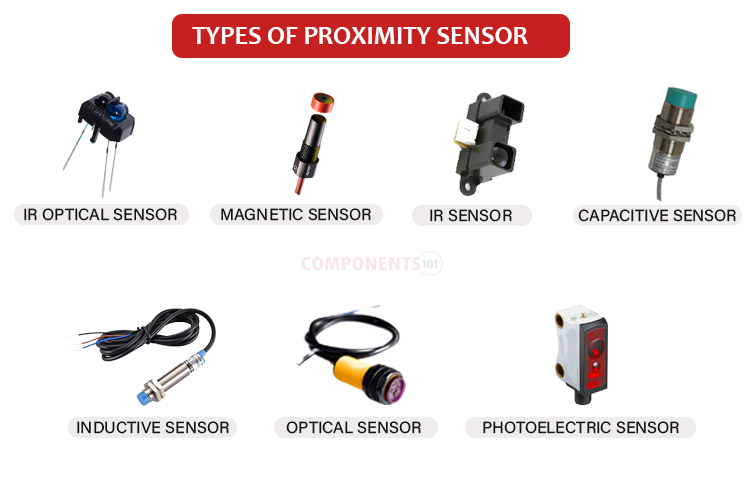

Hall Effect Sensors: Detect external magnetic fields, finding applications in position detection and automotive systems.


Light Sensors: Convert light energy into electrical signals, used in ambient light detection, object detection, and photography.


Gas and Chemical Sensors: Detects presence and concentration of gases, essential for safety systems, environmental monitoring, and industrial processes.


Humidity Sensors: Measure humidity levels in the air, employed in HVAC systems, weather stations, and agriculture.


Radiation Detectors: Detects various types of radiation, crucial for nuclear power plants, medical imaging, and radiation safety.


Sensors are fundamental components of modern technology, facilitating our interaction with the environment in diverse ways. Understanding their types, applications, and operational principles is essential for effectively harnessing their capabilities. Whether monitoring temperature, detecting motion, or ensuring air quality, sensors play a pivotal role in shaping our world.

Thursday, 12 May 2022

How MAX30102 Pulse Oximeter and Heart Rate Sensor Works

 The MAX30102 is a very versatile sensor and it can also measure body temperature other than heart rate and blood oxygen level. This is a sensor designed by Analog Devices and features  two LEDs (one Infrared and one Red), a photodetector, optics, and low-noise signal processing unit to detect pulse oximetry (SpO2) and heart rate (HR) signals. 


The main idea is that you shine a single LED at a time and check the amount of light that is getting reflected back to the sensor. Based on the reflection you can determine the blood oxygen level and heart rate. 

We can interface MAX30102 sensor with any microcontroller or development board to get the SpO2 or heart rate values. Here is the complete tutorial which covers how to interface MAX30102 sensor with Arduino.


Saturday, 9 April 2022

Getting Started with Arduino - Tutorial Series for Beginners

The name Arduino is typically buzz word among most of the electronics students or hobbyists alike. Its ability to build things faster and cheaper with a massive online community support has made it an ideal choice for many people who are just getting started with electronics or programming. Because of its simplified hardware design and programming environment, it is possible even for people without any electronics or computer science background to learn it with ease. So here we have compiled a list of tutorials which will help you learn the basics of Arduino and then get started with Arduino to build few basic projects.


Tutorial 1 - Arduino Basics

Tutorial 2 - Different Types of Arduino Boards

Tutorial 3 - Different Ways to Power Your Arduino

Tutorial 4 - Getting Started with Arduino IDE

Tutorial 5 - Arduino Timers

Tutorial 6 - Arduino ADC

Tutorial 7 - Arduino SPI

Tutorial 8 - Arduino I2C

Tutorial 9 - Interfacing Push Button and LED

Tutorial 10 - Arduino Seven Segment Display

Tutorial 11 - Arduino Interrupts

Tutorial 12 - Arduino Sleep Modes

Tutorial 13 - Arduino IR Sensor

Tutorial 14 - Arduino Soil Moisture Sensor

Tutorial 15 - Arduino PIR Sensor

Tutorial 16 - Arduino Ultrasonic Sensor

Tutorial 17 - Arduino MQ2 Gas Sensor

Tutorial 18 - Arduino 16x2 LCD Display

Tutorial 19 - Arduino Rain Sensor

Tutorial 20 - Arduino Flex Sensor


Once you have gone through the basics of Arduino tutorials there are a vast variety of projects you can try and build. You can find many interesting arduino based projects ideas here.